
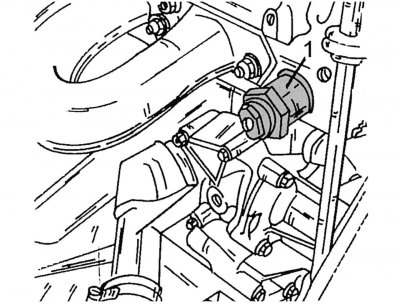
Pic. 97. Tensioner location (1) chains
The chain tensioner can be easily dismantled, but it is recommended to get a hand press to carry out the subsequent installation of the tensioner on the engine. A bench drill may also come in handy. There are two turnkey hexagons on the tensioner plug: large and small. With a wrench, only the large hexagon needs to be unscrewed. If you start to unscrew the small hexagon, then the chain tensioner can fall apart inside. On fig. 97 shows the location of the chain tensioner plug on a vehicle-mounted engine. If there is any doubt about the correctness of the tensioner, it should be replaced with a new one.
Before installing a new tensioner, it must be filled with oil. To do this, lower the tensioner with a pressure rod into a vessel with engine oil. The oil level should reach the mark above the hexagon flange. Then place the vessel together with the tensioner in it under a hand press (or on a bench drill) and press the pressure pin to the stop 7-10 times.
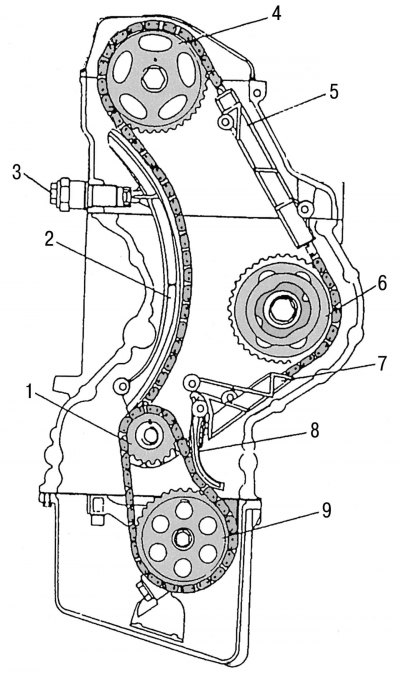
Pic. 96. Camshaft drive mechanism assembly: 1 - crankshaft sprocket; 2 - chain tension shoe; 3 - chain tensioner; 4 - camshaft drive sprocket; 5 - chain damper; 6 - fuel pump drive sprocket; 7 - chain damper; 8 — the lever of a tension of a chain of a drive of the oil pump; 9 - oil pump drive sprocket
After filling the tensioner with oil, its compression should be checked: it should be carried out slowly, evenly and only with the application of a certain force. After that, install the gasket and install the tensioner in its place in the engine. It should be tightened to a torque of 80 Nm. The pressure rod of the tensioner should sit on the tension shoe, as shown in fig. 96.