



Engine cooling system Mercedes Sprinter I (903)
Cooling system — design description
Only 1/4 of all the energy obtained from burning fuel goes to performing useful work. The remaining energy is converted into thermal energy, lost with exhaust gases and...
Only 1/4 of all the energy obtained from burning fuel goes to performing useful work. The remaining energy is converted into thermal energy, lost with exhaust gases and...

Replacing the coolant
Attention! The expansion tank cap shown in the picture 135, open only when the coolant temperature is no higher than 90°C. Recommended temperature is –50°C. Turn the...
Attention! The expansion tank cap shown in the picture 135, open only when the coolant temperature is no higher than 90°C. Recommended temperature is –50°C. Turn the...
Antifreeze — General Information
The cooling system is filled at the factory with antifreeze, which can remain in it all year round. When mixing antifreeze with water, you should achieve an equal ratio...
The cooling system is filled at the factory with antifreeze, which can remain in it all year round. When mixing antifreeze with water, you should achieve an equal ratio...
Radiator — General Description
All models are equipped with horizontal flow aluminum radiators. On the sides of the radiator there are plastic tanks, united by a middle part made of aluminum alloy....
All models are equipped with horizontal flow aluminum radiators. On the sides of the radiator there are plastic tanks, united by a middle part made of aluminum alloy....
Radiator check
The cooling system operates under pressure. The radiator cap or expansion tank contains a spring that ensures the tightness of the system and opens it when the pressure...
The cooling system operates under pressure. The radiator cap or expansion tank contains a spring that ensures the tightness of the system and opens it when the pressure...
Removal and installation the radiator
To remove the radiator, it is necessary to disassemble almost the entire front of the car. According to the company's recommendations, the pressure in the built-in air...
To remove the radiator, it is necessary to disassemble almost the entire front of the car. According to the company's recommendations, the pressure in the built-in air...

Coolant pump — design description
Figure 137. Coolant pump: 1 - drive (poly-V-shaped) belt; 2 — pulley mounting bolt; 3 - pulley; 4 — pump mounting bolt; 5 — pump; 6 - mounting sleeve; 7 - gasket; 8 —...
Figure 137. Coolant pump: 1 - drive (poly-V-shaped) belt; 2 — pulley mounting bolt; 3 - pulley; 4 — pump mounting bolt; 5 — pump; 6 - mounting sleeve; 7 - gasket; 8 —...

Removal and installation the coolant pump
Removal and installation of the coolant pump is carried out as follows: clear access to the front of the vehicle; drain the coolant ( see subsection 4.1 ). Do not open...
Removal and installation of the coolant pump is carried out as follows: clear access to the front of the vehicle; drain the coolant ( see subsection 4.1 ). Do not open...

Drive belt — removal and installation
Figure 140. Installing the poly V-belt on the pulley: 1 - pulley; 2 - poly V-belt The drive of the coolant pump and generator is carried out by a single poly-V belt,...
Figure 140. Installing the poly V-belt on the pulley: 1 - pulley; 2 - poly V-belt The drive of the coolant pump and generator is carried out by a single poly-V belt,...

Viscous fan clutch
Figure 146. Fan impeller and viscous coupling: 1 — mounting bolt; 2 — fan impeller; 3 — mounting bolt; 4 — viscous coupling If the front of the engine is disassembled,...
Figure 146. Fan impeller and viscous coupling: 1 — mounting bolt; 2 — fan impeller; 3 — mounting bolt; 4 — viscous coupling If the front of the engine is disassembled,...

Thermostat — design description
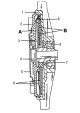
Figure 139. Coolant pump design (2.9L engine): 1 - pump retainer; 2 — bolt, M6x12; 3 — pump drive pulley; 4 — pulley hub; 5 — bearing; 6 — bearing housing fastening bolt...
Figure 139. Coolant pump design (2.9L engine): 1 - pump retainer; 2 — bolt, M6x12; 3 — pump drive pulley; 4 — pulley hub; 5 — bearing; 6 — bearing housing fastening bolt...
Thermostat malfunction
The thermostat will not open if it is jammed or the valve is stuck. In this case, even if the temperature gauge is already in the red zone, the radiator remains cold....
The thermostat will not open if it is jammed or the valve is stuck. In this case, even if the temperature gauge is already in the red zone, the radiator remains cold....

Checking the Thermostat
Figure 148. Checking the thermostat You can check the operation of the thermostat using a regular thermometer. Hang the thermostat as shown in the picture 148, put it in...
Figure 148. Checking the thermostat You can check the operation of the thermostat using a regular thermometer. Hang the thermostat as shown in the picture 148, put it in...
Checking the cooling system
The cooling system should be checked regularly, paying particular attention to the following: check the hose connections on the radiator, pump, thermostat housing and...
The cooling system should be checked regularly, paying particular attention to the following: check the hose connections on the radiator, pump, thermostat housing and...
Checking the coolant level sensor
There is a coolant level sensor in the expansion tank. This device does not relieve you from the need to regularly check the level, but it is very helpful in case of a...
There is a coolant level sensor in the expansion tank. This device does not relieve you from the need to regularly check the level, but it is very helpful in case of a...
Engine overheating
If the indicator goes into the red zone only briefly, this is normal for the following operating modes: at maximum speed, driving uphill or in a column in hot weather,...
If the indicator goes into the red zone only briefly, this is normal for the following operating modes: at maximum speed, driving uphill or in a column in hot weather,...

Checking the density of the coolant
Figure 149. Checking the coolant density: 1 - expansion tank cap Before the onset of cold weather, it is necessary to check the degree of frost resistance of the...
Figure 149. Checking the coolant density: 1 - expansion tank cap Before the onset of cold weather, it is necessary to check the degree of frost resistance of the...
Cooling system hoses
When repairing or replacing, use only coolant hoses that are appropriate for the engine type and model. Hose ruptures often occur on the road, so there is a need to...
When repairing or replacing, use only coolant hoses that are appropriate for the engine type and model. Hose ruptures often occur on the road, so there is a need to...
Cooling system specifications
Type - Forced circulation, with coolant pump Coolant Pump - Vane Filling volume (with heating system), l: four-cylinder engine approx. - 7.0 (model T1 - 11.5 l)...
Type - Forced circulation, with coolant pump Coolant Pump - Vane Filling volume (with heating system), l: four-cylinder engine approx. - 7.0 (model T1 - 11.5 l)...
This section is available on: russian, bulgarian, belarusian, ukrainian, serbian, croatian, romanian, polish, slovak, hungarian
More similar sections for repairing other models
☛ Power unit: Cooling and heating car Mercedes W168 (1997-2004)
☛ Power unit: Cooling system car Mercedes W202 (1993-2000)
☛ Power unit: Cooling and lubrication (M102) car Mercedes W123 (1976-1985)
☛ Power unit: Cooling system car Mercedes W463 (1999-2019)
☛ Power unit: Cooling system car Mercedes W163 (1997-2005)
☛ Power unit: Cooling system car Mercedes W126 (1979-1991, petrol)
Link in different formats to this section
TEXTHTMLBB Code
- General information
- Maintenance
- Power unit
- Engines 602.984/985
- Engines 904.908/914/923/936
- Transmission
- Clutch
- Manual gearbox 711.613
- Manual gearbox 710.64/66
- Manual gearbox 715.051
- Automatic gearbox 723.345
- Power take-off box
- Chassis
- Front suspension
- Rear suspension
- Steering
- Brake system
- Body and electrical equipment
- Interior (internal elements)
- Exterior (external elements)
- Heater and air conditioner
- Electrical diagrams
- General information
- User manual
- Maintenance
- Diesel engine OM646
- Engine repair
- Cooling and lubrication system
- Power and exhaust system
- Transmission
- Clutch
- Car gearbox
- Chassis
- Front suspension
- Rear suspension
- Steering
- Brake system
- Body
- Body elements
- Electrical equipment
- Equipment and devices
- Security systems
- Electrical circuits
- General information
- User manual
- Maintenance
- Petrol engines 2.0 l
- Engine repair
- Lubrication system
- Cooling system
- Power and control system
- Petrol engines 2.8 l
- Engine repair
- Lubrication system
- Cooling system
- Power and control system
- Diesel engines 2.3 l
- Engine repair
- Cooling system
- Lubrication system
- Turbocharging and recycling
- Power and control system
- Diesel engines 2.2 l
- Engine repair
- Cooling system
- Lubrication system
- Turbocharging and recycling
- Power and control system
- Transmission
- Clutch
- Mechanical gearbox
- Automatic gearbox
- Chassis
- Front suspension and wheels
- Rear suspension
- Steering
- Brake system
- Body
- Exterior (external elements)
- Interior (internal elements)
- Electrical equipment
- Equipment and devices
- Heater and air conditioner
- Electrical circuits
- General information
- Introduction to the guide
- Maintenance
- Power unit
- Engine repair
- Lubrication system
- Cooling system
- Power and exhaust system
- Transmission
- Clutch
- Mechanical gearbox
- Automatic gearbox
- Front axle
- Rear axle and cardan
- Chassis
- Car suspension
- Steering
- Brake system
- Tires and wheels
- Electrical equipment
- Equipment and devices
- Headlights and lighting
- Power devices
- Electrical circuits