



Diesel engines 602.984/985 of Mercedes Vario (512D-815DA)
.

Removal and installation the engine
Removal 1. Disconnect the negative cable from the battery. 2. Remove the engine cover 1 (figure 2.1). Remove protective cover 2 of the gearbox and protective cover 3 of...
Removal 1. Disconnect the negative cable from the battery. 2. Remove the engine cover 1 (figure 2.1). Remove protective cover 2 of the gearbox and protective cover 3 of...

Air filter
Removal 1. Disconnect the wiring connector from the intake air temperature sensor 3 (figure 2.2). Figure 2.2. Air filter: 1 - Inlet pipe; 2 - Inlet pipe; 3 - Inlet air...
Removal 1. Disconnect the wiring connector from the intake air temperature sensor 3 (figure 2.2). Figure 2.2. Air filter: 1 - Inlet pipe; 2 - Inlet pipe; 3 - Inlet air...

Intake manifold
Removal 1. Remove the air filter. 2. Disconnect wiring connectors 1 and 2 (figure 2.3). 3. Remove the compressed air supply pipe 3 from the intake manifold and secure it...
Removal 1. Remove the air filter. 2. Disconnect wiring connectors 1 and 2 (figure 2.3). 3. Remove the compressed air supply pipe 3 from the intake manifold and secure it...

Exhaust manifold
Removal 1. Remove the air filter. 2. Remove the compressed air supply tubes. 3. Remove the ventilation tube 7 (figure 2.4). 4. Unscrew bolt 6 and nuts 4. 5. Remove the...
Removal 1. Remove the air filter. 2. Remove the compressed air supply tubes. 3. Remove the ventilation tube 7 (figure 2.4). 4. Unscrew bolt 6 and nuts 4. 5. Remove the...

Cylinder head cover
Removal 1. Remove cover 1 (figure 2.5). 2. Remove the air filter. 3. Remove the compressed air supply tube 7. 4. Remove the corrugated tube 2 of the exhaust gas...
Removal 1. Remove cover 1 (figure 2.5). 2. Remove the air filter. 3. Remove the compressed air supply tube 7. 4. Remove the corrugated tube 2 of the exhaust gas...

Timing chain cover
Removal 1. Disconnect the negative cable from the battery. 2. Remove the engine protective cover. 3. Drain the oil from the engine. 4. Remove the cooling system radiator...
Removal 1. Disconnect the negative cable from the battery. 2. Remove the engine protective cover. 3. Drain the oil from the engine. 4. Remove the cooling system radiator...

Sliding lever
Removal 1. Remove the timing chain cover. 2. Remove tension lever 8 from pin 2 and carefully loosen spring 6 (figure 2.8). 3. Remove tension lever 8 together with spring...
Removal 1. Remove the timing chain cover. 2. Remove tension lever 8 from pin 2 and carefully loosen spring 6 (figure 2.8). 3. Remove tension lever 8 together with spring...

Timing chain tensioner
The timing chain tensioner is shown in the figure 2.9a,b. Figure 2.9a. Timing chain tensioner installation location (engines without air conditioning): 1 - Timing chain...
The timing chain tensioner is shown in the figure 2.9a,b. Figure 2.9a. Timing chain tensioner installation location (engines without air conditioning): 1 - Timing chain...

Timing chain tensioner lever
The timing chain tensioner lever is shown in the figure 2.10. Figure 2.10. Timing chain tensioner lever: 1 - Timing chain tensioner lever; 2 - Finger.
The timing chain tensioner lever is shown in the figure 2.10. Figure 2.10. Timing chain tensioner lever: 1 - Timing chain tensioner lever; 2 - Finger.

Timing chain replacement
Removal 1. Remove tensioner 1 (figure 2.11). 2. Remove the cylinder head cover. 3. Disconnect the chain by unriveting it. Check the camshaft pulley for damage and...
Removal 1. Remove tensioner 1 (figure 2.11). 2. Remove the cylinder head cover. 3. Disconnect the chain by unriveting it. Check the camshaft pulley for damage and...

Cylinder head
Removal 1. Disconnect the negative cable from the battery. 2. Disconnect the compressed air supply tube from the air filter (only on engines 602.985). 3. Remove the...
Removal 1. Disconnect the negative cable from the battery. 2. Disconnect the compressed air supply tube from the air filter (only on engines 602.985). 3. Remove the...

Camshaft
Removal 1. Disconnect the negative cable from the battery. 2. Remove the lower engine cover. 3. Remove the engine protective cover. 4. Remove the air filter. 5. Remove...
Removal 1. Disconnect the negative cable from the battery. 2. Remove the lower engine cover. 3. Remove the engine protective cover. 4. Remove the air filter. 5. Remove...

Valve springs and valve stem seals
Figure 2.14. Valve drive: 1 - Hydraulic compensator; 2 - Valve crackers; 3 - Valve spring retainer; 4 - Valve spring; 5 - Valve stem seal; 6 - Valve. Removal 1. Remove...
Figure 2.14. Valve drive: 1 - Hydraulic compensator; 2 - Valve crackers; 3 - Valve spring retainer; 4 - Valve spring; 5 - Valve stem seal; 6 - Valve. Removal 1. Remove...

Checking and grinding valves
Removal 1. Remove the cylinder head. 2. Remove the valve springs and valve stem seals. 3. Remove the valves. Examination 4. Wipe the valves and perform a visual...
Removal 1. Remove the cylinder head. 2. Remove the valve springs and valve stem seals. 3. Remove the valves. Examination 4. Wipe the valves and perform a visual...

Checking the valve spring
1. Install the spring in the test stand (figure 2.26). 2. Check the maximum compression of the spring. The dimensions of the valve spring are given in Table 2.2. Figure...
1. Install the spring in the test stand (figure 2.26). 2. Check the maximum compression of the spring. The dimensions of the valve spring are given in Table 2.2. Figure...

Checking and replacing the valve guide bushing
Removal 1. Remove the valve spring. 2. Remove the valves. 3. Remove the glow plugs. 4. Remove the injector holder. Examination 5. Check the valve guides (figure 2.27)....
Removal 1. Remove the valve spring. 2. Remove the valves. 3. Remove the glow plugs. 4. Remove the injector holder. Examination 5. Check the valve guides (figure 2.27)....
Replacing the ring and lapping the valve seat
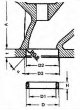
Replacing the valve seat ring 1. Remove the valve springs. 2. Remove the valves. 3. Remove the glow plugs. 4. Remove the injector holder. 5. Remove the prechamber. 6....
Replacing the valve seat ring 1. Remove the valve springs. 2. Remove the valves. 3. Remove the glow plugs. 4. Remove the injector holder. 5. Remove the prechamber. 6....

Pistons — Removal and Installation
Removal 1. Remove the engine. 2. Remove the cylinder head. 3. Remove the oil pump. 4. Unscrew the bolts securing the connecting rod caps 1. Connecting rod 2 and...
Removal 1. Remove the engine. 2. Remove the cylinder head. 3. Remove the oil pump. 4. Unscrew the bolts securing the connecting rod caps 1. Connecting rod 2 and...

Piston rings — removal and installation
Removal 1. Remove the pistons. 2. Measure the gap between the rings and the piston grooves (figure 2.42). Figure 2.42. Checking the clearance between the / rings and the...
Removal 1. Remove the pistons. 2. Measure the gap between the rings and the piston grooves (figure 2.42). Figure 2.42. Checking the clearance between the / rings and the...

Connecting rods — removal, inspection and installation
Removal 1. Remove the pistons. Examination 2. Check the connecting rods for discoloration, scuffs and scratches. 3. Unscrew the mounting bolts and remove the connecting...
Removal 1. Remove the pistons. Examination 2. Check the connecting rods for discoloration, scuffs and scratches. 3. Unscrew the mounting bolts and remove the connecting...

Cylinder block liners
Removal 1. Press out the sleeves (figure 2.47). 2. Clean the cartridge holes thoroughly. 3. Measure the diameters of the holes for the cylinder liners in the cylinder...
Removal 1. Press out the sleeves (figure 2.47). 2. Clean the cartridge holes thoroughly. 3. Measure the diameters of the holes for the cylinder liners in the cylinder...

Flywheel — removal and installation
Removal 1. Remove the gearbox. 2. Remove the clutch. 3. Lock the flywheel with the lock. 4. Unscrew the bolts 4 (figure 2.51). 5. Remove flywheel 3. Installation 6....
Removal 1. Remove the gearbox. 2. Remove the clutch. 3. Lock the flywheel with the lock. 4. Unscrew the bolts 4 (figure 2.51). 5. Remove flywheel 3. Installation 6....

Crankshaft ball bearing
Removal 1. Remove the clutch. 2. Remove ball bearing 3 together with retaining ring 4 (figure 2.52). 3. Remove bushing 2. Figure 2.52. Crankshaft ball bearing: 1 -...
Removal 1. Remove the clutch. 2. Remove ball bearing 3 together with retaining ring 4 (figure 2.52). 3. Remove bushing 2. Figure 2.52. Crankshaft ball bearing: 1 -...

Crankshaft — Removal, Inspection and Installation
Removal 1. Remove the engine. 2. Remove the cylinder head. 3. Remove the chain drive cover. 4. Remove the crankshaft pulleys. 5. Remove the crankshaft rear cover and oil...
Removal 1. Remove the engine. 2. Remove the cylinder head. 3. Remove the chain drive cover. 4. Remove the crankshaft pulleys. 5. Remove the crankshaft rear cover and oil...

Cooling system pump
Removal 1. Disconnect the negative cable from the battery. 2. Drain the coolant. 3. Remove the radiator with the front grille (engines 602.980). 4. Remove the fan...
Removal 1. Disconnect the negative cable from the battery. 2. Drain the coolant. 3. Remove the radiator with the front grille (engines 602.980). 4. Remove the fan...

Radiator of the cooling system
Removal 1. Remove the lower engine cover 1 (figure 2.63). 2. Remove finger 3. 3. Unscrew the front bumper 2 from the bracket and remove it. 4. Remove the radiator grille...
Removal 1. Remove the lower engine cover 1 (figure 2.63). 2. Remove finger 3. 3. Unscrew the front bumper 2 from the bracket and remove it. 4. Remove the radiator grille...

Pallet — removal and installation
Removal 1. Disconnect the negative cable from the battery. 2. Remove the engine protective cover. 3. Drain the engine oil. 4. Disconnect the ground wire from the...
Removal 1. Disconnect the negative cable from the battery. 2. Remove the engine protective cover. 3. Drain the engine oil. 4. Disconnect the ground wire from the...

Oil pump pressure reducing valve
Removal 1. Remove the tray. 2. Unscrew the cap. This plug is subject to spring force, so care must be taken when removing it. There is also a seal on the plug (arrow)...
Removal 1. Remove the tray. 2. Unscrew the cap. This plug is subject to spring force, so care must be taken when removing it. There is also a seal on the plug (arrow)...

Oil pump — removal and installation
Removal 1. Remove the tray. 2. Unscrew the pump bracket 6 from the pump 3 (figure 2.67). 3. Unscrew the oil pump pulley 4. 4. Unscrew bolts 5. 5. Remove the oil pump 3....
Removal 1. Remove the tray. 2. Unscrew the pump bracket 6 from the pump 3 (figure 2.67). 3. Unscrew the oil pump pulley 4. 4. Unscrew bolts 5. 5. Remove the oil pump 3....

Oil filter housing
Removal 1. Drain the coolant. 2. Remove filter element 1 (figure 2.68). 3. Disconnect the wiring connector from the oil pressure sensor 14. 4. Unscrew bolts 12 and 13....
Removal 1. Drain the coolant. 2. Remove filter element 1 (figure 2.68). 3. Disconnect the wiring connector from the oil pressure sensor 14. 4. Unscrew bolts 12 and 13....

Turbocharger — removal and installation
Removal 1. Remove the air filter 18 (figure 2.69). 2. Remove the inlet pipe 20. 3. Remove compressed air supply pipes 9 and 19. 4. Remove the connecting tube 6. 5....
Removal 1. Remove the air filter 18 (figure 2.69). 2. Remove the inlet pipe 20. 3. Remove compressed air supply pipes 9 and 19. 4. Remove the connecting tube 6. 5....

High pressure fuel pump (HPFP)
Removal 1. Disconnect the negative cable from the battery. 2. Remove the cylinder head. 3. Set the piston of the first cylinder to the position 12° before TDC. Both cams...
Removal 1. Disconnect the negative cable from the battery. 2. Remove the cylinder head. 3. Set the piston of the first cylinder to the position 12° before TDC. Both cams...

Injectors — checking
Examination 1. Insert the injector into the tester and create fuel pressure by closing the valve a (figure 2.81). 2. Perform a fuel atomization test. When working slowly...
Examination 1. Insert the injector into the tester and create fuel pressure by closing the valve a (figure 2.81). 2. Perform a fuel atomization test. When working slowly...

Nozzle holder — removal and installation
Removal 1. Disconnect the wiring connector from the needle travel sensor and fuel injection timing device. 2. Loosen the compressed air supply pipe from the intake...
Removal 1. Disconnect the wiring connector from the needle travel sensor and fuel injection timing device. 2. Loosen the compressed air supply pipe from the intake...

Starter — removal and installation
Removal 1. Disconnect the negative cable from the battery. 2. Unscrew nut 1 and remove it together with washer 2 (figure 2.85). 3. Disconnect wires 3 and 4. 4. Remove...
Removal 1. Disconnect the negative cable from the battery. 2. Unscrew nut 1 and remove it together with washer 2 (figure 2.85). 3. Disconnect wires 3 and 4. 4. Remove...

Generator — removal and installation
Removal 1. Disconnect the negative cable from the battery. 2. Remove the generator drive belt. 3. Unscrew nut 7, remove washer 6 and wire D+ 5 (figure 2.86). 4. Unscrew...
Removal 1. Disconnect the negative cable from the battery. 2. Remove the generator drive belt. 3. Unscrew nut 7, remove washer 6 and wire D+ 5 (figure 2.86). 4. Unscrew...

Tightening torques for engine components and parts 602.984/985
Tightening torques for engine components and parts 602.984/985 Fastening elements Tightening torques (Nm) Pressure line to the power steering pump 40 Mixing chamber...
Tightening torques for engine components and parts 602.984/985 Fastening elements Tightening torques (Nm) Pressure line to the power steering pump 40 Mixing chamber...
This section is available on: russian, bulgarian, belarusian, ukrainian, serbian, croatian, romanian, polish, slovak, hungarian
More similar sections for repairing other models
☛ Power unit: Engine overhaul car Mercedes 190 (W201) (1982-1993)
☛ Power unit: Engine overhaul car Mercedes W124 (1984-1995)
☛ Power unit: Engine repair car Mercedes W220 (1998-2005)
Link in different formats to this section
TEXTHTMLBB Code
- General information
- Maintenance
- Power unit
- Engines 602.984/985
- Engines 904.908/914/923/936
- Transmission
- Clutch
- Manual gearbox 711.613
- Manual gearbox 710.64/66
- Manual gearbox 715.051
- Automatic gearbox 723.345
- Power take-off box
- Chassis
- Front suspension
- Rear suspension
- Steering
- Brake system
- Body and electrical equipment
- Interior (internal elements)
- Exterior (external elements)
- Heater and air conditioner
- Electrical diagrams
- General information
- User manual
- Maintenance
- Diesel engine OM646
- Engine repair
- Cooling and lubrication system
- Power and exhaust system
- Transmission
- Clutch
- Car gearbox
- Chassis
- Front suspension
- Rear suspension
- Steering
- Brake system
- Body
- Body elements
- Electrical equipment
- Equipment and devices
- Security systems
- Electrical circuits
- General information
- User manual
- Maintenance
- Petrol engines 2.0 l
- Engine repair
- Lubrication system
- Cooling system
- Power and control system
- Petrol engines 2.8 l
- Engine repair
- Lubrication system
- Cooling system
- Power and control system
- Diesel engines 2.3 l
- Engine repair
- Cooling system
- Lubrication system
- Turbocharging and recycling
- Power and control system
- Diesel engines 2.2 l
- Engine repair
- Cooling system
- Lubrication system
- Turbocharging and recycling
- Power and control system
- Transmission
- Clutch
- Mechanical gearbox
- Automatic gearbox
- Chassis
- Front suspension and wheels
- Rear suspension
- Steering
- Brake system
- Body
- Exterior (external elements)
- Interior (internal elements)
- Electrical equipment
- Equipment and devices
- Heater and air conditioner
- Electrical circuits
- General information
- Introduction to the guide
- Maintenance
- Power unit
- Engine repair
- Lubrication system
- Cooling system
- Power and exhaust system
- Transmission
- Clutch
- Mechanical gearbox
- Automatic gearbox
- Front axle
- Rear axle and cardan
- Chassis
- Car suspension
- Steering
- Brake system
- Tires and wheels
- Electrical equipment
- Equipment and devices
- Headlights and lighting
- Power devices
- Electrical circuits