



Elements of the car body Mercedes Vito 2 (W639)

Vito Viano car body
The body of the Vito Viano cars is load-bearing, two-volume. The rear side doors are sliding. The rear end doors can be hinged (2 doors), or one lifting door can be...
The body of the Vito Viano cars is load-bearing, two-volume. The rear side doors are sliding. The rear end doors can be hinged (2 doors), or one lifting door can be...

Removal and installation the hood
1. Remove the upper part of the hood latch (1). 2. Mark the position of the hood (7) relative to the hinges (2). Do not use scratching objects. 3. Loosen the bolts (3)....
1. Remove the upper part of the hood latch (1). 2. Mark the position of the hood (7) relative to the hinges (2). Do not use scratching objects. 3. Loosen the bolts (3)....


Removal and installation the front bumper
1. Remove the radiator grille. 2. Remove the pistons (1). 3. Disconnect the parking sensor connectors (7) by unscrewing the bolts (3). 4. Unscrew the bolt (5). 5. Remove...
1. Remove the radiator grille. 2. Remove the pistons (1). 3. Disconnect the parking sensor connectors (7) by unscrewing the bolts (3). 4. Unscrew the bolt (5). 5. Remove...

Removal and installation the upper bumper trim
1. Remove the front bumper (4). 2. Remove the pins (2) and unclip the cover (1) from the bumper (4). 3. Installation is carried out in reverse order. VN 8.005 1. Front...
1. Remove the front bumper (4). 2. Remove the pins (2) and unclip the cover (1) from the bumper (4). 3. Installation is carried out in reverse order. VN 8.005 1. Front...
Removal and installation the front panel support crossmember
1. Remove the front bumper. 2. Disconnect the ambient temperature sensor connector (6) (drawing VN 8.006). 3. Remove the trim (1). 4. Disconnect the horn connector and...
1. Remove the front bumper. 2. Disconnect the ambient temperature sensor connector (6) (drawing VN 8.006). 3. Remove the trim (1). 4. Disconnect the horn connector and...

Removal and installation the external rearview mirror
1. Remove the protection (1) (drawing VN 8.007). 2. Loosen the screws (2) and tighten to 14 Nm during installation. 3. Remove the mirror (5) in the direction indicated...
1. Remove the protection (1) (drawing VN 8.007). 2. Loosen the screws (2) and tighten to 14 Nm during installation. 3. Remove the mirror (5) in the direction indicated...

Removal and installation the front wing
1. Remove the front bumper. 2. Remove the turn signal repeater. 3. Loosen the screws (1). When installing, tighten to the following torques: for cars up to chassis...
1. Remove the front bumper. 2. Remove the turn signal repeater. 3. Loosen the screws (1). When installing, tighten to the following torques: for cars up to chassis...

Removal and installation the fuel tank flap
1. Remove the plastic strip (1) from the hatch (3). 2. Disconnect the tank cover safety strap (2) from the hatch (3). 3. Unscrew the screws (4). 4. Remove the hatch (3)...
1. Remove the plastic strip (1) from the hatch (3). 2. Disconnect the tank cover safety strap (2) from the hatch (3). 3. Unscrew the screws (4). 4. Remove the hatch (3)...

Removal and installation rear bumper corners
1. Loosen the bolts (1), tighten to 9 Nm when installing 2. Remove the pistons (2). 3. Unclip the bumper corner (3) by pressing it in the direction indicated by the...
1. Loosen the bolts (1), tighten to 9 Nm when installing 2. Remove the pistons (2). 3. Unclip the bumper corner (3) by pressing it in the direction indicated by the...

Disassembling and assembling the rear bumper
1. Remove the rear bumper. 2. Remove the wiring and sensors of the parking sensors system. 3. Remove the reflectors (3). 4. Remove the corners (2) of the bumper. 5....
1. Remove the rear bumper. 2. Remove the wiring and sensors of the parking sensors system. 3. Remove the reflectors (3). 4. Remove the corners (2) of the bumper. 5....
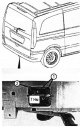
Removal and installation the bumper reinforcement
1. Remove the rear bumper. 2. Unscrew the bolts (1), tighten to 7 Nm during installation. 3. Remove the bumper reinforcement (2). 4. Installation is carried out in...
1. Remove the rear bumper. 2. Unscrew the bolts (1), tighten to 7 Nm during installation. 3. Remove the bumper reinforcement (2). 4. Installation is carried out in...

Removal and installation the side bumper mount
1. Remove the rear bumper corners. 2. Unclip the latches (1). 3. Remove the bracket (2). 4. Installation is carried out in reverse order. VN 8.013 1. Latches; 2 Bracket
1. Remove the rear bumper corners. 2. Unclip the latches (1). 3. Remove the bracket (2). 4. Installation is carried out in reverse order. VN 8.013 1. Latches; 2 Bracket

Removal and installation the side door step
1. Remove the plastic footrest cover. 2. Unscrew the bolts (1). 3. Remove the footrest (2) by unlatching the latches (3). VN 8.014 1. Bolts; 2. Footrest; 3. Latches
1. Remove the plastic footrest cover. 2. Unscrew the bolts (1). 3. Remove the footrest (2) by unlatching the latches (3). VN 8.014 1. Bolts; 2. Footrest; 3. Latches

Removal and installation front passenger seats
1. Remove the negative battery terminal. 2. Remove the horizontal seat cushion 3. Disconnect the connector (3) of the middle passenger seat belt pretensioner. 4. Loosen...
1. Remove the negative battery terminal. 2. Remove the horizontal seat cushion 3. Disconnect the connector (3) of the middle passenger seat belt pretensioner. 4. Loosen...


Coupling device
These vehicles are equipped with two types of coupling devices: removable and fixed. More detailed information about the coupling device can be found in the "Operating...
These vehicles are equipped with two types of coupling devices: removable and fixed. More detailed information about the coupling device can be found in the "Operating...
Control data for clearances when installing removable body elements
Gap between hood and wing A 4(±1) Gap between the hood and the bumper cover IN 6(±1) Gap between front door and wings WITH 5(±1) Gap between front door and roof D 5(±1)...
Gap between hood and wing A 4(±1) Gap between the hood and the bumper cover IN 6(±1) Gap between front door and wings WITH 5(±1) Gap between front door and roof D 5(±1)...
This section is available on: russian, bulgarian, belarusian, ukrainian, serbian, croatian, romanian, polish, slovak, hungarian
More similar sections for repairing other models
☛ Body: Body elements car Mercedes W220 (1998-2005)
Link in different formats to this section
TEXTHTMLBB Code
- General information
- Maintenance
- Power unit
- Engines 602.984/985
- Engines 904.908/914/923/936
- Transmission
- Clutch
- Manual gearbox 711.613
- Manual gearbox 710.64/66
- Manual gearbox 715.051
- Automatic gearbox 723.345
- Power take-off box
- Chassis
- Front suspension
- Rear suspension
- Steering
- Brake system
- Body and electrical equipment
- Interior (internal elements)
- Exterior (external elements)
- Heater and air conditioner
- Electrical diagrams
- General information
- User manual
- Maintenance
- Diesel engine OM646
- Engine repair
- Cooling and lubrication system
- Power and exhaust system
- Transmission
- Clutch
- Car gearbox
- Chassis
- Front suspension
- Rear suspension
- Steering
- Brake system
- Body
- Body elements
- Electrical equipment
- Equipment and devices
- Security systems
- Electrical circuits
- General information
- User manual
- Maintenance
- Petrol engines 2.0 l
- Engine repair
- Lubrication system
- Cooling system
- Power and control system
- Petrol engines 2.8 l
- Engine repair
- Lubrication system
- Cooling system
- Power and control system
- Diesel engines 2.3 l
- Engine repair
- Cooling system
- Lubrication system
- Turbocharging and recycling
- Power and control system
- Diesel engines 2.2 l
- Engine repair
- Cooling system
- Lubrication system
- Turbocharging and recycling
- Power and control system
- Transmission
- Clutch
- Mechanical gearbox
- Automatic gearbox
- Chassis
- Front suspension and wheels
- Rear suspension
- Steering
- Brake system
- Body
- Exterior (external elements)
- Interior (internal elements)
- Electrical equipment
- Equipment and devices
- Heater and air conditioner
- Electrical circuits
- General information
- Introduction to the guide
- Maintenance
- Power unit
- Engine repair
- Lubrication system
- Cooling system
- Power and exhaust system
- Transmission
- Clutch
- Mechanical gearbox
- Automatic gearbox
- Front axle
- Rear axle and cardan
- Chassis
- Car suspension
- Steering
- Brake system
- Tires and wheels
- Electrical equipment
- Equipment and devices
- Headlights and lighting
- Power devices
- Electrical circuits