



Contents: Removal ↡ Installation ↡
Note: See also Section Timing Drive - General Information, Component Maintenance
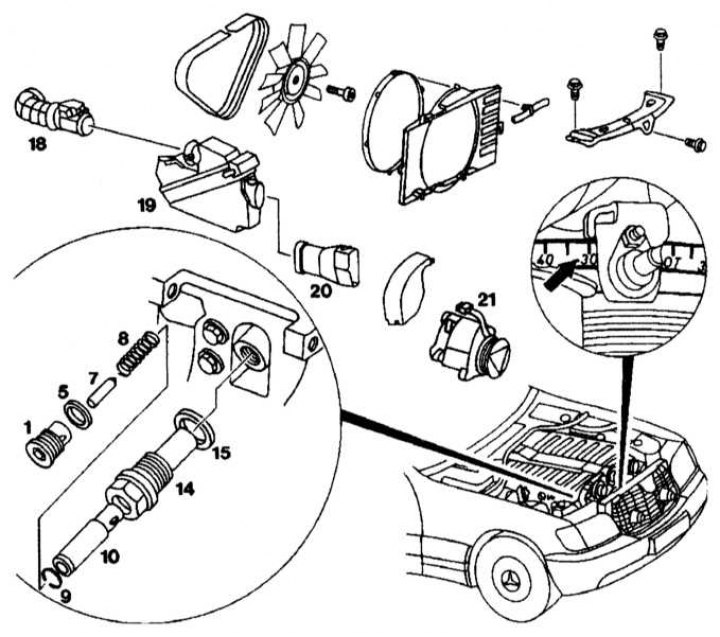
Timing Chain Tensioner Installation Details
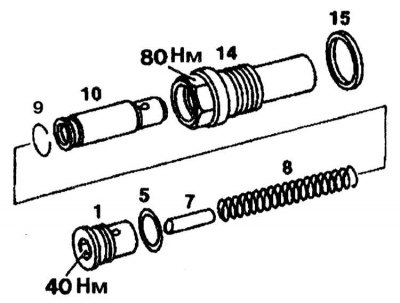
1 - Cork; 5, 15 - Sealing rings; 7 - Finger; 8 - Spring; 9 - Spring ring; 10 - Stop bolt; 14 - Tensioner housing; 18, 20 - Air ducts; 19 - Air filter; 21 - Air pump
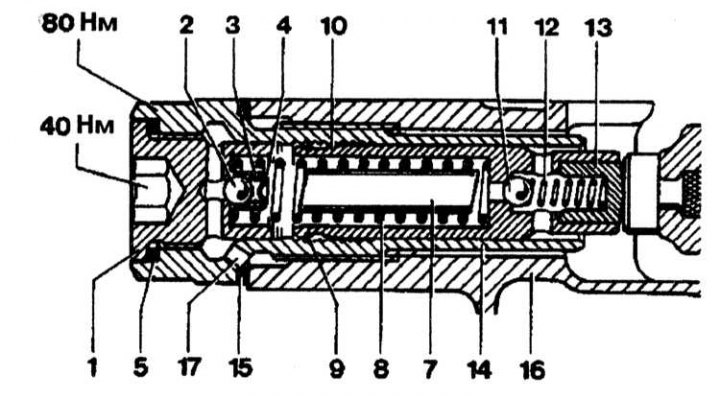
Timing chain tensioner design
1 - Cork; 2, 11 - Balls; 3, 12 - Pressure springs; 4 - Ball guide; 5, 15 - Aluminum sealing rings; 7 - Finger; 8 - Thrust spring; 9 - Limiting spring; 10 - Stop bolt; 13 - Thrust piece; 14 - Tensioner housing; 16 - Timing chain cover; 17 - Oil channel
Removal
1. Set the piston of the first cylinder to the position 30° after TDC. 2. Loosen the plug (1) by about one turn.
3. Unscrew the tensioner assembly.
4. Remove the plug (1) with the sealing ring (5). Unscrew the stop bolt (10) together with the limiting spring (9) in the stop direction. Wipe all elements.
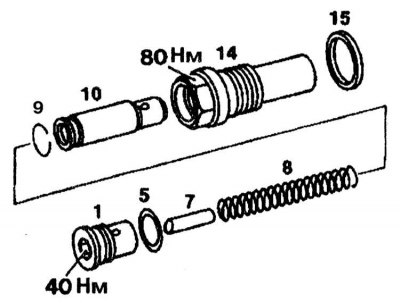
Installation
1. Screw in the tensioner housing (14) with a new sealing ring (15) and tighten it to a torque of 50 Nm.
2. Secure the sealing ring (15) with sealant in the tensioner housing (14) so that it is centered. Tighten the tensioner housing to a torque of 80 Nm.
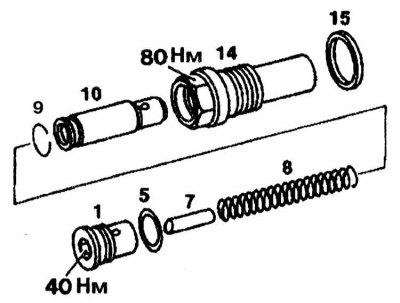
3. Insert the stop bolt (10) into the tensioner housing together with the limiting (9) and pressure (8) springs and the pin (7).
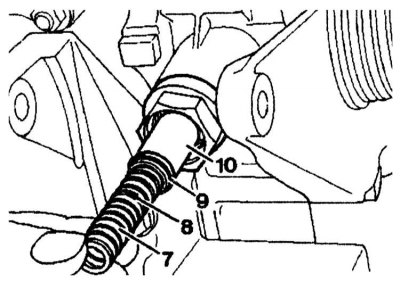
4. Screw the plug (1) into the tensioner housing (14) with a new sealing ring (5) and tighten it to a torque of 40 Nm.
(Information copied from the website: mercedesman.ru)