



Gasoline car engines Mercedes S-Class (W126)

Vehicle Identification
To purchase spare parts, as well as to properly repair the car, it is necessary to identify it. All information about the vehicle is contained in a 17-digit...
To purchase spare parts, as well as to properly repair the car, it is necessary to identify it. All information about the vehicle is contained in a 17-digit...

Removal and installation the engine
It is recommended to remove the engine and gearbox as one unit, i.e. as a single unit, and then separate the engine from the gearbox. The following instructions are...
It is recommended to remove the engine and gearbox as one unit, i.e. as a single unit, and then separate the engine from the gearbox. The following instructions are...

Disassembling the engine
Disassembling the engine is easier when using a mounting stand. Before any work on disassembling the engine begins, it is necessary to thoroughly clean the outer...
Disassembling the engine is easier when using a mounting stand. Before any work on disassembling the engine begins, it is necessary to thoroughly clean the outer...

Engine assembly
In this description you will find instructions for assembling the engine step by step. When performing assembly work, make sure that the tools, workbench and parts to be...
In this description you will find instructions for assembling the engine step by step. When performing assembly work, make sure that the tools, workbench and parts to be...

Disassembling the cylinder head
Remove the spark plugs. Remove the rocker arms with the pressure levers. If the rocker arms and camshafts are not renewed, they must be installed again in the same place...
Remove the spark plugs. Remove the rocker arms with the pressure levers. If the rocker arms and camshafts are not renewed, they must be installed again in the same place...

Checking cylinder head parts
Clean the cylinder head surface and check for scratches and wear. Check if the coolant separator tubes are firmly seated in the cylinder head; if this is not the case,...
Clean the cylinder head surface and check for scratches and wear. Check if the coolant separator tubes are firmly seated in the cylinder head; if this is not the case,...

Installing the valve guide bushing
Machine the oversize valve seat ring until the required overlap is achieved. Heat the cylinder head to a temperature of approximately 90°C in a water bath. Cool the...
Machine the oversize valve seat ring until the required overlap is achieved. Heat the cylinder head to a temperature of approximately 90°C in a water bath. Cool the...
Cylinder head assembly
Slide the mounting sleeve that comes with the new valve seals onto the valve stem. Lightly lubricate the new seal and push it on by hand. Remove the mounting sleeve....
Slide the mounting sleeve that comes with the new valve seals onto the valve stem. Lightly lubricate the new seal and push it on by hand. Remove the mounting sleeve....

Checking pistons and connecting rods
Clean and inspect all parts. If any parts show signs of chipping, scratching or wear, they must be replaced with new ones. The piston pin seating locations must be...
Clean and inspect all parts. If any parts show signs of chipping, scratching or wear, they must be replaced with new ones. The piston pin seating locations must be...

Cylinder block (crankcase)
During each major overhaul, all cavities and passages must be thoroughly cleaned and all remnants of old gaskets or sealant must be removed. This applies especially to...
During each major overhaul, all cavities and passages must be thoroughly cleaned and all remnants of old gaskets or sealant must be removed. This applies especially to...

Crankshaft and flywheel
Wash the crankshaft in gasoline and check that the oil holes are clean and free. Check the journals (trunnions) of the supports for deviation from the steep shape and...
Wash the crankshaft in gasoline and check that the oil holes are clean and free. Check the journals (trunnions) of the supports for deviation from the steep shape and...
Camshaft and Drive Mechanism — General Information
The camshafts of 8-cylinder engines are each located on □ bearings, which are standard and of two repair sizes, so that the journals of the camshaft can be reground...
The camshafts of 8-cylinder engines are each located on □ bearings, which are standard and of two repair sizes, so that the journals of the camshaft can be reground...

Checking camshafts
Check the axial clearance of the camshafts. Check the camshaft bearings and journals to determine if the weight is within specifications. Using prisms and a dial...
Check the axial clearance of the camshafts. Check the camshaft bearings and journals to determine if the weight is within specifications. Using prisms and a dial...
Checking the valve timing
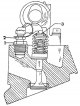
Remove the valve cover and install the camshaft mark. The mark is stamped on the rear end of the camshaft. Remove the spark plugs to make it easier to bleed the engine....
Remove the valve cover and install the camshaft mark. The mark is stamped on the rear end of the camshaft. Remove the spark plugs to make it easier to bleed the engine....

Adjusting the valve timing
If adjustment of valve timing is required, the required disc spring or a new drive chain must be installed. Disc springs are available in the following types and are...
If adjustment of valve timing is required, the required disc spring or a new drive chain must be installed. Disc springs are available in the following types and are...

Rocker arm — removal and installation
The rocker arm is always installed in the same position it was in before removal. If the rocker arm is replaced with a new one, the camshaft must be checked and, if...
The rocker arm is always installed in the same position it was in before removal. If the rocker arm is replaced with a new one, the camshaft must be checked and, if...
Checking and replacing the hydraulic valve clearance compensator
If noise occurs, check the compensator as follows: Install the corresponding cam head vertically opposite the rocker arm. Use the hammer handle to press on the rocker...
If noise occurs, check the compensator as follows: Install the corresponding cam head vertically opposite the rocker arm. Use the hammer handle to press on the rocker...
Chain tensioner — removal and installation
For vehicles with air conditioning, remove the battery and compressor. Unscrew the plug with a 17 mm wrench. It is located in front on the right in front of the exhaust...
For vehicles with air conditioning, remove the battery and compressor. Unscrew the plug with a 17 mm wrench. It is located in front on the right in front of the exhaust...
Engine specifications
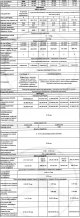
Note: The permissible difference in piston weight for one engine is 4 g, in case of repair up to 10 g. Note: The cylinder bores are serially divided by group number....
Note: The permissible difference in piston weight for one engine is 4 g, in case of repair up to 10 g. Note: The cylinder bores are serially divided by group number....

Tightening torques for threaded connections
Engine 280S and 280SE 380SE and 500SE 350SE and 450SE Cylinder head bolts (allen bolts)only when the engine is cold 110 60 50 Bolts or nuts for fastening the cylinder...
Engine 280S and 280SE 380SE and 500SE 350SE and 450SE Cylinder head bolts (allen bolts)only when the engine is cold 110 60 50 Bolts or nuts for fastening the cylinder...

Cylinder head cover of a six-cylinder engine
1 - lid; 2 - sealing gasket; 3 - spark plug socket sealing gaskets; 7 - side cover; 8 - spark plug leads tips; 9 - lid; 10 - bolts; 11 - hose clamp; 12 - exhaust...
1 - lid; 2 - sealing gasket; 3 - spark plug socket sealing gaskets; 7 - side cover; 8 - spark plug leads tips; 9 - lid; 10 - bolts; 11 - hose clamp; 12 - exhaust...

Cylinder head of a six-cylinder engine
1 - oil filler cap; 2 - bolt (3 pcs.); 3 - sealing hoof (3 pcs.); 4 - cylinder head cover; 5 - cap nuts; 6 - cover gasket; 7 - bolt (2 pcs.); 3 - washers; 9 - threaded...
1 - oil filler cap; 2 - bolt (3 pcs.); 3 - sealing hoof (3 pcs.); 4 - cylinder head cover; 5 - cap nuts; 6 - cover gasket; 7 - bolt (2 pcs.); 3 - washers; 9 - threaded...
This section is available on: russian, bulgarian, belarusian, ukrainian, serbian, croatian, romanian, polish, slovak, hungarian
More similar sections for repairing other models
☛ Power unit: Engine repair car Mercedes W168 (1997-2004)
☛ Gasoline engines: Engine repair car Mercedes W210 (1996-2002)
☛ Power unit: Engine repair car Mercedes W463 (1999-2019)
☛ Diesel engine OM646: Engine repair car Mercedes Vito 2 (2003-2014, diesel)
Link in different formats to this section
TEXTHTMLBB Code
- General information
- Introduction to guide
- User manual
- Maintenance
- Power unit
- Engine repair
- Cooling and heating systems
- Power and exhaust systems
- Ignition and control system
- Charge and launch systems
- Transmission
- Automatic gearbox
- Drive shafts
- Chassis
- Brake system
- Front suspension
- Rear suspension
- Steering
- Body
- Body elements
- Electrical equipment
- Equipment and devices
- Electrical circuits
- User manual
- Controls and instruments
- Driving and operation
- Maintenance
- Power unit
- Petrol engine V6
- Petrol engine V8
- Petrol engine V12
- Diesel engine OM603
- Diesel engine OM606
- Cooling system
- Power supply and injection system
- Control system HFM-SFI
- Control system LH-SFI
- Control systems ME-SFI
- Diesel control system
- Ignition system
- Charge and launch system
- Transmission
- Mechanical gearbox 717.438
- Mechanical gearbox 717.454
- Automatic gearbox 722.5
- Automatic gearbox 722.6
- Clutch and drive shafts
- Differential
- Chassis
- Brake system
- Steering
- Front suspension
- Rear suspension
- Body
- Exterior (external elements)
- Interior (internal elements)
- Electrical equipment
- Equipment and devices
- Electrical circuits
- General information
- Introduction to guide
- Power unit
- 8-cylinder V8 engine
- 6-cylinder I6 engine
- Cooling and lubrication system
- Power system (carburetor)
- Fuel injection system
- Ignition system
- Transmission
- Clutch and cardan
- Car gearbox
- Chassis
- Front suspension
- Rear suspension
- Steering
- Brake system
- Electrical equipment
- Power devices
- Electrical circuits