
Cars BMW Cars Volkswagen Cars Chevrolet Cars Land Rover Cars Lada Cars Honda Cars Peugeot
English Русский
Български
Беларускі
Український
Српски
Hrvatski
Română
Polski
Slovenský
Magyar
Bookmark News and articles Sitemap Feedback Site search
MercedesMan.ru


A-Class C-Class E-Class G-Class M-Class S-Class Others
W116 (1972-1980, petrol) W126 (1979-1991, petrol) W140 (1991-1998) W220 (1998-2005)
  • Main
  • S-Class
  • W126 (1979-1991)
  • Power unit
  • Engine repair
  • Removal and installation the engine

Removal and installation the engine (Mercedes-Benz S-Class W126)

0
Contents: Removal ↡ Installation ↡
It is recommended to remove the engine and gearbox as one unit, i.e. as a single unit, and then separate the engine from the gearbox. The following instructions are generally applicable to all engines, but attention is drawn to the special features of the various engine versions.

Removal


Removal


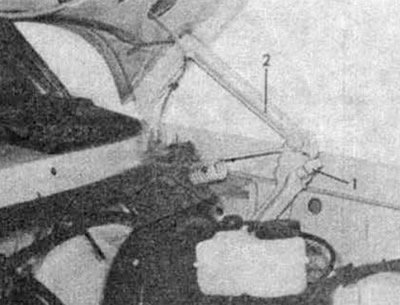
Set the hood to the 90° position. To do this, first unhook the left and then the right stop (1) of the bracket (2) from the first position, and then place the stopper in the second position.

Place rags on the fenders to protect the paintwork.

Remove the ground cable from the battery.
Remove the ground cable from the battery.


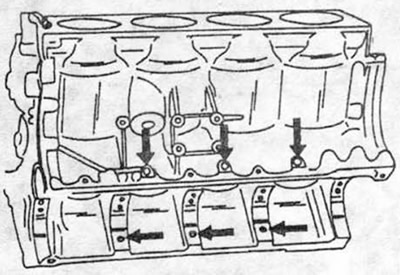
Drain the coolant by removing the drain plugs on the left bottom of the radiator, the left and right side of the cylinder block, or the right side on 280SE models. Crankshaft bearing cap side bolts on V-engines (see arrow A in the figure) not to be confused with coolant drain plugs.


Remove the upper and lower radiator hoses.

Article text obtained from the website (MERCEDESMAN)

Drain the engine oil.

Unscrew the gearbox oil hoses from the gearbox oil cooler, and also unscrew the oil cooler hose clamps and drain the oil.

Pull both clips up from the fan shroud, remove the fan shroud from the bottom bracket and place it on the fan.

Pull both radiator retaining clips upwards and lift the radiator outwards. On 280SE engines, you must first unscrew the oil cooler and lift it upwards out of the guides on the radiator.

On cars with air conditioning (6 cylinders) unscrew the compressor together with the support and put it aside. Coolant pipes (refrigerant) no need to remove. On cars with V-engines, the air conditioning system must be emptied and then the hoses on the twin pipe must be removed.
On cars with air conditioning (6 cylinders) unscrew the compressor together with the support and…


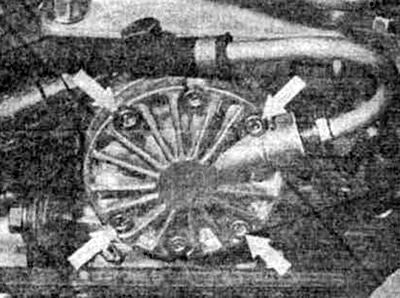
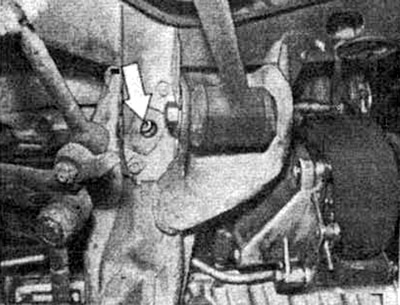
For vehicles with level control, unscrew the oil pressure pump and set it aside. To do this, unscrew only the bolts shown in the figure with arrows. Remove the hoses and plug them.

Suck the oil out of the power steering reservoir and remove the pressurized oil hoses from the power steering pump.


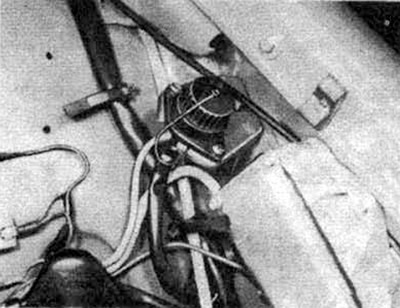
On 8-cylinder engines, remove the entire exhaust system. On 6-cylinder engines, disconnect the exhaust pipe from the exhaust manifold and from the gearbox.
On 8-cylinder engines, remove the entire exhaust system. On 6-cylinder engines, disconnect the…


Disconnect all coolant hoses and vacuum hoses going to the engine. Disconnect the top dead center (TDC) sensor wire at the diagnostic socket by unscrewing the diagnostic socket from its mount (two screws).

Disconnect the throttle control system.

Disconnect the fuel lines.

Disconnect all electrical wires from the gearbox. Remove the inductive sensor for the tachometer from the gearbox. To do this, unscrew the M6 bolt and remove the sensor.

Remove the gearshift lever.

Remove the clutch hydraulic hose from the clutch housing.

Remove the engine shock absorbers on the left and right.

Unscrew the flanges of the cardan shaft and gearbox, move the cardan shaft together with the washers back, first removing the clamping nuts from the connection.
Unscrew the flanges of the cardan shaft and gearbox, move the cardan shaft together with the…


Unscrew the flanges of the cardan shaft and gearbox, move the cardan shaft together with the…


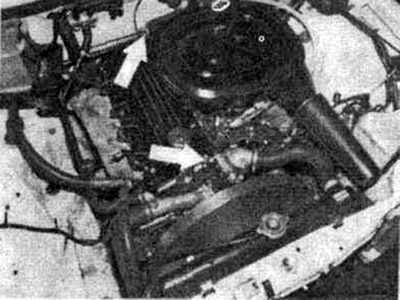
Thread a suitable cable through the engine lugs (arrows), attach the cable to a crane or lift and pull it slightly.


Remove the front engine mounts on the left and right by unscrewing the mounting bolts from below.
Remove the front engine mounts on the left and right by unscrewing the mounting bolts from below.


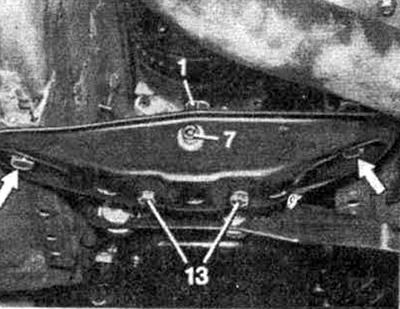
Remove the rear engine support or the metal pan with the support by unscrewing the nuts (1) and mounting bolts (arrows).

Remove the rear engine support or the metal pan with the support by unscrewing the nuts (1) and…


Carefully lift the engine, tilting it at about a 45' angle and then remove it from the engine compartment. Do this work very slowly and constantly monitor that the engine does not remain hanging on wires, etc. Pay attention not to damage the wall of the engine compartment, as it can damage the windshield washer. It is recommended to use special ears on the engine to lift the engine.

Installation


The engine is installed in the reverse order of removal, subject to the following conditions.


Do not install engine parts until the engine mounts and mount bracket are installed and the engine is hanging by cables.

Mount the rear engine support in a free state.

Roll the vehicle and tighten the clamp nut on the driveshaft joint.

Attach the control lever system and check its operation.

Install and adjust the radiator mount.

Fill with oil, coolant, cooling liquid and check the systems for leaks.

Check the condition of the coolant (density, freezing point).

Set the ignition, adjust the idle speed and gas.

Check the engine for tightness and leaks.

Rubber mounts should be replaced with new ones if they are cracked, worn or deformed.

Remove oil and grease from rubber parts. Tighten all bolts and nuts to the specified torque.

Removing the engine and gearbox is not necessary when you only need to replace the rubber engine mounts.
This article is available at: russian, bulgarian, belarusian, ukrainian, serbian, croatian, romanian, polish, slovak, hungarian
The article has been verified: Burova Vera Semenovna
Share with friends:
◀ Previous
S-Class W126 / Engine repair
Next ▶

Vehicle Identification
Disassembling the engine
Engine assembly
Disassembling the cylinder head
Checking cylinder head parts
Installing the valve guide bushing
More similar articles for repairing other models

☛ Checking the engine oil level using a dipstick Mercedes W168 (1997-2004)
☛ Engine hood — opening and closing Mercedes W202 (1993-2000)
☛ Design and specification of engine lubrication system Mercedes W123 (1976-1985)
☛ Starting the engine from an auxiliary power source Mercedes W463 (1999-2019)
☛ Starting the engine from an auxiliary power source Mercedes W163 (1997-2005)
☛ Checking the engine oil level Mercedes Sprinter (1995-2000, diesel)
Link in different formats to this article
Comments and feedback from visitors
No comments yet


How much will 25 + 39 ?


W220 (1998-2005) 
  • General information
  • Introduction to guide
  • User manual
  • Maintenance
  • Power unit
  • Engine repair
  • Cooling and heating systems
  • Power and exhaust systems
  • Ignition and control system
  • Charge and launch systems
  • Transmission
  • Automatic gearbox
  • Drive shafts
  • Chassis
  • Brake system
  • Front suspension
  • Rear suspension
  • Steering
  • Body
  • Body elements
  • Electrical equipment
  • Equipment and devices
  • Electrical circuits
W140 (1991-1998) 
  • User manual
  • Controls and instruments
  • Driving and operation
  • Maintenance
  • Power unit
  • Petrol engine V6
  • Petrol engine V8
  • Petrol engine V12
  • Diesel engine OM603
  • Diesel engine OM606
  • Cooling system
  • Power supply and injection system
  • Control system HFM-SFI
  • Control system LH-SFI
  • Control systems ME-SFI
  • Diesel control system
  • Ignition system
  • Charge and launch system
  • Transmission
  • Mechanical gearbox 717.438
  • Mechanical gearbox 717.454
  • Automatic gearbox 722.5
  • Automatic gearbox 722.6
  • Clutch and drive shafts
  • Differential
  • Chassis
  • Brake system
  • Steering
  • Front suspension
  • Rear suspension
  • Body
  • Exterior (external elements)
  • Interior (internal elements)
  • Electrical equipment
  • Equipment and devices
  • Electrical circuits
W126 (1979-1991, petrol) 
  • Power unit
  • Engine repair
  • Ignition system
  • Lubrication system
  • Cooling system
  • Fuel system
  • Fuel injection system
  • Transmission
  • Clutch and cardan
  • Mechanical gearbox
  • Automatic gearbox
  • Chassis
  • Front suspension
  • Rear suspension
  • Steering
  • Brake system
  • Electrical equipment
  • Power devices
  • Electrical circuits
W116 (1972-1980, petrol) 
  • General information
  • Introduction to guide
  • Power unit
  • 8-cylinder V8 engine
  • 6-cylinder I6 engine
  • Cooling and lubrication system
  • Power system (carburetor)
  • Fuel injection system
  • Ignition system
  • Transmission
  • Clutch and cardan
  • Car gearbox
  • Chassis
  • Front suspension
  • Rear suspension
  • Steering
  • Brake system
  • Electrical equipment
  • Power devices
  • Electrical circuits
 
MercedesMan.ru © 2017–2026 · Mobile version · Read about Mercedes · Sitemap: EN BG BY UA RS HR RO PL SK HU · Feedback · Site search · Bookmark A-Class (W168) · C-Class (W201) · C-Class (W202) · C-Class (W203) · E-Class (W123) · E-Class (W124) · E-Class (W210) · G-Class (W463) · M-Class (W163) · S-Class (W116, petrol) · S-Class (W126, petrol) · S-Class (W140) · S-Class (W220) · Sprinter · Vito 1 · Vito 2 · Vario 814D ·
 
We only use cookies without which some of the site's features may not be available.