



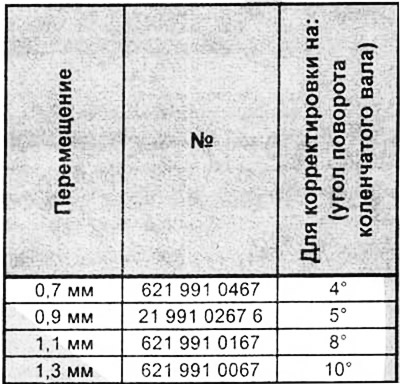
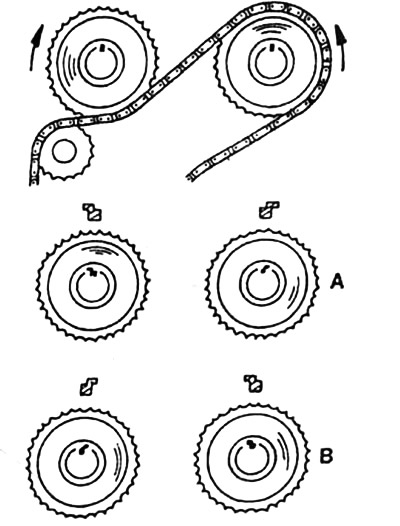
Moving one tooth on the camshaft gear (sprocket) gives approximately 18° of rotation of the crankshaft. Moving the disc spring to the right in the direction of travel gives an earlier start, and to the left - a later start of intake. Adjustments are made as follows:
Loosen the camshaft sprocket mounting bolt while holding the camshaft.
Mark the relative positions of the camshaft sprocket and chain with paint and remove the sprocket.
Carry out the same check on the intake valve of the sixth cylinder.
6-cylinder engines remove both rocker arms of the first cylinder using puller N 110 589 04 61 00 (for 8-cylinder engine N 123 589 03 61 00). To do this, turn the crankshaft to a position where the top of the cam "looks" upward. Replace both pressure devices with the measuring pressure device of the control device.
Install the rocker arm without the tension spring. Select the remaining valve clearance by turning the valve adjusting bolt. The measuring pressure device should not detect any clearance.
Install and attach control device 110 89 10 21 00.
Inlet valve
With the inlet valve closed, i.e. the cam pointing up, the dial indicator with the extension rod must be inserted into the control device on the inlet valve.
[Information copied from the website MERCEDESMAN.ru]
Then adjust the pre-tension to 3mm and secure the indicator.
Turn the rotating dial so that the large pointer is at zero.
Slowly turn the crankshaft in the direction of engine rotation until the dial indicator returns after 2 mm to the preload of 1 mm. In this position of the engine, read the readings on the vibration damper. It should correspond to the value "Inlet valve open after TDC".
Exhaust valve
Carry out the same measurement on the exhaust camshaft. After setting the preload, turn the crankshaft in the direction of engine rotation. The exhaust valve opens completely and the indicator points to 0. When the exhaust valves close again, the indicator rod returns to its position and the pointer starts to move. The small pointer should remain at 1 and the large pointer at 0. This corresponds to a valve stroke of 2 mm when the exhaust valve closes.
Place a clean cloth under the camshaft and remove the disc spring.
Insert the correct disc spring and install the camshaft sprocket. Repeat the valve timing check again.
After installing the disc offset spring or new chain, check the ignition timing.
Since both camshafts move in opposite directions, you need to pay attention to the installation order when installing the spring washer.
b-cylinder engines
Check the chain for damage, wear or excessive elongation. In case of repair, there is an open chain with a connecting link. When repairing the engine, it is necessary to install a closed one (endless) chain.
Remove the spark plugs.
Remove the cylinder head cover.
Remove the chain tensioner or remove the pressure spring with the tensioner installed (6-cylinder engines).
Remove the right camshaft rocker arm to prevent the camshaft from rotating back. if
Cover the body with a cloth.
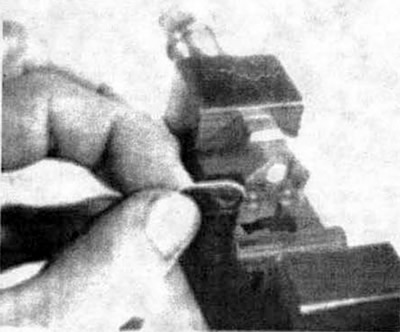
Open the circuit using a separating device.
To install:
Attach a new open link chain to the old chain.
Slowly turn the engine by the crankshaft in the direction of rotation. At the same time, pull the old chain upward until the open link reaches the top position of the camshaft sprocket. The chain must remain engaged with both camshaft sprockets as it rotates.
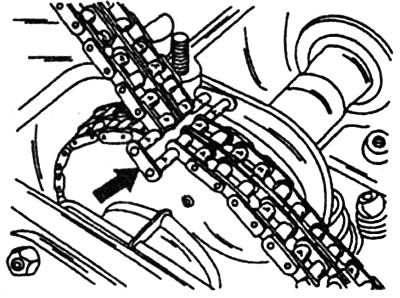
Unhook the old chain and connect the ends of the new chain.
Install both lock washers. Crank the engine and check the adjustment marking.
If necessary, check the valve timing.
Install the chain tensioner or install the pressure spring in the chain tensioner. If the chain tensioner was removed on a 6-cylinder engine, it must be disassembled, then assembled on a mounting unit and then installed.
Install the rocker arms in the correct order.
Adjust the valve clearance on the right camshaft.
Install the cylinder head cover. Screw in the spark plugs.