
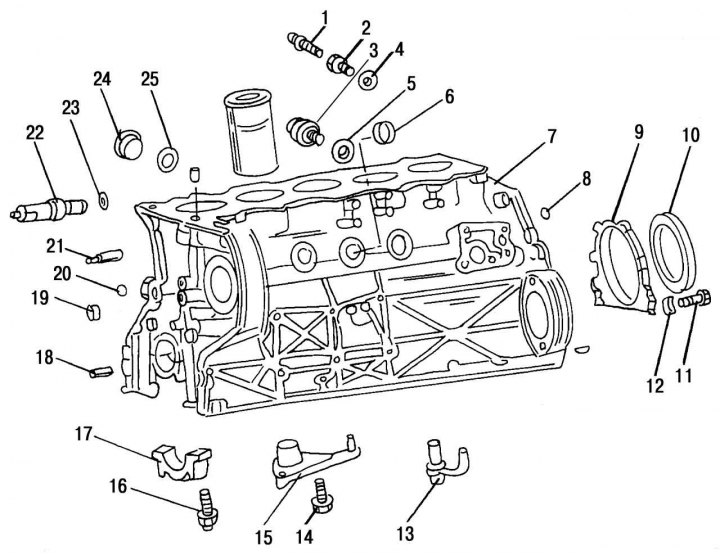
Pic. 65. Parts installed on the cylinder block: 1 - connecting fitting; 2 - threaded nozzle; 3 - connecting fitting for draining the coolant, on the right side; 4, 5 - sealing rings; 6 — a cap of the block of cylinders; 7 - cylinder block; 8 - a ball blocking the oil line at the back; 9 — a flange of a back cuff of a cranked shaft; 10 — a back cuff of a cranked shaft; 11 — a bolt of fastening of a flange of a back cuff of a cranked shaft to the block of cylinders; 12 - elastic washer; 13 - oil spray nozzle of the piston cooling system, new design; 14 — a bolt with a six-sided head; 15 - oil spray nozzle of the piston cooling system, obsolete; 16 — a bolt of fastening of a cover of the radical bearing; 17 - main bearing cap; 18 - landing sleeve of the cover of the camshaft drive mechanism; 19 - plug for closing the oil channel in front; 20 - a ball that locks the oil line in front; 21 - fitting for connecting the lubricant supply pipe to the chain; 22 - a tube for supplying lubricant to the chain; 23 - sealing ring of the oil spray nozzle on the block; 24 - screw plug on the left side; 25 - sealing ring
The rear collar of the crankshaft is assembled in a holder, which is bolted to the rear end wall of the cylinder block, and is its cover. On fig. 65 shows the crankshaft seal holder on the right side. The correct position of the holder relative to the axis of the crankshaft is determined by two mounting pins located on each side of it. The holder is sealed to the cylinder block with Loctite. When replacing the holder or cuff, you must perform the following operations:
- remove the gearbox;
- remove the flywheel or drive plate of the torque converter (subsection 2.8.4);
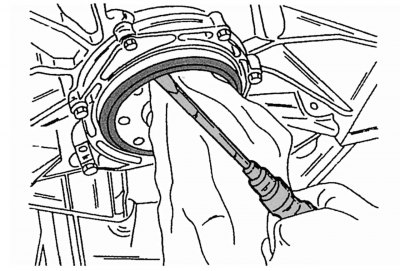
Pic. 92. Dismantling the rear crankshaft seal
- if it is necessary to replace only the cuff, then it is removed with a screwdriver, as shown in fig. 92. A piece of thick rag should be placed under the fulcrum of the screwdriver in order not to damage other parts;
- unscrew the fixing bolts along the outer perimeter of the holder and two bolts from the bottom;
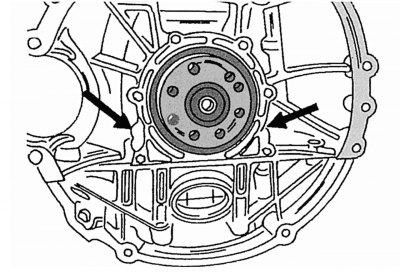
Pic. 93. Removing the crankshaft seal holder
- insert two screwdrivers under the shoulder of the holder in the places indicated by the arrows in fig. 93 and gently press it away from the cylinder block;
- the cuff, if necessary, can be removed with a screwdriver without causing damage to the holder;
- thoroughly clean the adjacent surfaces on the cover and cylinder block;
- insert a new cuff into the holder if it was removed from it. The sealing lip of the new ring is offset by 3mm so it will not work on the crankshaft flange at the same point as the old ring. The space between the sealing and dust-catching lip should be filled with approximately 1 g of grease;
- apply sealant to the sealing surface of the cover and attach it to the cylinder block so that the dowel pins fit into the holes provided for them. Gently tap the top of the lid to make it fit snugly. Mercedes-Benz workshops use a special clamping tool for this purpose;
- tighten the two lower bolts, and then all the others with a torque of 10 Nm;
- Further work is carried out in the reverse order of removal.