
Removing
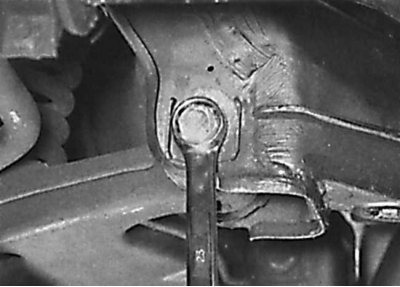
Unscrewing the nuts from the hinge bolts of the lower arm of the front suspension
1. Apply the handbrake, then raise the front of the vehicle and support it on stands. Remove the corresponding front wheel.
2. Unscrew the screws and remove the engine mudguard from the bottom of the engine compartment.
3. Unscrew the nuts securing the anti-roll bar clamp to the front of the lower front suspension arm and remove the rubber pad from the stabilizer.
4. Using a spring compressor, compress the spring until it is clear of the top mount. When using a special device for spring compression, make sure that the coils of the spring are securely gripped, and the spring is compressed from opposite sides.
5. Support the front suspension lower arm with a jack through a block of wood.
6. Loosen the nut and remove the clamping bolt that secures the front suspension lower arm ball joint trunnion to the steering knuckle. Being careful, lower the lower arm while removing the ball joint trunnion from the steering knuckle clamp so that the coil spring can be removed from the support cup.
7. Using paint, mark the position of the eccentric washers of the lower arm pivot bolts to the lower frame. This is necessary to set the lower arm to its original position to maintain the camber and toe angles of the front wheels.
8. Unscrew the nuts securing the lower arm pivot bolts and remove the bolts and remove the eccentric washers (see picture).
9. Remove the lower front suspension arm from under the vehicle.
Repair
1. Clean the lower arm of the front suspension from dirt and check its condition for cracks, deformation or mechanical damage. Pay special attention to the condition of the lever mounting bushings and the ball joint. If the bushings or ball joint of the lower arm are to be replaced, the replacement must be carried out in a specialist workshop, as this requires the use of a hydraulic press and special mandrels.
2. Check the condition of the lower arm ball joint boot for tears, cracks or wear and replace if necessary.
Installation
1. Reinstall the lower front suspension arm and insert the front and rear pivot bolts with eccentric washers. Install the front pivot bolt from the rear of the vehicle and the rear pivot bolt from the front of the vehicle. Install the eccentric washers in the position in which they were before removal. Thread the new nuts onto the pivot bolts, but do not completely tighten them.
2. Check that the lower spring seat is clean, then install the upper seat onto the spring and reinstall the spring with the upper seat.
3. Rotate the coil spring so that its lower end is correctly positioned in the lower spring seat. Position the upper spring seat under the mount and, being careful, raise the lower front suspension arm while aligning the ball joint trunnion with the knuckle bore.
4. Check for proper spring placement, then insert the ball joint trunnion to knuckle clamp bolt. Screw a new nut onto the clamping bolt and tighten it to the required torque. To prevent corrosion, fill the gap of the ball joint trunnion clamp in the steering knuckle with sealant.
5. Install the rubber cushion on the anti-roll bar, install it on the lower arm, then install the mounting clamp and screw in the new bolts, tightening them to the required torque.
6. Remove the jack from under the lower front suspension arm, then remove the spring compressor from the coil spring. Check the correct position of the ends of the spring.
7. Install the wheel, then lower the vehicle to the ground and tighten the wheel bolts to the correct torque.
8. Rock the vehicle to properly install the lower front suspension arm.
9. Check that the eccentric washers of the lower arm pivot bolts are installed in accordance with the marks made earlier, and tighten the pivot bolt nuts to the specified torque.