



Contents: Removal ↡ Installation ↡
Removal
Unscrewing the nut securing the ball joint of the steering rod end to the steering knuckle
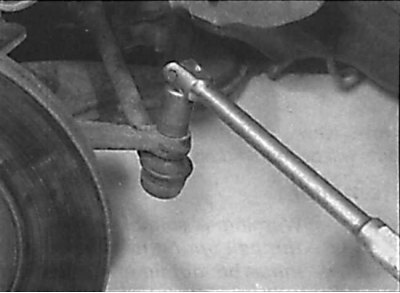
1. Apply the parking brake, then raise the front of the vehicle and secure it on stands. Remove the affected front wheel.
2. If it is necessary to replace the steering knuckle, remove the hub.
3. If the steering knuckle is not being replaced, remove the two bolts securing the caliper bracket to the steering knuckle and remove the caliper from the brake disc. Using soft wire, tie the caliper to the front suspension coil spring. Do not twist or stretch the brake hose. When installing the caliper bracket to the steering knuckle, use new bolts. On models with an anti-lock braking system, remove the ABS sensor from the steering knuckle.
4. Unscrew the nut securing the ball joint of the steering rod end to the steering knuckle, press the ball joint pin out of the steering knuckle (see picture).
5. On models with automatic locking differential (ASD), when removing the right steering knuckle, loosen the bolts and remove the wheel acceleration sensor.
6. Use a jack to support the lower arm of the front suspension through a wooden block while removing the steering knuckle.
7. Unscrew and remove the two bolts securing the lower part of the shock absorber to the steering knuckle.
8. Unscrew the nut and remove the upper bolt securing the lower part of the shock absorber to the steering knuckle.
9. Separate the steering knuckle from the shock absorber, then unscrew the nut and remove the clamp bolt securing the lower arm ball joint.
10. Remove the steering knuckle from the ball joint pin of the lower arm of the front suspension and remove it from the car. Check the condition of the ball joint and, if necessary, replace it. It should be noted that the steering arm can be replaced separately. In this case, it is necessary to use new arm mounting bolts.
Installation
1. Using a suitable tap, clean all threaded holes in the steering knuckle.
2. Install the steering knuckle onto the lower arm ball joint pin. Insert the ball joint clamp bolt, screw a new nut onto it and tighten it to the specified torque. To prevent corrosion, fill the groove for fastening the lower arm ball joint pin with sealant.
3. Align the steering knuckle with the shock absorber, making sure that the protrusion on the steering knuckle fits into the hole.
4. Insert the upper bolt securing the steering knuckle to the shock absorber and screw a new nut onto the bolt. Partially screw in the two new bolts securing the lower part of the shock absorber to the steering knuckle. Press the steering knuckle until it is aligned with the shock absorber and in this position screw in the nut of the upper bolt, then both lower bolts and tighten them to the required torque.
5. Remove the jack supporting the lower control arm of the front suspension, then connect the ball joint of the tie rod end to the steering knuckle. Screw a new nut onto the ball joint and tighten it to the specified torque.
6. Install the hub.
7. Install the caliper over the brake disc onto the steering knuckle and secure it with new bolts, tightening them to the specified torque.
8. On models with automatic locking differential (ASD), when installing the right steering knuckle, install the wheel acceleration sensor and secure with the bolt.
9. Install the wheel, then lower the vehicle to the ground and tighten the wheel bolts to the specified torque.
Material created based on the website MercedesMan.ru