
Note: New tie rod ball nuts and pitman arm pinch bolt nut will be required for installation.
Removing
1. Chock the rear wheels, apply the parking brake, raise the front of the vehicle and support it on jack stands (see "Vehicle lifting and jacking up").
2. Turn away nuts of fastening of spherical hinges of steering drafts to a steering bipod. Disconnect the ball joints from the bipod, if necessary, using a universal ball joint remover.
3. Loosen and remove the bipod yoke bolt and nut, then remove the circlip (see fig. 22.3).
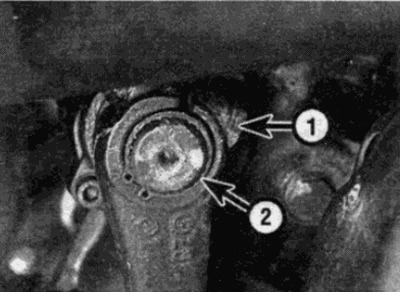
Pic. 22.3. Pivot clamp bolt (1) and retaining ring (2)
4. Before removing, measure the distance between the upper edge of the bipod and the steering gear housing, write down the value. Also check that the mark on the gear is clearly visible, which is in line with the gap of the bipod clamp; if not, apply an alignment mark.
5. Using a universal puller, remove the bipod from the steering gear and pull it out from under the car from below. When the bipod is removed, check for leaks in the lower seal and replace if found.
Installation
6. Remove all traces of fixing compound from steering gear and bipod and ensure all splines are clean and dry.
7. Apply a fixing compound to the splines of the steering arm (Loctite 270).
8. Align the splines of the bipod and steering gears, making sure that the mark on the gear is correctly aligned with the collar cut.
9. Press the bipod into the steering gear so that the distance between the top edge and the crankcase is the same as before removal.
10. Install the bipod yoke bolt, then install a new nut and tighten to specification. Secure the bipod by installing the retaining ring, making sure it is properly seated in the gear groove.
11. Connect the ball joints to the bipod, then install new mounting nuts and tighten them to the required torque. Lower the car to the ground.