
Note: A new intermediate arm axle nut will be required for installation. You will also need new tie rod ball nuts.
Removing
1. Apply the parking brake and place wedges under the rear wheels. Raise the front of the car with a jack and place it on stands (see "Lifting the vehicle and placing it on stands").
2. Loosen and remove the fastening nuts and disconnect the ball joints of the longitudinal and transverse steering rods from the intermediate lever. If necessary, separate the hinges with a puller (see fig. 28.2).
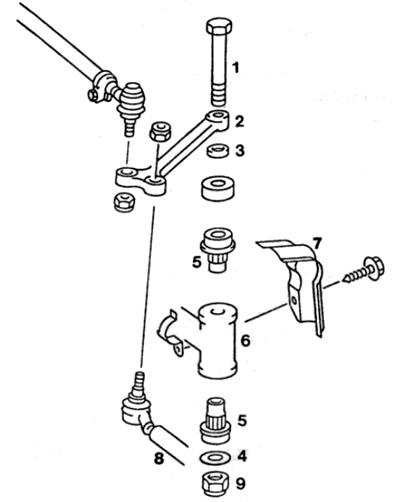
Pic. 28.2. Intermediate lever parts
1 axle bolt
2 Intermediate lever
3 bushing
4 Washer
5 Rubber-metal axle bushing
6 Support
7 Heat shield
8 Tie rod
9 Tie rod
3. Turn away bolts of fastening and remove a thermal guard from an axis of the lever.
4. Turn away a nut of a bolt of an axis of the intermediate lever and remove a washer. Remove the bolt, then remove the lever along the bushing that fits between the lever and axle.
5. Check the condition of the intermediate lever, and if it is damaged, replace it. Check the condition of the lever bushings. If wear or damage is found, replace. The bushings can be knocked out or pulled out and then fitted with new ones using a suitable nut and bolt with large washers after wetting the bushings with soapy water.
Installation
6. Attach the intermediate arm by positioning the metal bushing between the arm and the upper bushing, then inserting the axle bolt. Install the washer and new nut on the axle bolt, tightening it to the required torque. Then install the heat shield.
7. Make sure the ball joint pins are clean and dry. After that, install them in the intermediate lever. Install new ball joint nuts and tighten to specification. Lower the car to the ground.