



External elements of the car body Mercedes C-Class (W203)

General information and safety precautions when performing bodywork
The body is made as a load-bearing structure. The bottom, sides, roof and rear fenders are welded together. The hood, trunk lid, doors and front fenders are bolted and...
The body is made as a load-bearing structure. The bottom, sides, roof and rear fenders are welded together. The hood, trunk lid, doors and front fenders are bolted and...
Cleaning and care of the body and underbody
During operation, your vehicle is exposed to a variety of external influences. These include weather conditions, road conditions, exposure to sea air and industrial...
During operation, your vehicle is exposed to a variety of external influences. These include weather conditions, road conditions, exposure to sea air and industrial...
Repair of minor damage to body panels
Removal traces of minor scratches 1. If the scratch is superficial and does not affect the metal of the panel, it is extremely easy to repair. To remove particles of...
Removal traces of minor scratches 1. If the scratch is superficial and does not affect the metal of the panel, it is extremely easy to repair. To remove particles of...
Repair of significant body damage
Repairs to serious body damage must be carried out in a specialized auto repair shop that has the necessary equipment. In case of extensive damage to the body, first of...
Repairs to serious body damage must be carried out in a specialized auto repair shop that has the necessary equipment. In case of extensive damage to the body, first of...
Windshield damage due to stone impacts
Minor damage caused by small stones hitting the windshield reduces visibility and can lead to cracks in the glass. They need to be repaired as soon as possible. For this...
Minor damage caused by small stones hitting the windshield reduces visibility and can lead to cracks in the glass. They need to be repaired as soon as possible. For this...

Replacing windshield wipers
Before replacing the wiper blade, remove the electronic key from the ignition switch. Removal 1. Fold back the windshield wiper arm "1" and place the windshield wiper...
Before replacing the wiper blade, remove the electronic key from the ignition switch. Removal 1. Fold back the windshield wiper arm "1" and place the windshield wiper...

Removal and installation the windshield washer nozzle
Removal 1. Open the hood. 2. Disconnect the negative (-) battery cable with the ignition off. The cabin air filter box must be removed first. Warning! Before...
Removal 1. Open the hood. 2. Disconnect the negative (-) battery cable with the ignition off. The cabin air filter box must be removed first. Warning! Before...

Removal and installation the rear window jet
Station wagon Removal 1. Open the tailgate and remove the trim, refer to Section Removal and installation the tailgate trim . 2. Open the cover (1) and remove the nozzle...
Station wagon Removal 1. Open the tailgate and remove the trim, refer to Section Removal and installation the tailgate trim . 2. Open the cover (1) and remove the nozzle...

Removal and installation the windshield wiper arm
Removal 1. Wet the windshield with water. 2. Run the windshield wiper briefly and turn it off with the switch. The brushes should stop in the extreme position. 3. Mark...
Removal 1. Wet the windshield with water. 2. Run the windshield wiper briefly and turn it off with the switch. The brushes should stop in the extreme position. 3. Mark...

Removal and installation the rear wiper arm
Station wagon Removal 1. Wet the rear window with water. 2. Start the windshield wiper briefly and stop it with the switch. This will bring the wiper to its extreme...
Station wagon Removal 1. Wet the rear window with water. 2. Start the windshield wiper briefly and stop it with the switch. This will bring the wiper to its extreme...

Removal and installation the water collector
Removal 1. Open the hood and place it vertically. 2. Remove the right windshield wiper, refer to Section Removal and installation the windshield wiper arm . 3. Remove...
Removal 1. Open the hood and place it vertically. 2. Remove the right windshield wiper, refer to Section Removal and installation the windshield wiper arm . 3. Remove...

Removal and installation the hood
Removal 1. Open the hood and place it vertically. 2. Remove the front spoiler grille, refer to the relevant section. 3. Disconnect the windshield washer nozzle heater...
Removal 1. Open the hood and place it vertically. 2. Remove the front spoiler grille, refer to the relevant section. 3. Disconnect the windshield washer nozzle heater...

Removal and installation the hood trim
Removal 1. Open the hood and place it vertically. 2. Remove the expansion clamp (1) and remove the trim. Installation Installation is performed in the reverse order of...
Removal 1. Open the hood and place it vertically. 2. Remove the expansion clamp (1) and remove the trim. Installation Installation is performed in the reverse order of...

Adjusting the hood
Examination Check the gap between the hood and the mating body elements along the perimeter of their fit specified in Specifications . Adjustment 1. Open the hood and...
Examination Check the gap between the hood and the mating body elements along the perimeter of their fit specified in Specifications . Adjustment 1. Open the hood and...

Removal and installation the hood lock
Note: The hood lock, which has a difficult movement, is not lubricated, but replaced. Removal 1. Open the hood and place it vertically. 2. Mark the position of the lock...
Note: The hood lock, which has a difficult movement, is not lubricated, but replaced. Removal 1. Open the hood and place it vertically. 2. Mark the position of the lock...

Disconnecting the drive cable from the hood lock
Removal 1. Pull the hood lock cable drive lever (1) and disconnect the rear cable (2). 2. Remove the cover under the instrument panel, refer to the relevant section. 3....
Removal 1. Pull the hood lock cable drive lever (1) and disconnect the rear cable (2). 2. Remove the cover under the instrument panel, refer to the relevant section. 3....

Removal and installation the spoiler grille
Removal 1. Open the hood and place it vertically. 2. Remove the 3 mounting screws (1) and close the hood. 3. Install the plastic wedge at the rear of the spoiler grille...
Removal 1. Open the hood and place it vertically. 2. Remove the 3 mounting screws (1) and close the hood. 3. Install the plastic wedge at the rear of the spoiler grille...

Removal and installation the bumper
Removal 1. Mark the position of the corresponding front wheel relative to the hub with paint. This will allow the balanced wheel to be installed in its original position...
Removal 1. Mark the position of the corresponding front wheel relative to the hub with paint. This will allow the balanced wheel to be installed in its original position...

Removal and installation the rear bumper
Station wagon Note: Unlike the front one, the rear bumper is removed together with the cross member. Removal 1. Models with a towing hitch: Loosen the nuts on the...
Station wagon Note: Unlike the front one, the rear bumper is removed together with the cross member. Removal 1. Models with a towing hitch: Loosen the nuts on the...

Removal and installation the front wing
Removal 1. Mark the position of the corresponding front wheel relative to the hub with paint. This will allow the balanced wheel to be installed in its original position...
Removal 1. Mark the position of the corresponding front wheel relative to the hub with paint. This will allow the balanced wheel to be installed in its original position...

Removal and installation the protective strip on the wing
Removal Separate the protective strip (1) from the wing with your hands. Installation 1. Install the protective strip on the wing so that the noses on the strip enter...
Removal Separate the protective strip (1) from the wing with your hands. Installation 1. Install the protective strip on the wing so that the noses on the strip enter...

Removal and installation the protective strip on the bumper
Front bumper Removal 1. Insert a plastic wedge between the protective strip (1) and the bumper and remove the fastening hook (2) from the bumper. Note: The mounting hook...
Front bumper Removal 1. Insert a plastic wedge between the protective strip (1) and the bumper and remove the fastening hook (2) from the bumper. Note: The mounting hook...

Removal and installation the protective strip on the door
Removal 1. Open the door and remove the screw (1). The illustration shows the front door with the trim removed. 2. Lift the rear protective strip and remove it back from...
Removal 1. Open the door and remove the screw (1). The illustration shows the front door with the trim removed. 2. Lift the rear protective strip and remove it back from...

Removal and installation the front wing liner
Note: The wing locker consists of three parts. Front mudguard Removal 1. Raise the front of the vehicle and support it on stands. Attention! The operation of lifting and...
Note: The wing locker consists of three parts. Front mudguard Removal 1. Raise the front of the vehicle and support it on stands. Attention! The operation of lifting and...

Removal and installation the rear part of the wing liner
Removal 1. Mark the position of the rear wheel relative to the hub with paint. This will allow you to install the balanced wheel in its original position during...
Removal 1. Mark the position of the rear wheel relative to the hub with paint. This will allow you to install the balanced wheel in its original position during...

Removal and installation the front door
Removal 1. Disconnect the negative (-) battery cable with the ignition off. The cabin air filter box must be removed first. Before disconnecting the cable, find out the...
Removal 1. Disconnect the negative (-) battery cable with the ignition off. The cabin air filter box must be removed first. Before disconnecting the cable, find out the...

Checking and adjusting the door
Examination 1. Check the door gaps with the body elements. They should be uniform along the entire contact contour. The door should lie in the same plane as the wing or...
Examination 1. Check the door gaps with the body elements. They should be uniform along the entire contact contour. The door should lie in the same plane as the wing or...

Removal and installation the front door trim
Removal 1. Disconnect the negative (-) battery cable with the ignition off. The cabin air filter box must be removed first. Warning! Before disconnecting the cable, find...
Removal 1. Disconnect the negative (-) battery cable with the ignition off. The cabin air filter box must be removed first. Warning! Before disconnecting the cable, find...

Removal and installation the triangular overlay
Removal 1. Disconnect the negative (-) battery cable with the ignition off. The cabin air filter box must be removed first. Before disconnecting the cable, find out the...
Removal 1. Disconnect the negative (-) battery cable with the ignition off. The cabin air filter box must be removed first. Before disconnecting the cable, find out the...

Removal and installation the outer door handle
Removal 1. Disconnect the negative (-) battery cable with the ignition off. The cabin air filter box must be removed first. Before disconnecting the cable, find out the...
Removal 1. Disconnect the negative (-) battery cable with the ignition off. The cabin air filter box must be removed first. Before disconnecting the cable, find out the...

Removal and installation the exterior rearview mirror trim
Removal 1. Install the outside mirror inward. 2. Disconnect the negative (-) battery cable with the ignition off. You must first remove the cabin air filter box. Before...
Removal 1. Install the outside mirror inward. 2. Disconnect the negative (-) battery cable with the ignition off. You must first remove the cabin air filter box. Before...

Removal and installation the outside mirror
Removal 1. Install the outside mirror inward. 2. Disconnect the negative (-) battery cable with the ignition off. The cabin air filter box must be removed first....
Removal 1. Install the outside mirror inward. 2. Disconnect the negative (-) battery cable with the ignition off. The cabin air filter box must be removed first....

Removal and installation mirror glass
Removal 1. Set the outside mirror to the inward position. 2. Disconnect the negative (-) battery cable with the ignition off. You must first remove the cabin air filter...
Removal 1. Set the outside mirror to the inward position. 2. Disconnect the negative (-) battery cable with the ignition off. You must first remove the cabin air filter...
Removal and installation the trunk lid
Sedan Removal 1. Disconnect the negative (-) battery cable with the ignition off. The cabin air filter box must be removed first. Warning! Before disconnecting the...
Sedan Removal 1. Disconnect the negative (-) battery cable with the ignition off. The cabin air filter box must be removed first. Warning! Before disconnecting the...

Removal and installation the trunk lid trim
Sedan Removal 1. Open the trunk and remove the warning sign from the holder. 2. Remove the expansion clamps from the trim on the boot lid. To do this, pry the clamp pin...
Sedan Removal 1. Open the trunk and remove the warning sign from the holder. 2. Remove the expansion clamps from the trim on the boot lid. To do this, pry the clamp pin...

Removal and installation the trunk lock retainer
Removal 1. Open the trunk. 2. Using a plastic wedge, remove the cover (1) at the boot trim retainer. Estate: Remove the plug, refer to the relevant section. 3. Mark the...
Removal 1. Open the trunk. 2. Using a plastic wedge, remove the cover (1) at the boot trim retainer. Estate: Remove the plug, refer to the relevant section. 3. Mark the...

Removal and installation the tailgate lock
Station wagon Note: This describes removal and installation for the Station Wagon model. The installation and removal process for other models is similar. Differences...
Station wagon Note: This describes removal and installation for the Station Wagon model. The installation and removal process for other models is similar. Differences...

Removal and installation the tailgate lock mechanism
Station wagon Note: This describes removal and installation for the Station Wagon model. The installation and removal process for other models is similar. Differences...
Station wagon Note: This describes removal and installation for the Station Wagon model. The installation and removal process for other models is similar. Differences...

Removal and installation the trunk and tailgate lock cylinder
Removal 1. Disconnect the negative (-) battery cable with the ignition off. You must first remove the cabin air filter box. Before disconnecting the cable, find out the...
Removal 1. Disconnect the negative (-) battery cable with the ignition off. You must first remove the cabin air filter box. Before disconnecting the cable, find out the...

Removal and installation the tailgate
Station wagon and sports coupe Removal 1. Open the tailgate. 2. Remove the tailgate trim, refer to the relevant section. 3. Remove the cable harness (3). Disconnect all...
Station wagon and sports coupe Removal 1. Open the tailgate. 2. Remove the tailgate trim, refer to the relevant section. 3. Remove the cable harness (3). Disconnect all...

Tailgate adjustment
Station wagon Examination Check the clearances in the mating of the tailgate with the adjacent body elements. The values are given in the Specifications. Adjustment 1....
Station wagon Examination Check the clearances in the mating of the tailgate with the adjacent body elements. The values are given in the Specifications. Adjustment 1....

Removal and installation the tailgate trim
Station wagon Removal Note: The designations "oben" (up) and "unten" (down) refer to the closed position of the tailgate. 1. Open the tailgate. 2. Remove the clip from...
Station wagon Removal Note: The designations "oben" (up) and "unten" (down) refer to the closed position of the tailgate. 1. Open the tailgate. 2. Remove the clip from...

Removal and installation the rear spoiler — removal and installation
Station wagon Removal 1. Disconnect the negative (-) battery cable with the ignition off. The cabin air filter box must be removed first. Before disconnecting the cable,...
Station wagon Removal 1. Disconnect the negative (-) battery cable with the ignition off. The cabin air filter box must be removed first. Before disconnecting the cable,...

Removal and installation the cargo compartment plug
Station wagon Removal 1. Open the tailgate. 2. Remove the cargo compartment cover in the bottom. 3. Remove the cover above the spare wheel compartment. 4. Remove the 4...
Station wagon Removal 1. Open the tailgate. 2. Remove the cargo compartment cover in the bottom. 3. Remove the cover above the spare wheel compartment. 4. Remove the 4...
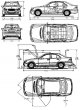
Specifications and body sizes
Overall dimensions of the Sedan model Overall dimensions of the Coupe model Overall dimensions of the Universal model The body is self-supporting, with a rigid...
Overall dimensions of the Sedan model Overall dimensions of the Coupe model Overall dimensions of the Universal model The body is self-supporting, with a rigid...
This section is available on: russian, bulgarian, belarusian, ukrainian, serbian, croatian, romanian, polish, slovak, hungarian
More similar sections for repairing other models
☛ Body: Exterior car Mercedes W168 (1997-2004)
☛ Body: Exterior (external elements) car Mercedes W123 (1976-1985)
☛ Body: Exterior (external elements) car Mercedes W463 (1999-2019)
☛ Body: Exterior (external elements) car Mercedes W163 (1997-2005)
☛ Body: Exterior (external elements) car Mercedes W140 (1991-1998)
☛ Body and electrical equipment: Exterior (external elements) car Mercedes Vario 814D (1996-2003, diesel)
Link in different formats to this section
TEXTHTMLBB Code
- General information
- Introduction to guide
- User manual
- Maintenance
- Power unit
- Gasoline engines
- Diesel engines
- Cooling system
- Ventilation and heating
- Supply system
- Injection system (gasoline)
- Injection system (diesel)
- Exhaust system
- Ignition and control system
- Charge and launch systems
- Transmission
- Mechanical gearbox
- Automatic gearbox
- Clutch and drive shafts
- Differential
- Chassis
- Brake system
- Car suspension
- Steering
- Body
- Exterior (external elements)
- Interior (internal elements)
- Electrical equipment
- Equipment and devices
- Lighting system
- Electrical diagrams (2000)
- Electrical diagrams (since 2001)
- General information
- User manual
- Driving a car
- Car care
- Maintenance
- Power unit
- Gasoline engines
- Diesel engines
- Lubrication system
- Cooling system
- Heating and ventilation
- Ignition system
- Fuel system
- Injection system (gasoline)
- Injection system (diesel)
- Exhaust system
- Transmission
- Clutch
- Car gearbox
- Chassis
- Suspension, wheels and tires
- Steering
- Brake system
- Body
- Exterior (external elements)
- Interior (internal elements)
- Doors and windows
- Electrical equipment
- Equipment and devices
- Power devices
- Lighting system
- Electrical circuits
- General information
- Introduction to the guide
- Operation and care
- Maintenance (gasoline)
- Maintenance (diesel)
- Troubleshooting
- Power unit
- Petrol engine I4
- Petrol engine V6
- Diesel engines
- Engine overhaul
- Cooling and heating
- Power system (carburetor)
- Injection system (gasoline)
- Injection system (diesel)
- Exhaust system
- Charge and start system
- Ignition system (I4)
- Ignition system (V6)
- Diesel heating system
- Transmission
- Clutch
- Mechanical gearbox
- Automatic gearbox
- Cardan shaft and axle shafts
- Chassis
- Brake system
- Car suspension
- Steering
- Body
- Exterior (external elements)
- Interior (internal elements)
- Doors, locks and windows
- Electrical equipment
- Equipment and devices
- Electrical circuits