
Sedan
Removing
1. Open the trunk and remove the warning sign from the holder.
2. Take out expansion clips from facing on a luggage carrier cover. To do this, pry the clamp pin with a plastic wedge, eg HAZET 1965-20, and remove it. The pin can be removed in another way, for example, by wrapping it with a strong thread and pulling on the thread.
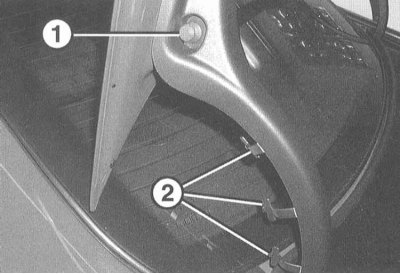
3. Take out the clips (1) from the lining on the wings of the trunk lid.
4. Detach the lock bars (2) and pull back the wing trim.
5. Turn out 2 screws of fastening.
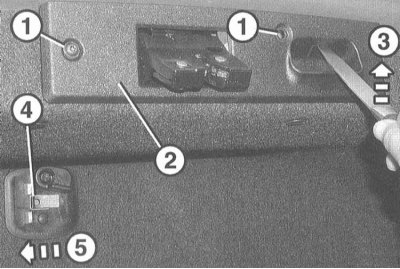
6. Insert a narrow screwdriver or knife into the gap in the hole for the handle, press up (arrow 3) and separate the lining (2) from the trunk lid.
7. Detach the bar (4) screwdriver from the trunk lid, at the same time move the warning sign holder to the left (arrow 5) and remove from the trunk lid.
8. Disconnect facing from a cover of a luggage carrier and remove it.
Installation
1. Install the lining on the trunk lid, insert it between the lining of the wings and secure with clips.
2. Secure the fender trim with clips and retaining bars.
3. Install the warning sign holder on the trunk lid and move to the right so that the bar is fixed.
4. Fix the lining on the trunk lid and secure it. Insert the warning sign into the holder.
5. Close the trunk lid and check that it is in the correct position. If necessary, adjust the rubber stops by turning them so that the lid closes properly. To do this, circle the stops at the top with chalk, close the lid and, using the impression of the chalk, check whether the rubber stops fit.