
Removing
1. Disconnect the negative cable (-) battery with the ignition off. The cabin air filter box must first be removed.
Attention! Before disconnecting the cable, find out the security code of the radio, if any, refer to Section Replacing the battery.
2. Fully lower the glass and open the door.
3. Remove triangular pad, refer to relevant section.
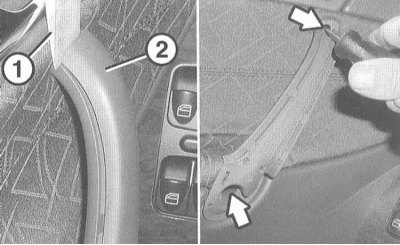
4. Insert the plastic wedge (1) into the upper and lower slots of the door handle and disconnect the trim (2).
5. Remove the screws (arrows in the illustration) in the door handle at the top and bottom.
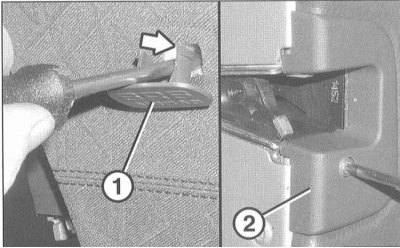
6. Take out the SRS cover (1) from lining.
7. Remove the screw (arrow illustration) behind the SRS cover.
8. Detach the trim (2) door lock.
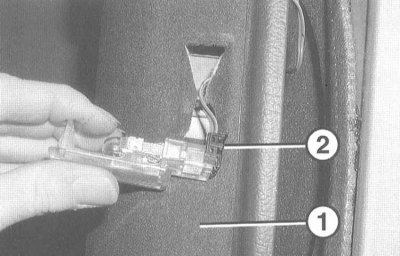
9. Using a plastic wedge, disconnect the door illumination lamp from the facing (1) on the back of the door.
10. Remove the lamp and disconnect the connector (2).
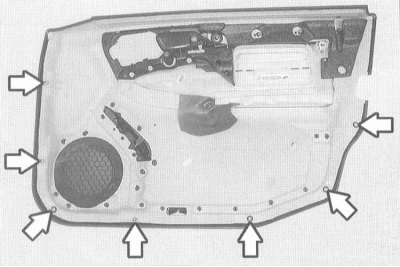
11. Insert a plastic wedge in the area of the clamps (arrow illustration) between the door leaf and the cladding and separate the cladding from the door.

12. Grab under the lining (1) in the area of the outside rear-view mirror and remove the lining upwards from the inner rubber seal (2).
13. Ask an assistant to hold the door and remove the lower group of switches, refer to Section Removal and installation of switches in doors.
14. Pull the inner door opener cable at the shell and out of the guide at the door handle. Disconnect the cable.
15. Place the door lining on the appropriate lining.
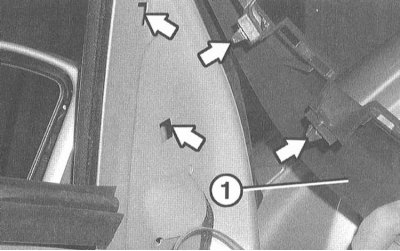
16. Peel off the lining (1) in the area of the exterior mirror at the window frame from the clip holder (arrows in the illustration) and detach it around the perimeter of the frame.
17. Lift up the inner rubber seal (1) at the front of the window frame and detach it.
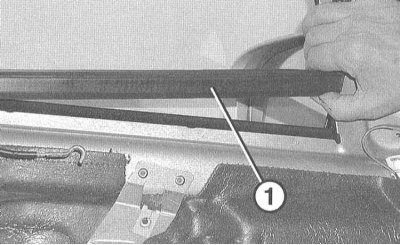
18. Lift the outer sealing bar at the window frame through the gap of the inner rubber seal and separate it.
Installation
1. Place the outer sealing bar into the groove on the window frame and press firmly.
2. Place the inner sealing rubber into the groove on the window frame and press firmly.
3. Press the window frame trim under the seal on the frame and secure. The cladding must not lag behind the frame.
4. Have an assistant hold the door trim and connect the cable to the inside door opener.
5. Install a group of switches in the lining, refer to Section Removal and installation of switches in doors.
6. Attach the cladding to the door, insert the edge of the cladding from above into the rubber seal at the window edge and press firmly.
7. Fix on clips facing on a door.
8. Further installation is performed in the reverse order of removal.
9. Connect the negative cable (-) to the battery when the ignition is off. Install the cabin air filter box. Enter the radio code and set the time on the clock.