



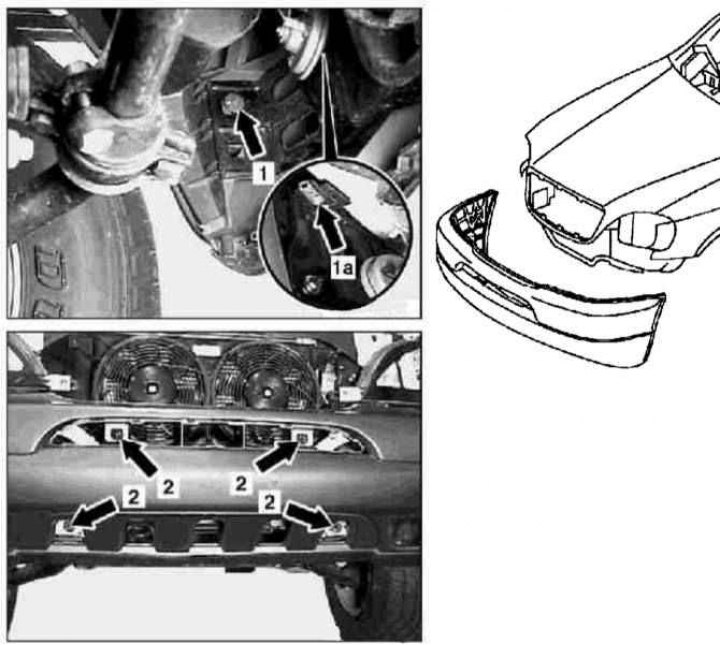
Front bumper installation details for standard (non-AMG) models
1 - Nut; 1a - Screw; 2 - Nuts
1. The installation details of the front bumper on standard (non-AMG) models are shown in the illustration, to which all references in the text refer.
2. If equipped, remove the lower engine compartment protection elements.
3. Loosen the nuts (1) and unscrew the bolts (1a) on the left and right sides from the inside of the bumper.
4. Carefully, being careful not to damage the supports, release the clamps and remove the front bumper grille.
5. If equipped, remove the outside air temperature sensor from the bumper.
6. Loosen the nuts (2) and, pushing forward, remove the bumper - try not to damage the paintwork.
7. Installation is carried out in reverse order.
AMG trim models
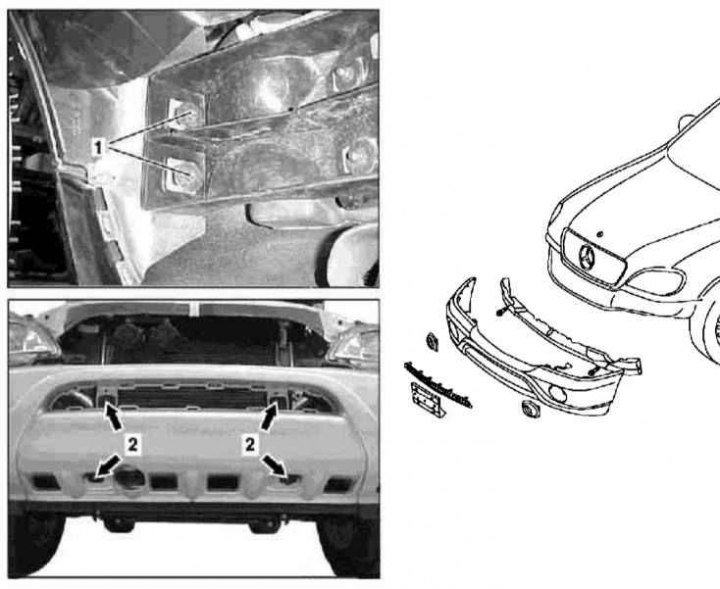
Front bumper installation details for AMG trim models (including ML 55 AMG)
1. The installation details of the front bumper on AMG models are shown in the illustration, to which all references in the text refer.
2. Loosen the nuts (1) on the right and left sides from the inside of the bumper.
3. Carefully remove the bumper grille.
4. Loosen the screws (2) and, pushing forward, carefully remove the bumper, disconnecting the wiring of the fog lights/Parktronic sensors and the washer fluid supply hoses.
(Article was obtained from the portal: www.MercedesMan.ru)
5. Installation is carried out in reverse order.