
Steering knuckle installation details
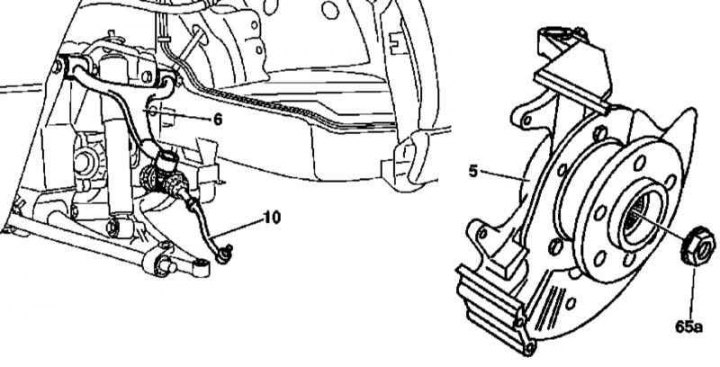
1. The details of the installation of the steering knuckle are shown in the illustration, to which all references in the text refer.
2. Remove the corresponding front wheel.
3. Give the hub nut (65a), - the nut must be replaced without fail.
4. Disconnect wiring from wheel sensor and brake pad wear indicator.
5. Remove the brake disc (see chapter Brake and auxiliary systems).
6. Remove the wheel sensor assembly with its support bracket from the steering knuckle assembly.
7. Disconnect the tie rod from the steering knuckle (10), evaluate the condition of the anther and the degree of wear of the tip, if necessary, replace.
8. Using a puller, release the ball joint from the upper control arm (6) (see chapter Suspension and steering). Check the condition of the anther, evaluate the degree of wear of the ball assembly, replace if necessary.
9. Using an extractor, press the front drive shaft out of your flange.
10. Having fixed a rotary fist, press out a spherical support from the lower rotary fist. Check the condition of the anther, evaluate the degree of wear of the ball assembly, replace if necessary.
11. Remove the steering knuckle assembly (5) from under the car.
12. Installation is carried out in the reverse order - if necessary, use the appropriate special tool. Follow the correct laying and connection of the electrical wiring.
Ball joint replacement

Installation details of the lower ball joint in the steering knuckle
1. Remove the steering knuckle (see above).
2. Detach and deploy the brake shield.
3. Press out the ball joint (7) from the swivel (5).
4. Using a crown nut and a suitable wrench, press in a new ball bearing against the stop into the steering knuckle - replace the nut.
5. Replace the brake shield and install the steering knuckle on the car (see above).