
Details of installation of a two-section rear driveshaft
Attention! Self-locking bolts and shims must be replaced without fail!
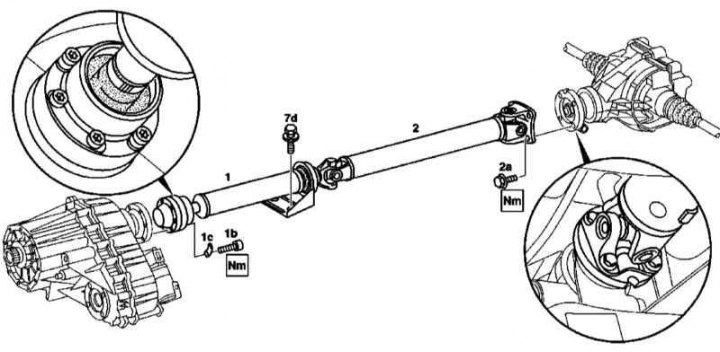
1. Installation details of the two-section rear propeller shaft are shown in the illustration, to which all references in the text refer.
2. Remove the self-locking bolts (1b) front section mounts (1) rear propeller shaft to the output flange of the transfer case, remove the shims (1s).
3. Remove the self-locking bolts (2a) rear section mounts (2) propeller shaft to the rear differential drive flange.
4. Remove the screws (7d) fastening the intermediate bearing of the cardan shaft assembly to the frame beam.
5. Gently lower the shaft assembly, feed it back and remove it from under the vehicle.
6. Assess the degree of wear of the constant velocity joint (SHRUS) on the front end of the shaft, universal joints and intermediate bearing, if necessary, replace the shaft assembly.
7. If necessary, remove the intermediate bearing (see Section Removal and installation of the intermediate bearing of a back cranked shaft).
8. Installation is carried out in the reverse order - carefully clean the mating surfaces, try to prevent deformation of the bearing assembly.