



Repair of engines M110 and M123 Mercedes E-Class (W123)

Checking and adjusting clearances in the valve drive mechanism on M123 and M110 engines
Valve clearances can be checked and adjusted on both a hot and cold engine. Exhaust valves Intake valves Valve arrangement: A - engine M123 B - M110 engine Adjusting...
Valve clearances can be checked and adjusted on both a hot and cold engine. Exhaust valves Intake valves Valve arrangement: A - engine M123 B - M110 engine Adjusting...

Removal engines M110 and M123
Exhaust system (EG) Above are carburetor engines below are the fuel injected engines 1 - intake pipe; 2, 4 - central muffler; 3 - rear muffler; 5 - catalytic converter;...
Exhaust system (EG) Above are carburetor engines below are the fuel injected engines 1 - intake pipe; 2, 4 - central muffler; 3 - rear muffler; 5 - catalytic converter;...

Removal the cylinder head
Removal the cylinder head If the engine has not yet been removed from the vehicle, first perform the following operations: 1. Disconnect the ground wire from the...
Removal the cylinder head If the engine has not yet been removed from the vehicle, first perform the following operations: 1. Disconnect the ground wire from the...

Removal the camshaft
Engine M123 1. If the engine is still in the car, there is no need to remove the cylinder head, although the camshaft sprocket should still be removed. First, remove the...
Engine M123 1. If the engine is still in the car, there is no need to remove the cylinder head, although the camshaft sprocket should still be removed. First, remove the...

Disassembling the cylinder head
Note: All components should be labeled to ensure correct assembly. 1. Remove the pressure pads from the top of the valves. 2. Using a valve spring compressor, compress...
Note: All components should be labeled to ensure correct assembly. 1. Remove the pressure pads from the top of the valves. 2. Using a valve spring compressor, compress...
Replacing the camshaft chain
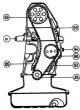
Timing chain parts on M 123 engine 28 - crankshaft sprocket; 53 - camshaft gear; 85 - right guide; 89 - upper guide; 93 - lower guide; 94 - limit pin; 98 - intermediate...
Timing chain parts on M 123 engine 28 - crankshaft sprocket; 53 - camshaft gear; 85 - right guide; 89 - upper guide; 93 - lower guide; 94 - limit pin; 98 - intermediate...

Removal the intermediate sprocket and shaft
Sectional view of crankshaft vibration damper and pulley 1 - pulley; 2 - bolts; 3 - washers; 4 - vibration damper; 5 - pins; 6 - flange; 7 - oil seal; 8 - flange; 9 -...
Sectional view of crankshaft vibration damper and pulley 1 - pulley; 2 - bolts; 3 - washers; 4 - vibration damper; 5 - pins; 6 - flange; 7 - oil seal; 8 - flange; 9 -...
Removal the flywheel (drive disk)
1. If the engine is not yet removed from the vehicle, remove the clutch or automatic transmission, depending on the design. 2. Holding the flywheel (leading disk) from...
1. If the engine is not yet removed from the vehicle, remove the clutch or automatic transmission, depending on the design. 2. Holding the flywheel (leading disk) from...
Replacing the front crankshaft oil seal
1. Remove the radiator and cooling fan. Also remove the drive belts where necessary. 2. Using a hex socket wrench, remove the pulley and vibration damper bolts from the...
1. Remove the radiator and cooling fan. Also remove the drive belts where necessary. 2. Using a hex socket wrench, remove the pulley and vibration damper bolts from the...

Removal the oil pump
Location of oil pump mounting bolts 1. Remove the fuel pump where necessary and drain the oil from the engine crankcase. 2. Remove the oil pan bolts from the cylinder...
Location of oil pump mounting bolts 1. Remove the fuel pump where necessary and drain the oil from the engine crankcase. 2. Remove the oil pan bolts from the cylinder...
Removal connecting rods and pistons
1. Remove the cylinder head, front crankshaft oil seal and oil pump. 2. Remove the oil return tube, oil dipstick tube from the oil pan housing. If necessary, insert a...
1. Remove the cylinder head, front crankshaft oil seal and oil pump. 2. Remove the oil return tube, oil dipstick tube from the oil pan housing. If necessary, insert a...

Removal the crankshaft and main bearings
Removing the sprocket and timing chain 1. Remove the pistons or, alternatively, disconnect the main bearings if no work is required on the pistons and cylinders. Also...
Removing the sprocket and timing chain 1. Remove the pistons or, alternatively, disconnect the main bearings if no work is required on the pistons and cylinders. Also...
Replacing the oil filter
1. The oil filter should be replaced every 10,000 km on engines produced before 1980 and every 8,000 km on engines produced after 1980. 2. Place a container under the...
1. The oil filter should be replaced every 10,000 km on engines produced before 1980 and every 8,000 km on engines produced after 1980. 2. Place a container under the...

Engine mount replacement
Removing the engine mount 1. Turn on manual (parking) brake, then lift the front of the car with a jack and place supports (trestles) under it. 2. Loosen the engine...
Removing the engine mount 1. Turn on manual (parking) brake, then lift the front of the car with a jack and place supports (trestles) under it. 2. Loosen the engine...

Description and maintenance of the crankcase ventilation system
The closed crankcase ventilation system sucks out gases that have broken through from the cylinders into the crankcase for subsequent combustion in the combustion...
The closed crankcase ventilation system sucks out gases that have broken through from the cylinders into the crankcase for subsequent combustion in the combustion...
General instructions for engine inspection and restoration
After the engine has been completely disassembled, inspect all its components and parts for wear. Each part should be inspected and, if necessary, replaced or restored...
After the engine has been completely disassembled, inspect all its components and parts for wear. Each part should be inspected and, if necessary, replaced or restored...

Inspection and restoration of the crankshaft and its bearings
1. Make sure that there are no gaps or scratches on the surface of the connecting rod and main journals. Check the ovality of the connecting rod journals in several...
1. Make sure that there are no gaps or scratches on the surface of the connecting rod and main journals. Check the ovality of the connecting rod journals in several...
Inspection and restoration of connecting rods and bearings
A defective big end bearing can be identified by a knocking sound in the crankcase and a drop in pressure level. 1. Inspect the connecting rod bearing surfaces for...
A defective big end bearing can be identified by a knocking sound in the crankcase and a drop in pressure level. 1. Inspect the connecting rod bearing surfaces for...
Inspection and restoration of pistons and piston rings
1. If the pistons are being reinstalled on the engine, carefully remove the piston rings by spreading each one just enough to remove it through the bridge between the...
1. If the pistons are being reinstalled on the engine, carefully remove the piston rings by spreading each one just enough to remove it through the bridge between the...
Inspection and restoration of cylinders in the block
1. Check the cylinder bores in the block for taper, ovality, scoring, and scratches. Start by carefully inspecting the top of the bores. If they are worn, a small ridge...
1. Check the cylinder bores in the block for taper, ovality, scoring, and scratches. Start by carefully inspecting the top of the bores. If they are worn, a small ridge...
Inspection and restoration of distribution mechanism parts
1. Check the camshaft journals for scoring and measure them with a micrometer in several places to determine taper or ovality. 2. Inspect the bearing surfaces in the...
1. Check the camshaft journals for scoring and measure them with a micrometer in several places to determine taper or ovality. 2. Inspect the bearing surfaces in the...
Inspection and restoration of the flywheel (drive disk) and flywheel ring gear
1. On manual transmission models, inspect the flywheel contact surfaces for scoring or discoloration caused by overheating. If present, regrind the surfaces or replace...
1. On manual transmission models, inspect the flywheel contact surfaces for scoring or discoloration caused by overheating. If present, regrind the surfaces or replace...

Inspection and restoration of the oil pump
Oil pump parts 1. Remove the spring clamp from the oil pick-up tube, take out the filter and rubber support. 2. Mark the position of the mounting bracket, loosen and...
Oil pump parts 1. Remove the spring clamp from the oil pick-up tube, take out the filter and rubber support. 2. Mark the position of the mounting bracket, loosen and...
Cleaning of carbon deposits, grinding of valves and restoration of cylinder head
1. With the cylinder head removed, remove carbon deposits and deposits from the combustion chamber surfaces and bores using a blunt scraper. Clean the cylinder head from...
1. With the cylinder head removed, remove carbon deposits and deposits from the combustion chamber surfaces and bores using a blunt scraper. Clean the cylinder head from...
Engine assembly
1. To ensure maximum service life and minimum interruptions of the repaired engine, it must not only be correctly assembled, but also impeccably clean. All oil passages...
1. To ensure maximum service life and minimum interruptions of the repaired engine, it must not only be correctly assembled, but also impeccably clean. All oil passages...

Installing the crankshaft and its bearings
Pressing the rear crankshaft oil seal into the crankcase before cutting Crankshaft mounted in rear main bearing (the rear oil seal is indicated by the arrow) Free...
Pressing the rear crankshaft oil seal into the crankcase before cutting Crankshaft mounted in rear main bearing (the rear oil seal is indicated by the arrow) Free...
Installing connecting rods and bearings
1. Clean the bearing beds and caps of the big end of the connecting rod, the channels and seats in the connecting rods. 2. Install the bearing shells into the connecting...
1. Clean the bearing beds and caps of the big end of the connecting rod, the channels and seats in the connecting rods. 2. Install the bearing shells into the connecting...
Installing an oil pump
1. Insert the oil pump into the bottom of the cylinder block. 2. Insert and tighten the crankcase mounting bolts and main bearing cap bolt. 3. Install the oil pan with a...
1. Insert the oil pump into the bottom of the cylinder block. 2. Insert and tighten the crankcase mounting bolts and main bearing cap bolt. 3. Install the oil pan with a...
Installing the flywheel (drive disk)
1. Measure the narrow part of the mounting bolts with a vernier caliper. It should not be smaller than the specification. Replace the bolts if necessary. 2. Dry the...
1. Measure the narrow part of the mounting bolts with a vernier caliper. It should not be smaller than the specification. Replace the bolts if necessary. 2. Dry the...

Installing the intermediate sprocket and shaft
Engine M110 1. Using a soft metal drift, press the rear bearing shaft flush into the cylinder block. Make sure the groove is in the uppermost position. 2. Install the...
Engine M110 1. Using a soft metal drift, press the rear bearing shaft flush into the cylinder block. Make sure the groove is in the uppermost position. 2. Install the...
Cylinder head assembly
1. Lubricate the threads, then insert the tappet ball pin into the cylinder head and tighten it. 2. Install the lower spring seats and seals over the valve guides. On...
1. Lubricate the threads, then insert the tappet ball pin into the cylinder head and tighten it. 2. Install the lower spring seats and seals over the valve guides. On...

Installing the camshaft
Engine M 110 Tightening the camshaft bolt (engine M 110) 1. Install the camshaft bearings into the front of the housing. 2. Install thrust washers on the front end of...
Engine M 110 Tightening the camshaft bolt (engine M 110) 1. Install the camshaft bearings into the front of the housing. 2. Install thrust washers on the front end of...

Installing the cylinder head
Location of the dowel pins on the cylinder block (engine M 110) 1. Clean the cylinder head and block surfaces and install a new gasket on the block pins. Do not use...
Location of the dowel pins on the cylinder block (engine M 110) 1. Clean the cylinder head and block surfaces and install a new gasket on the block pins. Do not use...

Removal and installation the intake manifold and exhaust manifold
Engine M 123 Removing the manifold gasket (engine M 123) 1. Drain the cooling system. 2. Remove the air cleaner. 3. Disconnect the throttle controls. 4. Mark (mark it)...
Engine M 123 Removing the manifold gasket (engine M 123) 1. Drain the cooling system. 2. Remove the air cleaner. 3. Disconnect the throttle controls. 4. Mark (mark it)...
This section is available on: russian, bulgarian, belarusian, ukrainian, serbian, croatian, romanian, polish, slovak, hungarian
Link in different formats to this section
TEXTHTMLBB Code
- General information
- Vehicle description
- Working conditions and tools
- Car care
- Diesel engines
- Engine repair
- Lubrication system
- Cooling system
- Injection system
- Supply system
- Exhaust system
- Gasoline engines
- Engine repair
- Lubrication system
- Cooling system
- Control system
- Power and exhaust system
- Transmission
- Clutch
- Mechanical gearbox
- Automatic gearbox
- Drive shafts
- Chassis
- Car suspension
- Steering
- Tires and wheels
- Brake system
- Body
- Exterior (external elements)
- Interior (internal elements)
- Doors and windows
- Heating and ventilation
- Electrical equipment
- Equipment and devices
- Power devices
- Lighting and signaling
- Electrical circuits
- General information
- Governing bodies
- Driving and operation
- Weekly care
- Maintenance (gasoline)
- Maintenance (diesel)
- Troubleshooting
- Power unit
- I4 petrol engine
- V6 petrol engine (SOHC)
- V6 petrol engine (DOHC)
- Diesel engines
- Engine overhaul
- Cooling system
- Heating and ventilation
- Fuel system (carburetor)
- Injection system «Bosch CIS-E»
- Injection system «Bosch HFM»
- Diesel fuel system
- Supply system
- Starting and charging system
- Ignition system (I4)
- Ignition system (V6)
- Preheating
- Transmission
- Clutch
- Mechanical gearbox
- Automatic gearbox
- Drive shafts
- Chassis
- Brake system
- Car suspension
- Steering
- Body
- Exterior (external elements)
- Interior (internal elements)
- Doors, locks and windows
- Electrical equipment
- Equipment and devices
- Switches
- Headlights and lighting
- Electrical circuits
- General information
- Introduction to the guide
- Power unit
- Engine device
- Repair M102 engines
- Repair M110 and M123 engines
- Cooling and lubrication (M102)
- Cooling (M110 and M123)
- Ignition system
- Power system «Stromberg»
- Power system «Solex 4A1»
- Fuel injection «K-Jetronic»
- Fuel injection «L-Jetronic»
- Transmission
- Clutch
- Mechanical gearbox
- Automatic gearbox
- Cardan and rear axle
- Chassis
- Front suspension
- Rear suspension
- Steering
- Brake system
- Body
- Exterior (external elements)
- Interior (internal elements)
- Doors, locks and windows
- Electrical equipment
- Equipment and devices
- Power devices
- Electrical circuits