



Removal
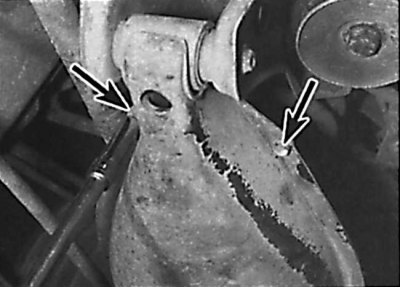
Location of the screws for fastening the protective cover of the lower arm of the rear suspension
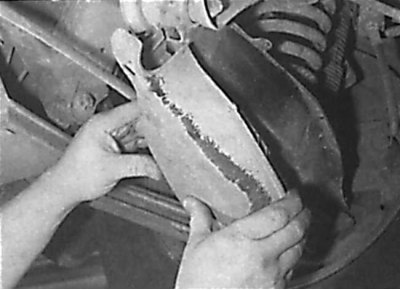
Removal the protective cover from the base of the lower arm of the rear suspension
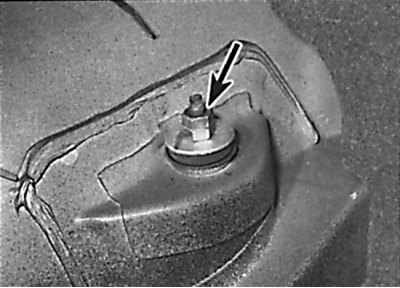
Upper rear shock mount
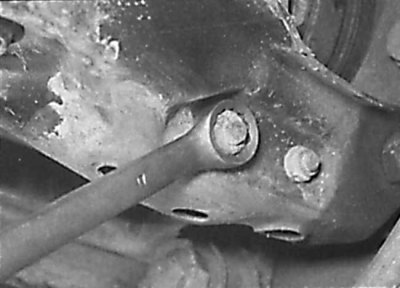
Unscrewing the nut from the lower shock absorber mounting bolt
Upper rear shock mount components on early models
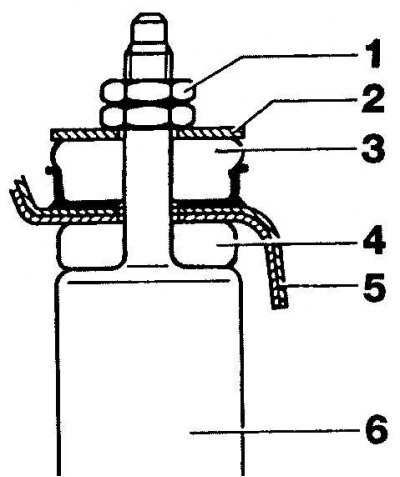
1 – nut and lock nut; 2 – washer; 3 – rubber cushion; 4 – rubber cushion; 5 – body element; 6 – rear shock absorber
Upper rear shock mount components on later models
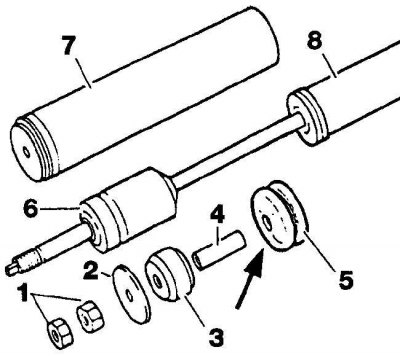
1 – nut and lock nut; 2 – washer; 3 – rubber cushion; 4 – bushing; 5 – rubber cushion; 6 – buffer; 7 – dust cover; 8 – rear shock absorber
1. Raise the rear of the vehicle and secure it on stands. Remove the corresponding rear wheel.
2. Remove the screws and the cover from the base of the rear lower control arm (see fig. Location of the screws securing the protective cover of the lower arm of the rear suspension, Removing the protective cover from the base of the lower arm of the rear suspension).
3. Use a jack to support the lower arm of the rear suspension through a wooden block.
4. To access the upper rear shock absorber mount, remove the luggage compartment side trim (see fig. More precisely, the rear shock absorber mount).
5. While holding the shock absorber rod mounting nut with a wrench from turning, use a second wrench to unscrew the lock nut. Unscrew the shock absorber rod mounting nut, while holding the rod from turning. Remove the washer and rubber cushion.
6. Working underneath the vehicle, unscrew the nut from the lower shock absorber mounting bolt and remove the bolt and washers (see fig. Unscrewing the nut from the lower shock absorber mounting bolt).
7. Carefully release the lower rear suspension arm slightly, then remove the shock absorber from under the rear wheel arch. Remove the rubber pad from the top of the shock absorber. On December 1986 and later models, remove the gasket installed on the upper rubber pad, then remove the dust boot and rubber bumper from the shock absorber rod (see Fig. Upper Rear Shock Mounts on Early Models, Upper Rear Shock Mounts on Later Models).
Examination
1. Check the shock absorber for signs of fluid leaks. Check the entire length of the shock absorber rod for pitting. Check the shock absorber body for mechanical damage. Set the shock absorber in a vertical position and check its operation by moving the shock absorber rod through its full stroke. Also check the operation of the shock absorber by moving the shock absorber rod up and down a distance of 50 - 100 mm. In all cases, the shock absorber rod should move smoothly with noticeable resistance. If the shock absorber rod moves jerkily or there is mechanical damage, the shock absorber must be replaced.
Installation
1. On later models, install the buffer, dust boot and gasket onto the shock absorber rod.
2. On all models, install the lower rubber pad onto the shock absorber rod and install the shock absorber into the vehicle.
3. Align the mounting holes in the bottom of the shock absorber and the lower rear suspension arm, insert the bolt into the hole and screw a new nut onto the bolt without tightening it completely.
4. Use a jack to lift the lower arm of the rear suspension, while the shock absorber rod should pass through the hole in the body.
5. In the luggage compartment, install the rubber cushion and washer on the shock absorber rod and screw the mounting nut onto the shock absorber rod. Check that the rubber cushion is positioned correctly, then tighten the mounting nut to the required torque. At the same time, hold the shock absorber rod from turning. Holding the mounting nut with a wrench, screw on the lock nut and tighten it to the required torque.
6. Reinstall the luggage compartment trim.
7. Install the wheel, then lower the vehicle to the ground and tighten the wheel bolts to the specified torque.
8. Rock the car to ensure that the shock absorber is properly seated. Tighten the shock absorber lower mounting nut to the specified torque. Install the protective cover on the base of the rear lower arm and screw it in place.