
Shock absorber and rear suspension spring
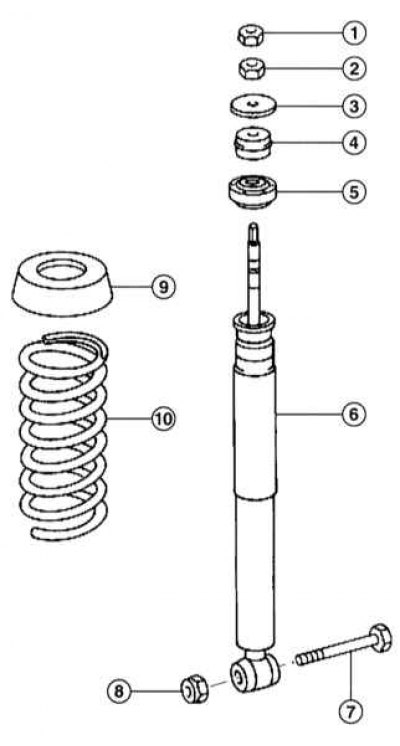
1 - Locknut, 30Nm; 2 - Nut; 3 - Washer; 4 - Rubber buffer; 5 - Rubber buffer; 6 - Shock absorber; 7 - Bolt; 8 - Nut M10, 55Nm; 9 - Spring cup
Models without clearance adjustment
In case of repair, shock absorbers, regardless of the manufacturer, must be replaced each separately. However, the design of the shock absorber must correspond to the color marking applied to it.
Removing
1. Disconnect the side trim of the trunk and remove it, refer to Section Removal and installation of facing in a cargo compartment.
Attention! Shock absorbers simultaneously serve as an elastic stop for the rear wheels. Therefore, the upper shock absorber support should only be disconnected when the vehicle is stationary, so that the axle does not fall down when the shock absorber is disconnected. If the vehicle is raised, the spring arm must be supported with a garage jack.
When disconnecting the upper part of the suspension, do not allow the shock absorber rod to rotate. Otherwise, the cylinder may become disconnected. There is a risk of accident!
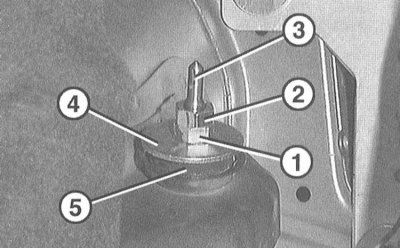
2. Version 1: Loosen the lock nut with a wrench (2) and a nut (1) shock absorber mountings. In this case, the rod must be held with a wrench by the flats (3). It shouldn't rotate.
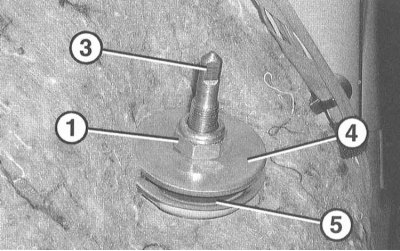
3. Version 2: Unscrew the self-locking nut with a wrench (1) shock absorber mountings. In this case, the rod must be held with a wrench by the flats (3). It shouldn't rotate.
4. Remove washer (4) and rubber damper (5).
5. Raise and place the rear of the vehicle on stands.

6. Turn away 2 bolts of fastening (1) spring arm covers (2) and remove the cover.
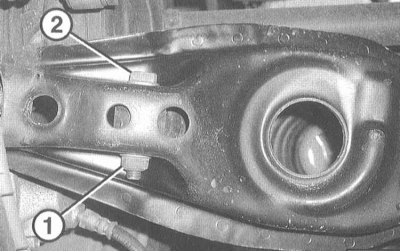
7. Loosen the nut (1) at the spring arm and remove the mounting bolt (2) with puck.
8. Remove the shock absorber from the spring arm and the hole in the frame. To facilitate removal of the shock absorber, press it from above through the hole in the spring arm. The shock absorber is pulled back.
Installation
1. Check the shock absorber for smooth running before installation.
2. Check rubber parts for cracks and damage.
3. Insert the shock absorber so that the numbered markings on the paint point to the rear.
4. Insert the shock absorber at the spring arm. Install the bolt with washer. Fit a new self-locking nut and tighten to 55Nm.
5. Fix the spring arm cover and secure it with two bolts.
6. Slowly lower the vehicle while inserting the shock absorber into the upper hole.
7. Place a rubber damper and washer on the shock absorber bar from the passenger compartment. Tighten the new damper rod self-locking nut to 30Nm while holding the cylinder rod from turning. When fastening with two nuts: Screw a new nut onto the shock absorber rod and tighten it to a torque of 15 Nm, holding the cylinder rod from turning. Screw on a new lock nut and secure it with a torque of 30 Nm, holding the lower nut from turning.
8. Establish into place facing of a luggage carrier, as it is described in the Section Removal and installation of facing in a cargo compartment.