
Removing
1. Mark the position of the rear wheels on the hub with paint. This will allow the assembly to set the balanced wheel in its original position.
2. Loosen the wheel bolts. In this case, the car must be on wheels.
3. Jack up the rear of the vehicle, jack it up and remove the rear wheel.
4. Remove the fender liner of the removed rear wheel, see relevant chapter.
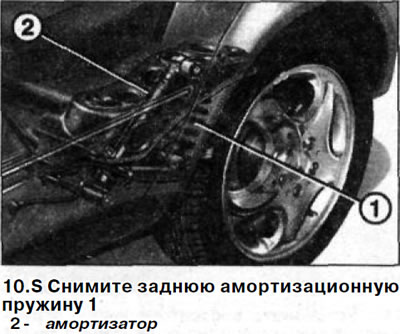
5. Remove the rear damping spring 1, see the relevant chapter (see illustration).
6. Unscrew the bolt 3 of the upper support, and then the bolt 4 of the lower support of the shock absorber 2 and remove the shock absorber (see illustration). The key size for the top bolt is 16 mm, for the bottom bolt - 18 mm.
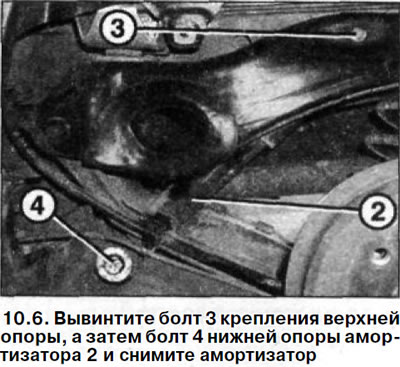
Attention! Hold the nut on the upper support bolt from turning with a wrench by removing the plastic cap to do this (see illustration 10.6).
7. Check the functioning of the shock absorber, see relevant chapter.
The shock absorber is installed in the reverse order of removal.
Tightening torques for threaded connections:
- upper support bolt - 40 Nm + 45°turn
- lower support mounting bolt - 80 Nm + 90°turn
Attention! Secure the nut to the upper shock mount bolt with tape so that it does not fall off while holding it from turning.
8. Establish a back wheel according to the marks put at removal.
Before doing this, lubricate the centering seat of the wheel disc on the hub with a thin layer of grease.
Do not lubricate wheel bolts. Replace rusted bolts with new ones.
9. Screw in bolts of fastening of wheels and lower the car.
10. Tighten the wheel bolts in a cross pattern to 110 Nm.