
Removing
1. Mark with paint the position of the front wheels relative to the hub. This will allow the assembly to set the balanced wheel in its original position.
2. Loosen the wheel bolts. The vehicle must be on wheels during this operation.
3. Place the front of the car on jack stands and, having unscrewed the wheel bolts, remove the front wheels.
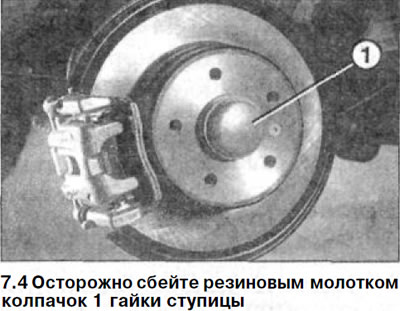
4. Carefully knock off the cap 1 of the hub nut with a rubber mallet (see illustration).
5. Install the wheels.
6. Lower the car on wheels.
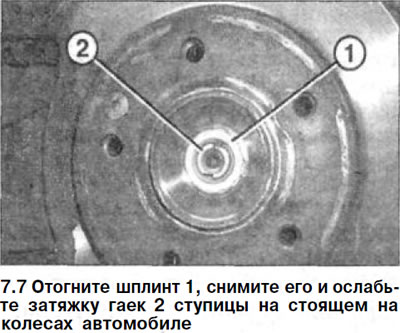
7. Bend cotter pin 1, remove it and loosen nuts 2 of the hub with the car standing on wheels. It is not necessary to completely unscrew the nuts (see illustration).
8. Place the front of the car on jack stands, remove the front wheels and unscrew the hub nuts.
9. Remove the bolts that secure the lower control arm to the cross member, see relevant chapter. Mark the bolt locations for proper installation during subsequent installation, because the bolts differ in length.
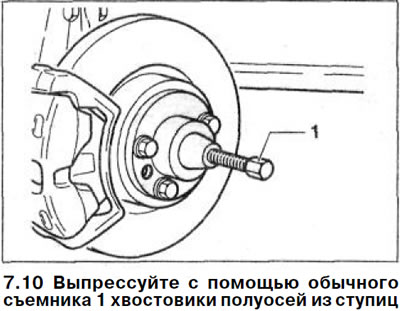
10. Using a conventional puller, press out 1 axle shaft shanks from the hubs (see illustration).
11. Unscrew bolts of fastening to the block of cylinders a basic arm of the right semiaxle and an intermediate shaft.
12. Use a suitable screwdriver to pry the intermediate shaft shank from the transmission gear.
13. Using a suitable screwdriver, wring out the shank of the left axle shaft from the gearbox.
14. Clean the splines of the front wheel drive axle shafts and surfaces mating with the axle shaft flange.
Installation
15. Check the elasticity of the thrust ring on the shank of the left semi-axle, with which it is attached to the gearbox. Replace the ring if necessary.
16. Turn the thrust ring with the hole down, carefully insert the shank of the left axle shaft into the slotted hole on the gearbox until it stops and fix it with the locking ring.
17. Carefully enter the shank of the intermediate shaft of the right axle shaft into the slotted hole on the gearbox until it stops.
18. Carefully correct the thread of the holes for the mounting bracket bolts on the cylinder block with an appropriate tap.
19. Fasten the support bracket to the cylinder block with new self-locking bolts and tighten to 20 Nm.
20. Apply in three passes to the mating surfaces of the front axle shafts and their flange an aerosol that forms a Teflon layer. Allow each coat to dry slightly between coats.
21. Insert the shanks of the drive shafts into the holes on the hubs until they stop. Make sure that the flange of the axle shafts does not move.
22. Secure the lower wishbone to the axle beam by screwing new nuts onto their bolts. Do not forget that the mounting bolts have different lengths.
23. Tighten the nuts with a torque of 105 Nm.
24. Screw new hub nuts onto the axle shafts.
25. Install the wheels and lower the car.
26. Tighten the nuts on both hubs. The vehicle must be on wheels.
The hub nuts are tightened in several passes:
- 1st pass. Tighten the nut to 180 Nm.
- 2nd pass. Loosen the nut completely.
- 3rd pass. Tighten the nut to 80 Nm.
- 4th pass. Tighten the nut with a 45°wrench.
27. Install in front of the car on the stand goats and, having unscrewed the wheel bolts, remove the front wheels.
28. Tap the protective cap onto the hub nuts with a rubber mallet, being careful not to damage the cap.
29. Establish forward wheels according to the marks put at removal. Before doing this, lubricate the disc seat of each wheel on the hub with a thin layer of bearing grease. Do not grease wheel bolts. Screw in the wheel bolts and lower the car. Tighten the nuts in a cross pattern to 110 Nm.