



Vehicle instruction manual Mercedes A-Class (W168)

Control Panel
1 - Light switch 2 - headlight leveling regulator 3 - hood lock drive lever 4 - steering column switch 5 - cruise control and speed limiter 6 - sound signal 7 -...
1 - Light switch 2 - headlight leveling regulator 3 - hood lock drive lever 4 - steering column switch 5 - cruise control and speed limiter 6 - sound signal 7 -...

Instrument cluster and information display
1 - tachometer 2 - signal lights 3 - left turn signal light 4 - right turn signal light 5 - speedometer 6 - information display 7 - indicator light of the switched on...
1 - tachometer 2 - signal lights 3 - left turn signal light 4 - right turn signal light 5 - speedometer 6 - information display 7 - indicator light of the switched on...

Checking the engine oil level using a dipstick
Caution! Before each check of the engine oil level, the dipstick should be wiped with a rag. The car should be horizontal. The check should be performed no earlier than...
Caution! Before each check of the engine oil level, the dipstick should be wiped with a rag. The car should be horizontal. The check should be performed no earlier than...

Indication of maintenance period
Approximately one month before the next scheduled maintenance, after the ignition is turned on, an indication appears on the instrument panel display service...
Approximately one month before the next scheduled maintenance, after the ignition is turned on, an indication appears on the instrument panel display service...

Heater control
1 - cabin air blower switch 2 - cabin air temperature switch 3 - cabin air flow direction switch 4 - Interior air recirculation switch. When the switch is moved to the...
1 - cabin air blower switch 2 - cabin air temperature switch 3 - cabin air flow direction switch 4 - Interior air recirculation switch. When the switch is moved to the...

Air Conditioning Control
1 - cabin air blower switch 2 - cabin air temperature switch 3 - cabin air flow direction switch 4 - cabin air recirculation switch 5 - key for switching on the...
1 - cabin air blower switch 2 - cabin air temperature switch 3 - cabin air flow direction switch 4 - cabin air recirculation switch 5 - key for switching on the...

Removal ice
1. Set the temperature, fan and air flow direction switch to the position . 2. Open the side deflectors and direct the air flow to the side windows. 3. Close the central...
1. Set the temperature, fan and air flow direction switch to the position . 2. Open the side deflectors and direct the air flow to the side windows. 3. Close the central...

Removal internal fogging of glass
1. Turn on the dehumidifier . When turned on, the indicator light on the key should light up. 2. Turn off the air recirculation mode in the cabin . The indicator light...
1. Turn on the dehumidifier . When turned on, the indicator light on the key should light up. 2. Turn off the air recirculation mode in the cabin . The indicator light...
Removal external fogging of glass
1. Turn on the windshield wipers. 2. Set the blower direction switch to position or . The A170 Turbodiesel vehicles are equipped with a coolant heater, which enables...
1. Turn on the windshield wipers. 2. Set the blower direction switch to position or . The A170 Turbodiesel vehicles are equipped with a coolant heater, which enables...
Rear window defroster
The rear window defroster switch is located on the center console. 1. Turn the ignition key to position 1 or 2. 2. Press the symbol on the switch. The indicator light 1...
The rear window defroster switch is located on the center console. 1. Turn the ignition key to position 1 or 2. 2. Press the symbol on the switch. The indicator light 1...

Adjusting the position of the steering wheel
1. Press lever 1 down to change the position of the steering wheel. 2. Set the steering wheel to the desired position. 3. Press lever 1 upwards to lock the steering...
1. Press lever 1 down to change the position of the steering wheel. 2. Set the steering wheel to the desired position. 3. Press lever 1 upwards to lock the steering...

Heated seats
The seat heater switch is located on the center console. 1. Turn the ignition key to position 1 or 2. 2. Press the switch. position 1 - normal heating mode; position 2 -...
The seat heater switch is located on the center console. 1. Turn the ignition key to position 1 or 2. 2. Press the switch. position 1 - normal heating mode; position 2 -...

Airbags
1 - driver's airbag 2 - front passenger airbag 3 - side airbag Front airbags are designed to deploy when a frontal impact is of a certain force. The front passenger...
1 - driver's airbag 2 - front passenger airbag 3 - side airbag Front airbags are designed to deploy when a frontal impact is of a certain force. The front passenger...

Interior Light Switches
1 - Interior light switch 2 - Door contact switch. When unlocking the door locks, removing the ignition key from the lock or opening the door, the interior lights turn...
1 - Interior light switch 2 - Door contact switch. When unlocking the door locks, removing the ignition key from the lock or opening the door, the interior lights turn...

Interior rear view mirror
1. Adjust the mirror position manually. 2. Move mirror lever 1 up to avoid being blinded by the headlights of vehicles behind you.
1. Adjust the mirror position manually. 2. Move mirror lever 1 up to avoid being blinded by the headlights of vehicles behind you.

Cup holders on console and armrest
On the center console 1. Press button 1 to release the cup holder from the console. On the armrest between the front seats
On the center console 1. Press button 1 to release the cup holder from the console. On the armrest between the front seats

Using the socket
The socket is located on the right side of the trunk. The maximum load of the socket is 180 watts. 1. Turn the ignition key to position 1 or 2. 2. Fold the socket cover...
The socket is located on the right side of the trunk. The maximum load of the socket is 180 watts. 1. Turn the ignition key to position 1 or 2. 2. Fold the socket cover...

Window lift control
1 - Front left door window lift switch 2 - Rear left door window lift switch 3 - Front right door window lift switch 4 - Rear right door window lift switch 5 - Rear side...
1 - Front left door window lift switch 2 - Rear left door window lift switch 3 - Front right door window lift switch 4 - Rear right door window lift switch 5 - Rear side...

Headlight leveling regulator
0 - when transporting passengers in the front seats 1 - when transporting passengers in the front and rear seats or the driver's seat is occupied and cargo in the trunk...
0 - when transporting passengers in the front seats 1 - when transporting passengers in the front and rear seats or the driver's seat is occupied and cargo in the trunk...
Light switch
Warning! When the key is removed from the ignition or the door is opened without turning off the vehicle's exterior lighting, an acoustic signal is emitted. The signal...
Warning! When the key is removed from the ignition or the door is opened without turning off the vehicle's exterior lighting, an acoustic signal is emitted. The signal...

Steering column switches
Turning on the lighting 1 - low beam. When the external lighting switch is in the position 2 - high and low beam headlights. When the external lighting switch is in the...
Turning on the lighting 1 - low beam. When the external lighting switch is in the position 2 - high and low beam headlights. When the external lighting switch is in the...

Rear Window Wiper Switch
1. Turn the ignition key to position I. 1 - interval mode. To turn on, press the switch. To turn off, press the switch again. 2 - turning on the rear window washer and...
1. Turn the ignition key to position I. 1 - interval mode. To turn on, press the switch. To turn off, press the switch again. 2 - turning on the rear window washer and...

Locking the car locks
1 - main key 2 - spare key 3 - lock 4 - opening the door 5 - door lock switch. Designed for individual door locking. The switch on the driver's door can only be pressed...
1 - main key 2 - spare key 3 - lock 4 - opening the door 5 - door lock switch. Designed for individual door locking. The switch on the driver's door can only be pressed...

Opening and locking the rear hatch
1 - the door can be opened, the lock is not locked 2 - unlock the lock 3 - locking the lock Warning! When the tailgate is opened on vehicles with an alarm system and...
1 - the door can be opened, the lock is not locked 2 - unlock the lock 3 - locking the lock Warning! When the tailgate is opened on vehicles with an alarm system and...

Emergency opening of the fuel filler flap
1. Open cover 1 on the right side of the trunk. 2. Press the clamp 2 and remove the cover. 3. Remove cover 3. 4. Pull the emergency hatch release button and open the...
1. Open cover 1 on the right side of the trunk. 2. Press the clamp 2 and remove the cover. 3. Remove cover 3. 4. Pull the emergency hatch release button and open the...
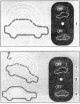
Security alarm switch with indicator light on the center console
1 - towing protection device off 2 - signal light on the switch 3 - disabling interior security The security alarm is activated approximately 15 seconds after the...
1 - towing protection device off 2 - signal light on the switch 3 - disabling interior security The security alarm is activated approximately 15 seconds after the...

External rear view mirror switches
1 - Driver's side exterior rearview mirror switch 2 - Front passenger side exterior rearview mirror switch The mirrors are driven only when the key is in the ignition...
1 - Driver's side exterior rearview mirror switch 2 - Front passenger side exterior rearview mirror switch The mirrors are driven only when the key is in the ignition...

Folding mirrors
1 - return the mirror to its original position 2 - folding the mirror The switch for folding mirrors is located on the center console.
1 - return the mirror to its original position 2 - folding the mirror The switch for folding mirrors is located on the center console.

Cars with a spare tire
1 - set of on-board tools 2 - jack 3 - spare wheel 4 - spare wheel mounting clamp 5 - triangle 6 - triangle mounting clamp 7 - thrust shoe 8 - strap fastening of the...
1 - set of on-board tools 2 - jack 3 - spare wheel 4 - spare wheel mounting clamp 5 - triangle 6 - triangle mounting clamp 7 - thrust shoe 8 - strap fastening of the...

Cars equipped with TIREFIT tire sealant
1 - set of on-board tools 2 - jack 3 - tire sealant TIREFIT 4 - electric pump 5 - triangle 6 - triangle mounting clamp 7 - thrust shoe 8 - tape fastening of the trunk...
1 - set of on-board tools 2 - jack 3 - tire sealant TIREFIT 4 - electric pump 5 - triangle 6 - triangle mounting clamp 7 - thrust shoe 8 - tape fastening of the trunk...

Tire sealant TIREFIT
Small point damage to tyres, especially on the running surface, can be sealed with TIREFIT tyre sealant. The sealant can be used at temperatures down to -20°C. If...
Small point damage to tyres, especially on the running surface, can be sealed with TIREFIT tyre sealant. The sealant can be used at temperatures down to -20°C. If...

Hood release handle
To open the bonnet, pull the red handle 1 under the instrument panel in the footwell on the driver's side. 1. Press the hood latch 2 upwards and lift the hood. 2....
To open the bonnet, pull the red handle 1 under the instrument panel in the footwell on the driver's side. 1. Press the hood latch 2 upwards and lift the hood. 2....


Location of fuses
1 - main fuse box in the passenger footwell. 2 - additional fuse box on the side of the instrument panel near the exterior lighting switch. Spare fuses are located in...
1 - main fuse box in the passenger footwell. 2 - additional fuse box on the side of the instrument panel near the exterior lighting switch. Spare fuses are located in...

Purpose of fuses and relays
№ Item No On the move K1 002 542 03 19 washer pump relay K2.0 002 542 1119 horn relay K2.1 002 542 12 19 electronic Stability Program (ESP) relay K3 002 542 23 19...
Есть 1 comment
№ Item No On the move K1 002 542 03 19 washer pump relay K2.0 002 542 1119 horn relay K2.1 002 542 12 19 electronic Stability Program (ESP) relay K3 002 542 23 19...
Есть 1 comment

Ignition switch
The key in the ignition switch is in position 0. The ignition key can only be removed from the switch after it is set to position 0. The steering is locked when the key...
The key in the ignition switch is in position 0. The ignition key can only be removed from the switch after it is set to position 0. The steering is locked when the key...

Manual transmission
The gear shift pattern is indicated on the lever. Reverse gear can only be engaged after the vehicle has stopped and the engine is idling. Caution! If reverse gear is...
The gear shift pattern is indicated on the lever. Reverse gear can only be engaged after the vehicle has stopped and the engine is idling. Caution! If reverse gear is...

Automatic transmission
Each gear is engaged automatically, depending on: gearbox control lever positions, program switch positions, accelerator pedal position, speed of movement. Touching 1....
Each gear is engaged automatically, depending on: gearbox control lever positions, program switch positions, accelerator pedal position, speed of movement. Touching 1....

Tempomat (cruise control)
Cruise control ensures movement at a set speed. 1. Maintaining the speed of movement (the switch is slightly pressed upwards). Increase in movement speed (the switch is...
Cruise control ensures movement at a set speed. 1. Maintaining the speed of movement (the switch is slightly pressed upwards). Increase in movement speed (the switch is...

Cruise control with Speedtronic speed limiter
1 - switching on the speed limiter. The speed increase is performed in 10 km/h increments 2 - switching on the speed limiter. The speed is reduced in 10 km/h increments...
1 - switching on the speed limiter. The speed increase is performed in 10 km/h increments 2 - switching on the speed limiter. The speed is reduced in 10 km/h increments...
Technical data of cars
Engine A140 A160 A170 Power (kW/hp) 60/82 75/102 66/90 at revolutions per minute 4800 5250 4200 Torque (Nm) 130 150 180 at revolutions per minute 3800 4000 1600 Number...
Engine A140 A160 A170 Power (kW/hp) 60/82 75/102 66/90 at revolutions per minute 4800 5250 4200 Torque (Nm) 130 150 180 at revolutions per minute 3800 4000 1600 Number...
This section is available on: russian, bulgarian, belarusian, ukrainian, serbian, croatian, romanian, polish, slovak, hungarian
More similar sections for repairing other models
☛ General information: User manual car Mercedes W202 (1993-2000)
☛ General information: User manual car Mercedes W220 (1998-2005)
☛ General information: User manual car Mercedes Vito 1 (1996-2003)
Link in different formats to this section
TEXTHTMLBB Code
- General information
- User manual
- Maintenance
- Troubleshooting
- Power unit
- Engine repair
- Cooling and heating
- Injection system (gasoline)
- Fuel system (diesel)
- Fuel system
- Exhaust system
- Ignition system
- Transmission
- Clutch
- Transmission
- Chassis
- Brake system
- Suspension
- Steering
- Body
- Interior (all models)
- Interior (since 1997)
- Interior (since 2001)
- Exterior
- Doors and windows
- Electrical equipment
- Equipment and devices
- Power devices
- Windshield wipers and washers
- Headlights and lighting
- Electrical circuits