
Attention! Depending on the equipment of the car, rubber supports of various heights are installed. When replacing, it is necessary to measure the height of all supports. Only rubber feet of the same height should be installed.
Removing
1. Raise and support the rear of the vehicle on stands.
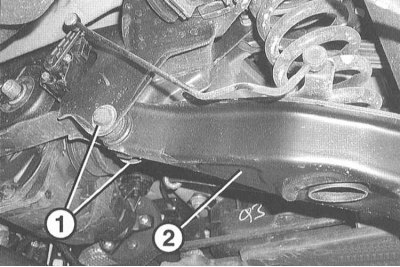
2. Turn off 2 bolts of fastening (1) spring arm covers (2). Detach the cover and remove it.
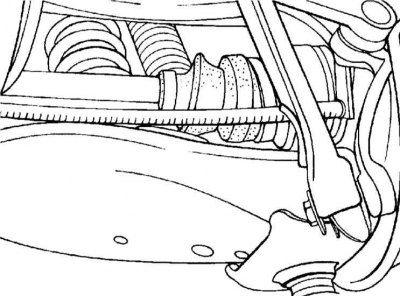
3. Place a garage jack under the spring arm from the outside and raise it so that the rear wheel drive shaft is horizontal. Use a wooden spacer for this.
When lifting the spring arm, make sure that the car does not come off the stands. Load the trunk if necessary.
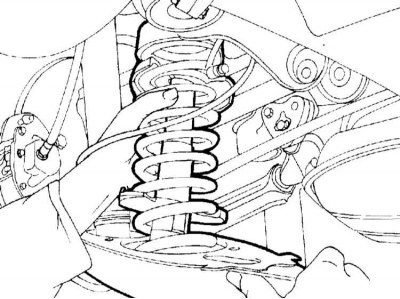
4. The spring is strongly clamped. To remove the spring, it must be further compressed so as to unload the support cups. To do this, you need to use a special tool for compression.
Attention! The spring should only be removed when it is securely compressed with a tool!
5. Compress the spring with a tool. In this case, the device should cover from 3 to 4 turns of the spring. Compress the spring so that the cups are unloaded.
Note. At the service station, a device is used that is inserted from the inside of the spring.
Attention! Make sure that the coils of the spring are securely covered by the fixture and the fixture cannot slip. The spring is clamped with great force, so only a reliable device must be used. Never compress the spring with wire. There is a danger of an accident!
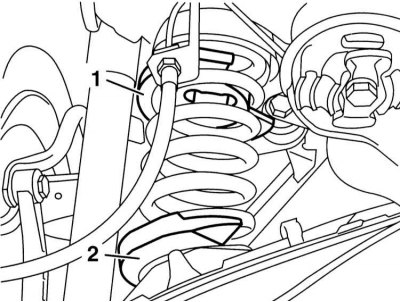
6. Loosen the self-locking nut (1) spring arm mounting (2) and remove it with a washer. Remove the mounting bolt.
7. Pull the lever down and remove the rubber-supported spring.
8. If the spring needs to be replaced, clamp it in a vise. By turning to the left, remove the rubber support and slowly unload the spring.
Installation
Before installation, check the rubber support for cracks or any damage. Replace support if necessary. Clean the area around the spring on the lever.
1. Install the tool and slowly compress the spring.
2. Install the rubber support by turning it to the right. To facilitate installation, the support can be lightly lubricated with dishwashing liquid or glycerin.
3. Insert the spring so that the end of the lower coil sits in the recess on the spring arm.
4. Insert the spring arm mounting bolt and screw on a new self-locking nut with washer without tightening the nuts.
5. Place a garage jack under the spring arm from the outside and raise it so that the rear wheel drive shaft is horizontal. Use a wooden spacer for this.
Attention! When lifting the spring arm, make sure that the car does not come off the stands. Load the trunk if necessary.
6. In this position, tighten the spring arm nut to 70Nm.
7. Unload the spring, keeping it in the correct position in the upper rubber support and the lower spring arm.
8. Remove the spring compressor and jack.
9. Fix the spring arm cover and secure it with two bolts.
10. Lower the car on wheels.
11. If new parts were installed, it is necessary to adjust the headlights (service station work).