
Front wheel suspension strut
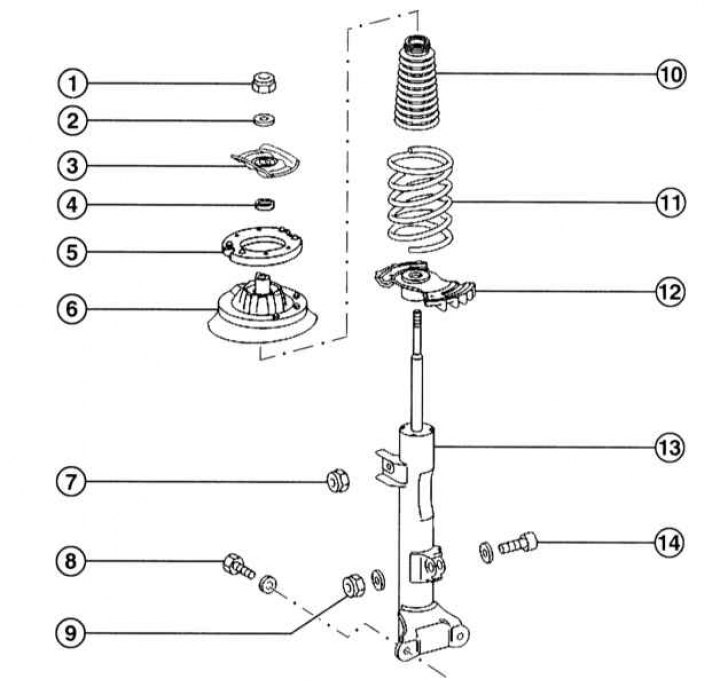
1 - Nut M14 x 1.5, 60Nm; 2 - Washer; 3 - Emphasis; 4 - Nut, 20Nm, self-locking, be sure to replace; 5 - Rubber gasket; 6 - Suspension strut support; 7 - Nut, 40Nm; 8 - Bolt, 110Nm, 2 pcs.; 9 - Nut, 200Nm; 10 - Buffer compression stroke; 11 - Helical spring; 12 - Holder; 13 - Shock absorber; 14 - Bolt
Warning! Attention! To carry out repairs, you will need a spring extractor. Do not attempt to remove the spring without a puller - you could be seriously injured and damage your vehicle. Read the instruction manual carefully before installing the puller. If you are not going to remove the spring puller after removing it from the strut, place it in a safe place.
1. If you find that the rack is defective (traces of leakage of the working fluid on its surface, breakage or drawdown of the spring, loss of vibration damping efficiency), must be disassembled and repaired. The struts themselves cannot be repaired, and when the shock absorber fails, they should be changed, but the springs and related components should be replaced in pairs (on both sides of the car).
2. Remove the stand (refer to section Removal and installation of the front caliper), place it on the workbench and clamp it in a vise. Remove all dirt from its surface.

3. Compress the spring with a puller, relieving all pressure from the poppet. Attach the puller securely to the spring (follow the puller manufacturer's instructions).
4. While holding the shock absorber rod from turning with a hexagon wrench, unscrew the rod fastening nut.
5. Remove the upper support with the support bearing, then the spring plate, spring, boot and bump stop.
6. If you are going to install a new spring, carefully remove the puller from the old spring. If you are going to install the old spring, there is no need to remove the puller.
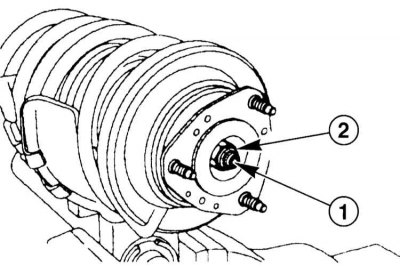
7. After you have completely disassembled the rack, carefully inspect all of its components. The support bearing must rotate freely. Any components that show signs of wear or damage should be replaced.
8. Inspect the surface of the rack itself. There should be no traces of working fluid on it. Inspect the surface of the shock absorber rod. It should not show signs of corrosion or damage. Place the rack vertically and check its performance by moving the shock absorber rod first from stop to stop, then with short movements of 50-100 mm. In both cases, the movement of the rod must be uniform. If jerking or jamming occurs, as well as any other signs of malfunction, the rack should be replaced.
9. Installation is carried out in the reverse order. Keep the following in mind:
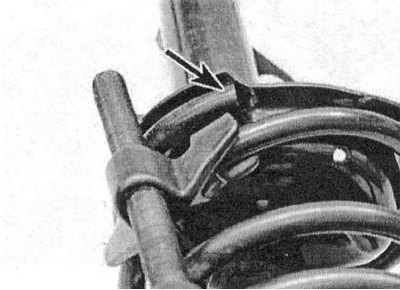
- a) Install the spring onto the strut, making sure it is in the correct position on the lower cup.
- b) Install the support bearing correctly.
- c) Tighten the support bearing mounting nut to the required torque.
- d) The springs should be installed in such a way that the marks applied to them are oriented downwards.