
Sequence of work
1. Loosen the wheel mounting bolts, raise the vehicle, support it on stands and remove the rear wheel.
2. If a wear sensor is installed, remove its connector.
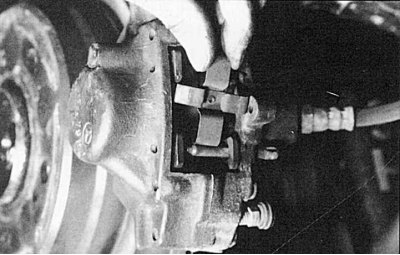
Pic. 8.18. After removing the retaining pins, the spring is removed
3. Knock out the retaining pins from the caliper and remove the springs (pic. 8.18).
4. Install a gas wrench between the guide pads and the caliper and wring out the brake pad.
5. Using a pry bar or a large screwdriver placed between the pad and the brake disc, gently pry out the old inner pad to the end.
6. Press out the outer shoe in the same way, leaving the inner shoe in place. When depressing the pads, make sure that the brake fluid reservoir does not overflow.
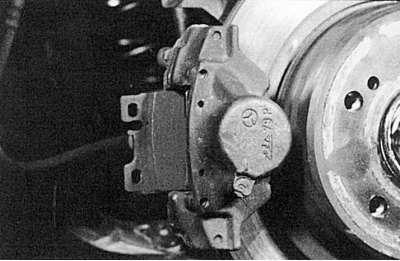
Pic. 8.19. Removing the rear brake pads
7. Having pressed the outer pad so that you can install a new one with a thicker pad, remove it (pic. 8.19). Remove the inner brake pad. The pads can be pulled off with pliers or a screwdriver. If the pads are rusted, the workshop uses a special removable tool to remove them. For replacement, it is best to purchase original parts, since in this case, fastening parts such as fixing pins and locking springs are supplied in the kit. When buying spare parts from other manufacturers, these parts are often missing.
8. Clean the brake shoe guides from dirt and deposits. When doing this, be careful not to damage the brake piston boot. Use a cloth dampened with alcohol for this (never use petrol).
9. Apply some special grease recommended by Mercedes to the new pads and carefully install them into the caliper. Install the outer pad into the caliper first.
10. Install the inner brake shoe into the caliper.
11. Install springs and locking pins. Gently tap the pins all the way into the caliper.
12. Reinstall the wheel, lower the vehicle to the ground and tighten the wheel bolts to 110 Nm. Replace the pads on the other rear wheel in the same way.
13. Check the brake fluid level.