
At the workshop, the brakes are bled using a special device, but this operation can also be performed in the traditional way.
Sequence of work
1. Mark the brake fluid level in the reservoir.
2. Add new brake fluid to the reservoir and, during the entire time of the work, top it up in a timely manner as necessary. Otherwise, air will enter the system again and work will have to be started again.
3. Remove a rubber cap from the union of prorolling of the working brake cylinder of a back right wheel.
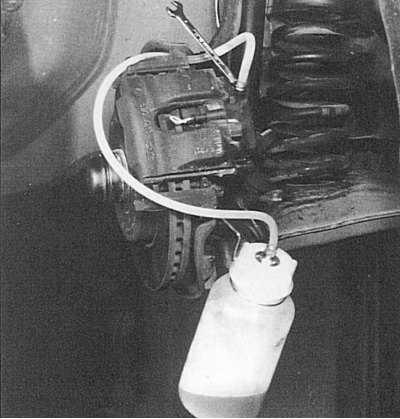
Pic. 8.21. Bleeding the brake mechanism of the front wheel
4. Clean the nipple of the fitting, put a clean transparent plastic hose on it and lower its free end into a container (plastic bottle), half filled with brake fluid (pic. 8.21).
5. Carefully loosen the bleeder screw half a turn with a ring wrench.
6. Ask the assistant to slowly press the brake pedal to the stop in order to pump out the brake fluid and the air in it from the system. At the same time, keep an eye on the hose and brake fluid container - you should notice air bubbles coming out of the fluid. Keep the brake pedal depressed.
7. Close the bleeder valve, then take your foot off the pedal. This will prevent air from entering the system through the fitting threads. Release the pedal slowly.
8. Repeat this operation until no more air bubbles are released into the liquid - this means that air has been removed from the system. Keep an eye on the brake fluid level in the reservoir. Completely screw the fitting (do not overtighten) and put on the rubber cap.
9. On the other bleeders, repeat the same operation in the following order: left rear wheel, right front and then left front.
10. If there was a lot of air in the system, repeat the whole procedure again.
11. Upon completion of work, check the fluid level in the tank again and, if necessary, add fresh fluid to the proper level.
12. Check the operation of the brakes during a trial (careful) trips.