
- A) On 4-cylinder petrol engines, remove the cylinder head and sump as described in Part A of this Chapter.
- b) On 6-cylinder petrol engines, remove the cylinder head, sump and oil pump as described in Part B of this Chapter.
- V) On diesel engines, remove the cylinder head, sump, oil pump and, where provided, the oil slinger plate as described in parts of this chapter.
2. If a pronounced protrusion is found in the upper part of the cylinder surface, it must be removed with a scraper or reamer before installing new pistons. Such a protrusion indicates significant wear on the surface of the cylinders.
3. Using a hammer and punch, paint or something else on the ground side surface, apply a mark, according to the piston number, on each connecting rod cap and connecting rod, see fig. 11.3). If the engine was previously disassembled, make sure that the marks on the connecting rods correspond to their numbers. Recall that cylinder No. 1 is located on the side of the camshaft drive chain.
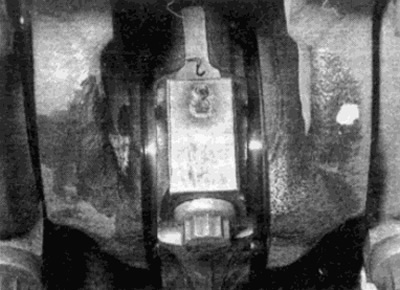
Pic. 11.3. Marks on the connecting rod and connecting rod cap
4. Similarly, check for the presence of direction indicators on the bottom of the pistons. The arrow on each bottom must point towards the target of the camshaft drive (see fig. 11.4). On some engines, this mark may be covered with a layer of soot, which should be washed off to check for the mark. In some cases, the label may be overwritten; in this case, it should be done with a scraper - do not scratch the piston bottom deeply, but make the mark clearly visible.
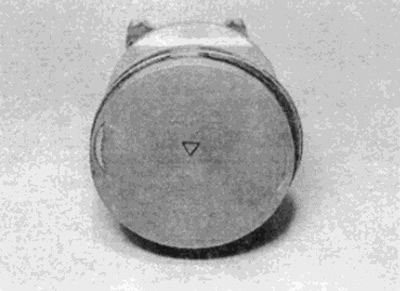
Pic. 11.4. Direction arrow on piston crown
5. Turn the crankshaft so that pistons 1 and 4 (on a 4-cylinder engine), 1 (on a 5-cylinder engine) or 1 and 6 (on a 6-cylinder engine) moved to bottom dead center (NMT).
6. Turn away bolts of a cover of the first rod. Remove the cover and remove the connecting rod bearing (see fig. 11.6). If the insert is to be used, secure it with adhesive tape to the lid.
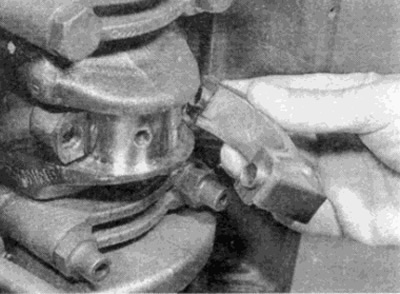
Pic. 11.6. Removing the connecting rod cover
7. Using a hammer handle, push the piston up and out of the cylinder and pull it out of the cylinder head, (be careful not to damage the oil cooling nozzles of the pistons on the cylinder head when removing the pistons, if they are installed).Remove the bushing from the connecting rod and secure it with adhesive tape.
8. Put the cover on the appropriate connecting rod and screw it on, which will allow you to keep the parts in proper order.
9. In the same way, remove the parts of the 4th piston (on a 4-cylinder engine) or 6th piston (on a 6-cylinder engine).
10. Rotate the crankshaft until the remaining pistons are in the BDC position and remove them.