
Attention! When installing the tensioner cap nut, a new O-ring must be used.
Installing a new chain
When installing a new chain, keep the chain legs in a constantly taut position.
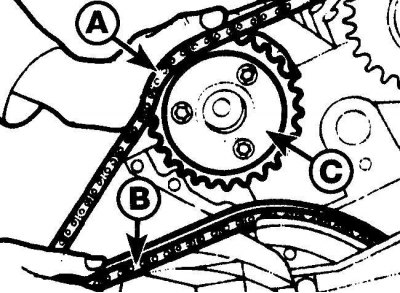
And – a new driving chain; B - old drive chain; C - camshaft sprocket that controls the exhaust valves
Drive chain tensioner
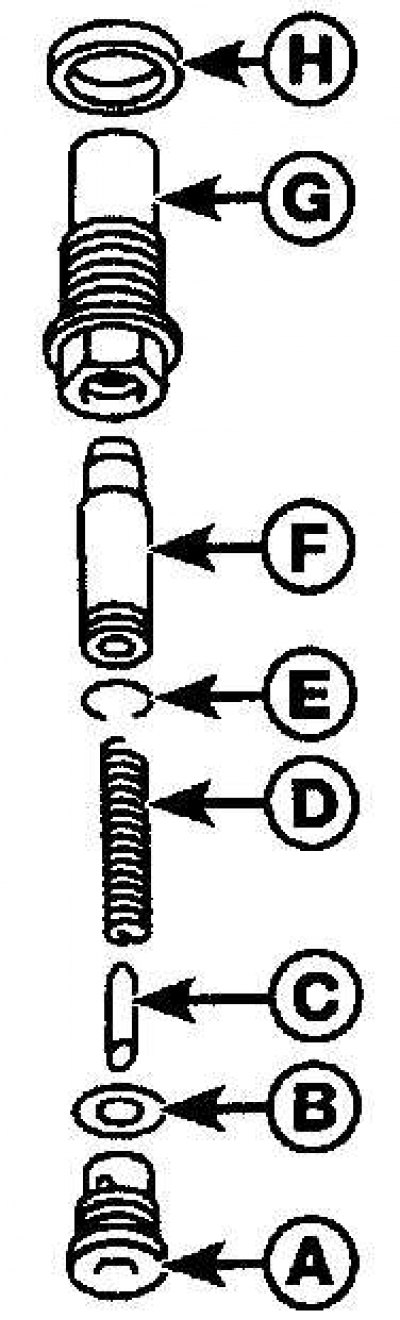
A - cork;
B - sealing ring;
C - pin;
D - spring;
E - bracket;
F - plunger;
G - body;
H - sealing ring
Removing
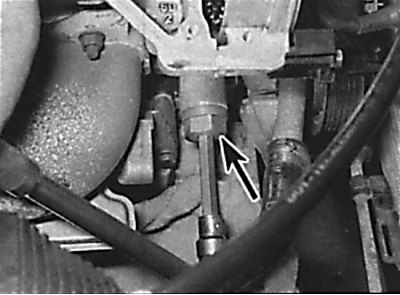
Unscrewing the stopper of the drive chain tensioner
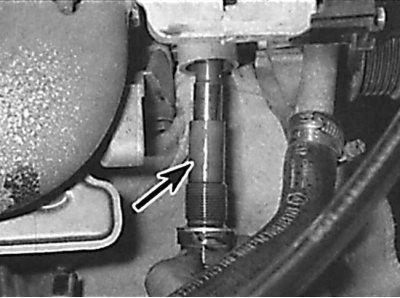
Unscrewing the drive chain tensioner assembly
1. Remove the ground wire from the battery.
2. Unscrew the bolts and remove the radiator fan impeller.
3. Remove the auxiliary drive belt.
4. If present, remove the air pump.
5. Cover the generator with a clean rag.
6. Unscrew the plug of the drive chain tensioner one turn (see fig. Unscrewing the stopper of the drive chain tensioner).
7. Unscrew the drive chain tensioner assembly from the engine (see fig. Unscrewing the drive chain tensioner assembly).
8. Unscrew the cover and remove the pin and spring from the tensioner housing.
9. Squeeze the plunger with the bracket out of the tensioner housing.
Examination
1. Clean the parts of the drive chain tensioner and check for wear on the plunger and housing.
2. Check the condition of the tensioner caliper and spring and replace if necessary.
Installation
1. Screw the timing chain tensioner housing with a new O-ring into the cylinder block and tighten to specified torque.
2. Insert the caliper plunger into the tensioner housing, then install the spring and pin.
3. Screw a plug with a new sealing ring into the tensioner housing and tighten it to the required torque.
4. Install an air pump if available.
5. Install the auxiliary drive belt.
6. Install the radiator fan impeller.
7. Connect ground wire to battery.