
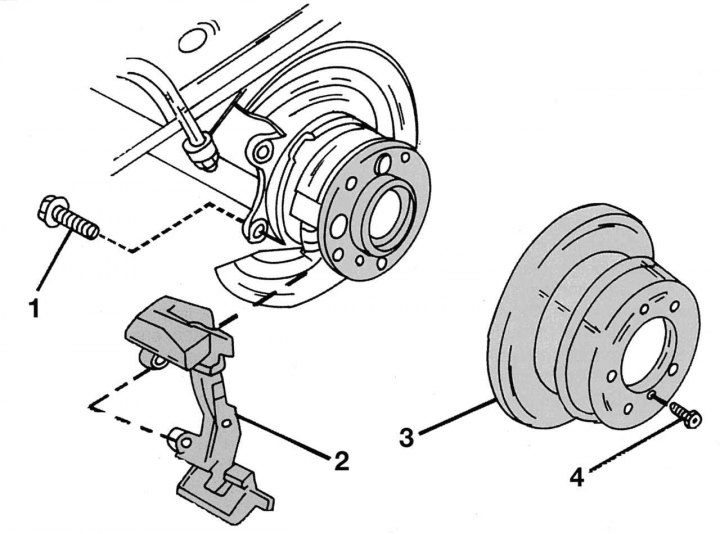
Pic. 287. Removing the rear brake disc: 1 - bolt, 105–110 Nm; 2 - caliper bracket; 3 - brake disc; 4 - bolt, 20 Nm
On fig. 287 shows the mounting of the rear brake disc. To remove it, you must first dismantle the caliper and caliper bracket, as described earlier. Removing the rear brake cylinder must be carried out in the following order:
- unscrew the caliper mounting bolts and remove it. Tie it with wire to the rear axle so that it does not hang on the brake hose. When assembling, make sure that the brake hose is not twisted and does not rub against other parts;
- Loosen the brake disc mounting bolt. When unscrewing, raise the parking brake lever, then lower it again when finished;
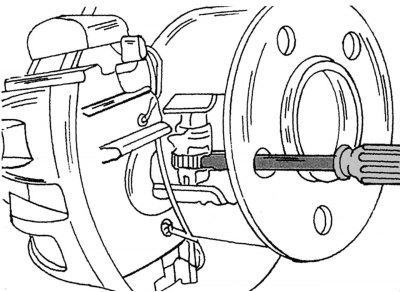
Pic. 288. Adjustment of the parking brake drive mechanism
- before removing the disc, press the parking brake pads. To do this, insert a screwdriver as shown in fig. 288, through the hole in the hub and remove the adjusting gear of the pads. This is necessary so that the pads move away from the drum and do not interfere with removal. Knock down the disc with a rubber or plastic hammer;
- read the following section before reinserting the disc. Tighten the disc mounting bolt to a torque of 20 Nm, the caliper mounting bolts to a torque of 105–115 Nm. After tightening, check again that the brake hose is properly positioned.
The parking brake drive mechanism must be adjusted as follows:
- insert screwdriver (pic. 288) and turn the parking brake pad adjuster;
- turn the gear until the disk stops rotating;
- from this position, rearrange the gear 5 teeth back.