
Cars BMW Cars Volkswagen Cars Chevrolet Cars Land Rover Cars Lada Cars Honda Cars Peugeot
English Русский
Български
Беларускі
Український
Српски
Hrvatski
Română
Polski
Slovenský
Magyar
Bookmark News and articles Sitemap Feedback Site search
MercedesMan.ru


A-Class C-Class E-Class G-Class M-Class S-Class Others
Sprinter (1995-2000, diesel) Vito 1 (1996-2003) Vito 2 (2003-2014, diesel) Vario 814D (1996-2003, diesel)
  • Main
  • Mercedes-Benz
  • Vito 2 (2003-2014)
  • General information
  • User manual
  • Removal the spare wheel

Removal the spare wheel (Mercedes-Benz Vito W639)

0
Contents: Removal the spare wheel secured…↡ Lowering the car ↡ Mounting the spare tire in the spare…↡ Mounting the spare tire in the…↡
The spare wheel is mounted under the rear of the car.

Open the trunk lid/door.
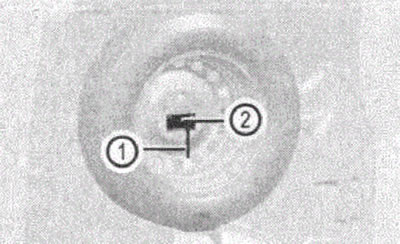
Figure 84

Figure 84
1. Lever
2. Profile


Using a lever, unscrew 1 mounting bolt in the center of the wheel.

Remove the mounting bolt and profile 2.

Remove the wheel.

Removal the spare wheel secured under the rear of the vehicle


Open the trunk lid/door.

Remove the red plug.
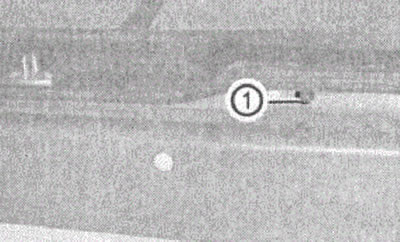
Figure 85

Figure 85
1. Hole


Install the adapter through hole 1 into the winch hole.

Place the wheel wrench onto the adapter. Turn the wrench counterclockwise until it stops.
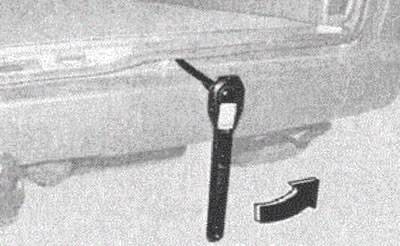
Figure 86

Figure 86


The spare wheel is covered by a cover with four handles.
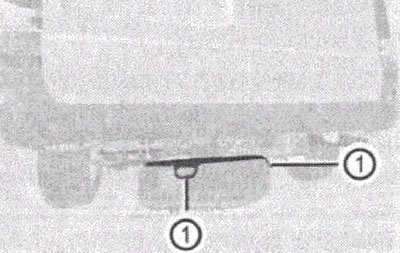
Figure 87

Figure 87

1. Pen


Pull the spare tire out from under the vehicle using one of the handles 1.

Press the holder console down from the wheel rim holder.

- Then remove the spare wheel from the wheel rim holder.

Lifting a car

- Prevent the vehicle from rolling away using wheel chocks or the like.

On a flat road

- Place chocks under the diagonally positioned wheels at the front and rear.

On the climbs

- Place chocks under both wheels of the other axle.

- Remove the vehicle tool kit and vehicle jack from the additional storage compartment in the luggage compartment.
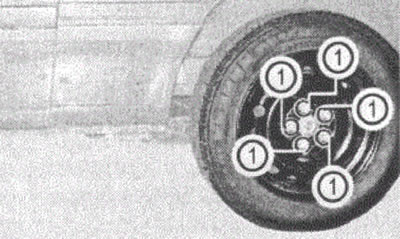
Figure 88

Figure 88
1. Wheel mounting bolts


The vehicle jacking points are located behind the front wheel wells and in front of the rear wheel wells.
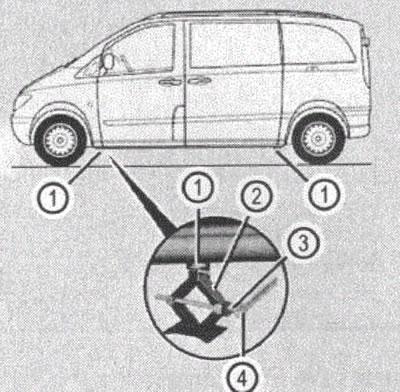


Figure 89

Figure 89
1. Reception point
2. Car jack
3. Adapter
4. Ratchet wrench


- Remove the vehicle jack 2, adapter 3 and ratchet wrench 4 from the on-board tool kit in the left additional luggage compartment of the luggage compartment

Information copied from the website (MERCEDESMAN.ru)

- Place the car jack 2 on the corresponding receiving point 1.

When lifting a vehicle, the car jack must be positioned directly under the receiving point, even if the road is on a slope.

Risk of injury!!!

The car jack plate should cover the car jack receiving point.

Otherwise, the vehicle may tip over from the jack. As a result, people may be injured and the vehicle may be damaged.

- Install the adapter with a ratchet wrench into the car jack.

The inscription AUF (UP) should be visible.

- Turn the ratchet wrench in the direction of the AUF (UP) marking until the wheel is lifted off the ground. In this case, the car jack

can be moved to one of the side support surfaces,

- Unscrew the wheel mounting bolts.

- Do not place wheel bolts on sand or mud. Otherwise, the threads of the bolts or hubs may be damaged.

-Remove the wheel.

Risk of accident!!!


Replace wheel mounting bolts that are damaged or show signs of rust.

Do not lubricate wheel mounting bolts with oil or grease.

If the threads in the wheel hub are damaged, do not continue driving under any circumstances. Contact a Mercedes-Benz service station or the 24-hour service "Service 24 h".

Refer maintenance work to qualified personnel only.

- Clean the mating surfaces of the forest and the wheel hub.

- Screw in the centering pin

- Place the wheel on the centering pin and press it down.
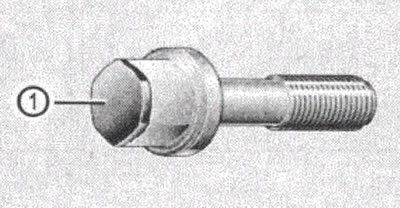
Figure 90

Figure 90
1. Fastening bolt for light alloy wheels and for steel wheels


- Screw in the wheel mounting bolts and tighten them slightly.

Risk of accident!!!

Do not fully tighten the wheel bolts when the vehicle is raised, otherwise the vehicle may tip over.

- Unscrew the centering pin and screw in the last wheel mounting bolt.

Lowering the car


- Install the adapter with a ratchet wrench into the car jack.

- The inscription AB (DOWN) must be visible.

- Lower the car.

- Put the jack aside.
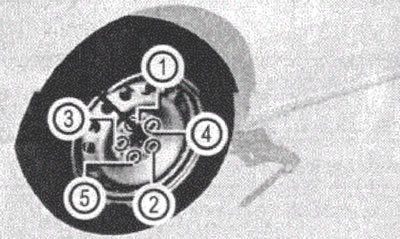
Figure 91

Figure 91
1-5 wheel mounting bolts


Tighten all wheel mounting bolts evenly in the specified sequence from 1 to 5. The tightening torque should be 130 Nm±10 Nm, all wheel mounting bolts in the specified sequence from 1 to 5.

The tightening torque should be 130 Nm ±10 Nm.

Mounting the spare tire in the spare tire holder at the rear of the vehicle


- Install the wheel on the console 2 on the wheel arch 1.

- Install the mounting bolt and tighten it securely using lever 3.
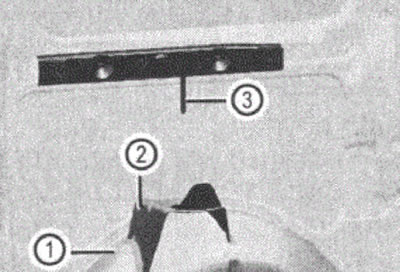
Figure 92

Figure 92
1. Wheel arch
2. Console
3. Lever


Mounting the spare tire in the holder under the rear of the car


- Place the spare tire in the wheel rim holder.

- Press the wheel cover until it snaps into place on the wheel rim holder.

- Insert the cable holder through the hole in the wheel rim holder.

- Pull the cable slightly until both protrusions are locked into the holder.

- Turn the key clockwise.

This way the spare wheel will be pulled under the car.

Tighten the spare wheel using a wrench, minimum tightening torque is 60 Nm.
This article is available at: russian, bulgarian, belarusian, ukrainian, serbian, croatian, romanian, polish, slovak, hungarian
The article has been verified: Lukyanov Nikita Ilyich
Share with friends:
◀ Previous
Mercedes Vito 2 / User manual
Next ▶

Replacing lamps
Manual disengagement of the gearbox lock when parked
Lift and slide sunroof/panoramic sliding roof
Emergency opening and closing
Self Help — Where to Look for What?
Electrical fuses
Front towing eye
Rear towing eye
Tires and wheels
Technical characteristics of the car
More similar articles for repairing other models

☛ Adjusting the position of the steering wheel Mercedes W168 (1997-2004)
☛ Checking the steering wheel free play Mercedes W202 (1993-2000)
☛ Removal and installation the rear wheel drive shaft Mercedes W123 (1976-1985)
☛ Removal and installation the spare wheel holder Mercedes W463 (1999-2019)
☛ Removal and installation the outer spare wheel carrier Mercedes W163 (1997-2005)
☛ Purchase of spare parts Mercedes W140 (1991-1998)
Link in different formats to this article
Comments and feedback from visitors
No comments yet


How much will 47 + 18 ?


Vario 814D (1996-2003, diesel) 
  • General information
  • Maintenance
  • Power unit
  • Engines 602.984/985
  • Engines 904.908/914/923/936
  • Transmission
  • Clutch
  • Manual gearbox 711.613
  • Manual gearbox 710.64/66
  • Manual gearbox 715.051
  • Automatic gearbox 723.345
  • Power take-off box
  • Chassis
  • Front suspension
  • Rear suspension
  • Steering
  • Brake system
  • Body and electrical equipment
  • Interior (internal elements)
  • Exterior (external elements)
  • Heater and air conditioner
  • Electrical diagrams
Vito 2 (2003-2014, diesel) 
  • General information
  • User manual
  • Maintenance
  • Diesel engine OM646
  • Engine repair
  • Cooling and lubrication system
  • Power and exhaust system
  • Transmission
  • Clutch
  • Car gearbox
  • Chassis
  • Front suspension
  • Rear suspension
  • Steering
  • Brake system
  • Body
  • Body elements
  • Electrical equipment
  • Equipment and devices
  • Security systems
  • Electrical circuits
Vito 1 (1996-2003) 
  • General information
  • User manual
  • Maintenance
  • Petrol engines 2.0 l
  • Engine repair
  • Lubrication system
  • Cooling system
  • Power and control system
  • Petrol engines 2.8 l
  • Engine repair
  • Lubrication system
  • Cooling system
  • Power and control system
  • Diesel engines 2.3 l
  • Engine repair
  • Cooling system
  • Lubrication system
  • Turbocharging and recycling
  • Power and control system
  • Diesel engines 2.2 l
  • Engine repair
  • Cooling system
  • Lubrication system
  • Turbocharging and recycling
  • Power and control system
  • Transmission
  • Clutch
  • Mechanical gearbox
  • Automatic gearbox
  • Chassis
  • Front suspension and wheels
  • Rear suspension
  • Steering
  • Brake system
  • Body
  • Exterior (external elements)
  • Interior (internal elements)
  • Electrical equipment
  • Equipment and devices
  • Heater and air conditioner
  • Electrical circuits
Sprinter (1995-2000, diesel) 
  • General information
  • Introduction to the guide
  • Maintenance
  • Power unit
  • Engine repair
  • Lubrication system
  • Cooling system
  • Power and exhaust system
  • Transmission
  • Clutch
  • Mechanical gearbox
  • Automatic gearbox
  • Front axle
  • Rear axle and cardan
  • Chassis
  • Car suspension
  • Steering
  • Brake system
  • Tires and wheels
  • Electrical equipment
  • Equipment and devices
  • Headlights and lighting
  • Power devices
  • Electrical circuits
 
MercedesMan.ru © 2017–2026 · Mobile version · Read about Mercedes · Sitemap: EN BG BY UA RS HR RO PL SK HU · Feedback · Site search · Bookmark A-Class (W168) · C-Class (W201) · C-Class (W202) · C-Class (W203) · E-Class (W123) · E-Class (W124) · E-Class (W210) · G-Class (W463) · M-Class (W163) · S-Class (W116, petrol) · S-Class (W126, petrol) · S-Class (W140) · S-Class (W220) · Sprinter · Vito 1 · Vito 2 · Vario 814D ·
 
We only use cookies without which some of the site's features may not be available.