
Sequence of work
1. Remove the protective cap from the wheel.
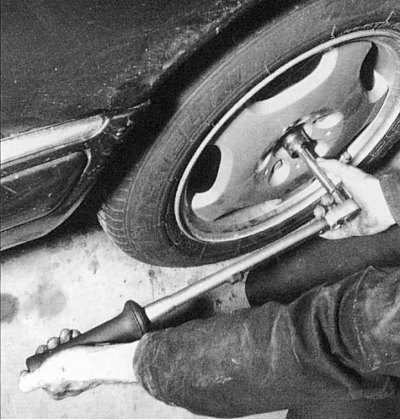
Pic. 6.20. Loosen the 12-point hub nut (SW 30) in the center of the wheel
2. Loosen the 12-point hub nut (SW 30) in the center of the wheel (pic. 6.20). Since the hub nut is tightened to a high torque, it is recommended to have an assistant hold down the brake pedal when loosening and tightening it.
3. Remove the left back part of system of release of the fulfilled gases.
4. Use a thin screwdriver to remove dirt from the socket head bolts on the differential and remove them using a special tool (Hazet-Nr. XZN 990 Ig-10).
5. Slide the unscrewed drive shaft and push it up off the flange. It is easier to do this when the shaft is in a horizontal position.
6. Pull the shaft off the flange from the outside, possibly with light blows. If the shaft is too tight in the flange, a puller should be used.
7. If possible, do not install the car on the wheel with the drive shaft removed, since the lack of axial pressure may damage the wheel bearing housing.
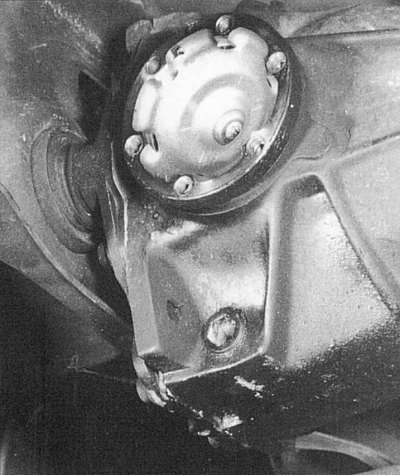
Pic. 6.21. Before installing the rear wheel drive shaft, clean the connecting flanges of the drive shaft and differential
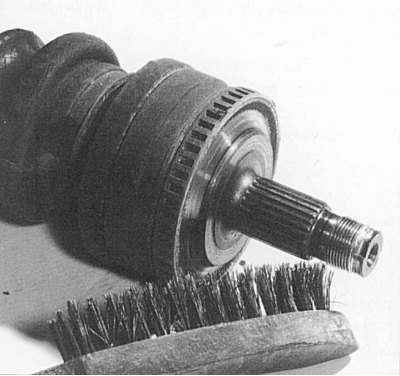
Pic. 6.22. Before installing, clean the spline connection with a wire brush and apply a little lubricant
8. Before installation, clean the contact surface of the shaft on the inside of the connecting flange (pic. 6.21). If necessary, remove the rest of the locking agent from the splines of the hub (pic. 6.22).
9. Install new bolts with an internal polygonal slot together with washers and tighten: with a thread diameter of 10 mm - a torque of 70 Nm, with a diameter of 12 mm - a torque of 100 Nm.
10. Lower the vehicle and install a new 12-point nut. For a sedan, the tightening torque of the nut is 220 N·m, for a station wagon (T-models) - 320 Nm.
11. Lock the nut by bending the collars into the grooves of the drive shaft.