
Valve timing
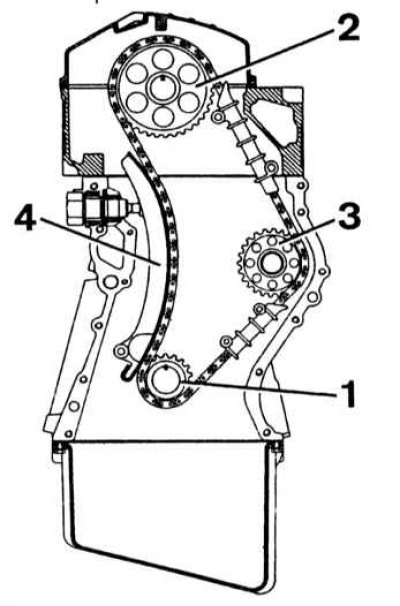
1 - crankshaft sprocket; 2 - camshaft sprocket; 3 - an asterisk of an intermediate shaft; 4 - chain tensioner shoe
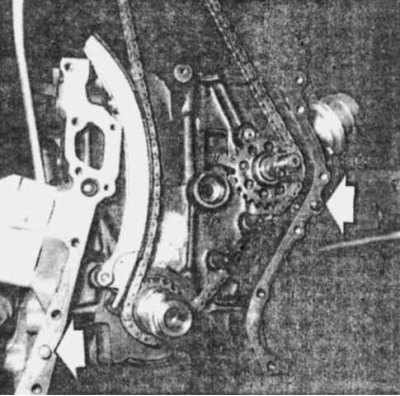
Details of the gas distribution mechanism of 4-cylinder engines
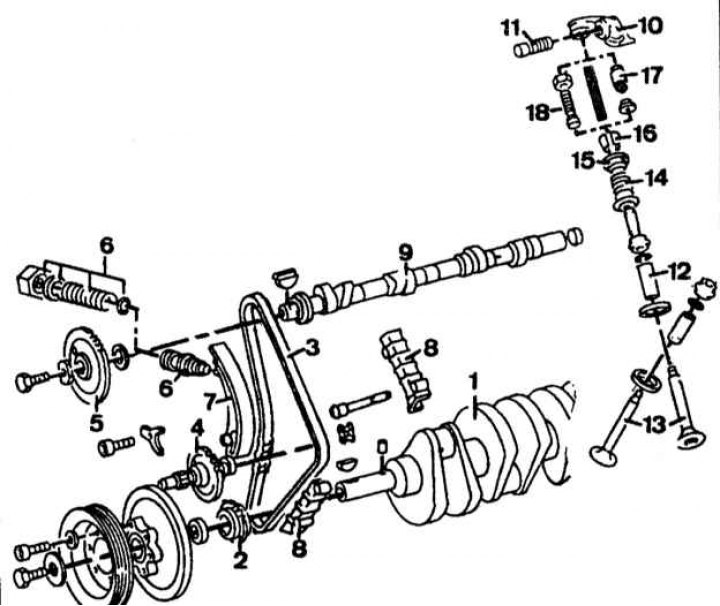
1 - crankshaft; 2 - crankshaft sprocket; 3 - distribution chain; 4 - intermediate shaft for driving the fuel pump and the ignition distribution sensor; 5 - camshaft sprocket; 6 - chain tensioner; 7 - shoe tensioner; 8 - chain dampers; 9 - camshaft; 10 - rocker; 11 - axis of the rocker; 12 - valve guide sleeve; 13 - valves; 14 - spring; 15 - spring plate; 16 - crackers; 17 - pusher; 18 - adjusting bolt
Section of the pulley and crankshaft sprocket
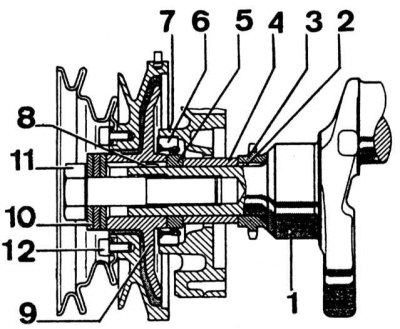
1 - crankshaft; 2 - dowel; 3 - crankshaft sprocket; 4 - spacer drive oil pump; 5 - stuffing box holder; 6 - stuffing box; 7 - camshaft drive cover; 7 - camshaft drive cover; 8 - key; 9 - pulley hub; 10 - disc washer; 11 - fastening bolt; 12 - a bolt of fastening of a pulley to a nave
Camshaft Drive Chain Replacement
The chain can be replaced from above the engine. However, when replacing the chain, it is recommended to remove the timing cover, check the condition of the dampers, shoe and chain tensioner and sprockets.
Removing the chain
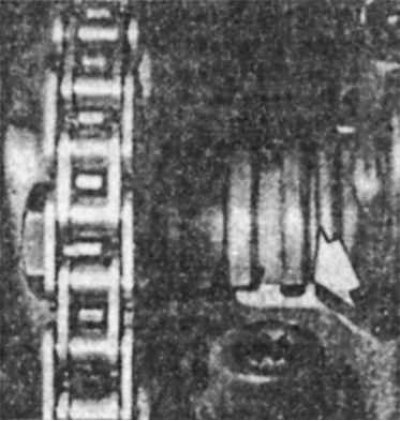
Timing marks on the camshaft. The arrow shows the alignment of the mark with the plane of the cylinder head
1. Place the hood in a vertical position.
2. Drain the engine oil.
3. Drain the coolant.
4. Disconnect the wire «masses» from the battery.
5. Remove the air filter.
6. Remove the radiator.
7. Remove the fan.
8. Depending on the year of manufacture of the vehicle, loosen and remove the alternator drive belt or multi-ribbed accessory drive belt.
9. Remove the water pump.
10. Remove auxiliary units from the camshaft drive cover (A/C compressor, power steering pump, alternator) and hang them in the engine compartment, being careful not to disconnect the hoses.
11. Remove the TDC sensor.
12. Remove the engine mudguard.
13. Turn away bolts of fastening of the stabilizer of cross-section stability to a body.
14. Depending on the configuration, remove the front buffer.
15. Disconnect an arm of fastening of a reception pipe of mufflers to a transmission and disconnect a pipe and an exhaust manifold.
16. Turn away bolts of fastening of a support of a transmission to a cross beam.
17. Turn away bolts of fastening of a crankcase of the engine.
18. Turn away bolts of fastening of an arm of the engine to a cross beam.
19. Hoist the engine with the hoist chain and lift it up to remove the crankcase.
20. Remove the bracket for the oil receiver and oil pickup pipe.
21. Remove the cylinder head cover.
22. Turn away four bolts of fastening of a cover of a drive of a camshaft to a head of cylinders.
23. Remove the ignition distributor.
24. Push dowel pins into cylinder block.
25. Turn away bolts of fastening of a cover to the block of cylinders, lower a cover for separation of a laying of a head of cylinders (take care not to damage the gasket) and take it off.
26. Turn the crankshaft until the piston of the 1st cylinder reaches TDC, which corresponds to the combustion phase (mark on front camshaft bearing).
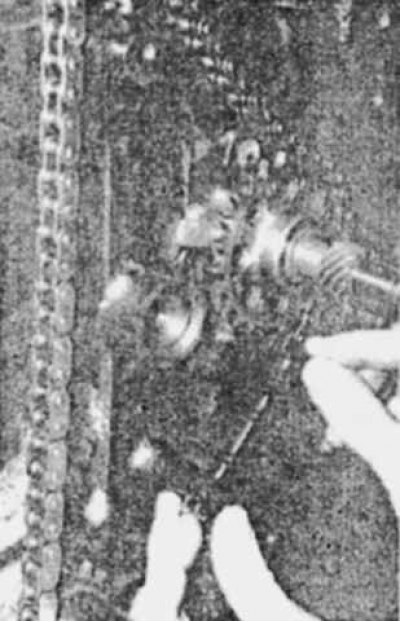
27. Remove the pusher of the chain tensioner.
28. Remove dampers, shoe and chain tensioner.
29. Remove one of the chain links by cutting its axles with an abrasive wheel.
30. Remove the chain from the sprockets.
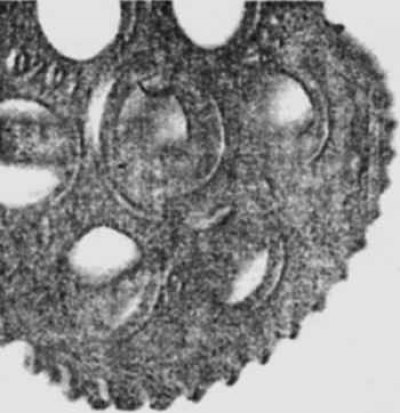
31. Check the condition of the sprockets, dampers, chain tensioner.
Chain installation
Installing the chain guide
Installation of an offset key on the camshaft sprocket to compensate for chain exhaust
The location of the centering pins of the camshaft drive cover on the cylinder block
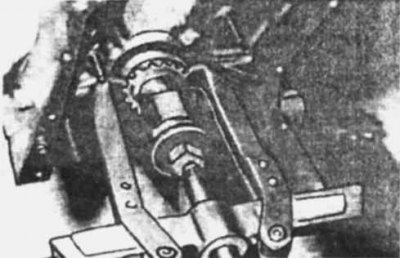
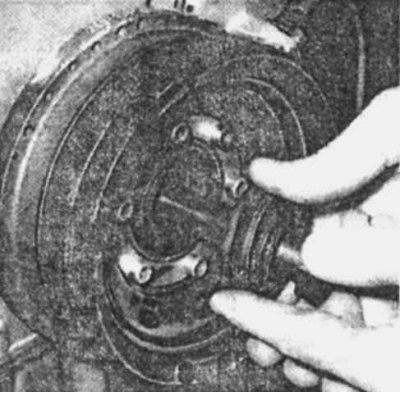
Removing the camshaft drive sprocket
When installing the crankshaft pulley, guide the convex part of the three cup washers towards the pulley
1. Check the position of the piston of the 1st cylinder at TDC and the position of the camshaft.
2. Install a new chain on the sprockets, with the quick-connecting link safety washers pointing towards the camshaft drive cover.
3. Install the chain guides, shoe and pressure piston of the chain tensioner.
Slight misalignment of the camshaft relative to the crankshaft can be corrected by installing an offset key on the camshaft drive sprocket.
4. Check up a condition of the oil pump and replace epiploons.
5. Cut the paper gasket of the camshaft drive cover at the break points.
6. Lubricate the gasket with special glue and put it in place.
7. Pull out the centering pins from the cylinder block.
8. Establish a cover of a drive of a camshaft, screw bolts, paying attention to their length and without allowing damage of a laying of a head of cylinders.
9. Gradually tighten the cap screws.
10. Install the crankshaft oil seal (when replacing the oil seal, replace the clip as well).
11. Install the crankshaft pulley and tighten the bolts to the specified torque.
12. Attach the bracket for the oil receiver and oil pickup pipe to the crankshaft main bearing.
13. Install a new crankcase gasket.
14. Install the crankcase.
15. Install the engine on supports, tighten the bolts of the engine and gearbox mounting brackets.
16. Connect the exhaust pipe of the mufflers to the exhaust manifold, fix the exhaust pipe bracket to the gearbox.
17. Install buffer.
18. Install the anti-roll bar.
19. Install the engine shield.
20. Install the TDC sensor.
21. Install the A/C compressor, power steering pump and alternator.
22. Install the water pump with a new gasket.
23. Depending on the year of manufacture of the car, install the alternator drive belt or accessory drive belt and adjust its tension.
24. Install fan and heatsink.
25. Connect the hoses and fill in the coolant.
26. Remove air from the cooling system.
27. Turn the crankshaft two turns to bring the piston of the 1st cylinder to TDC.
28. Make sure that the mark on the camshaft is opposite the plane of the cylinder head.
29. Establish a cover of a head of cylinders and fill in oil.
30. Install the ignition distributor.
31. Check engine idle, ignition timing, and check for oil and coolant leaks.