
Warning: Disc brake pads must be changed simultaneously on both front wheels; never replace the pads on only one wheel, when braking in this case, unpredictable consequences may occur. The dust generated by the wear of the pads may contain asbestos, which is a health hazard. Never blow it off with compressed air and do not inhale even an ounce of this dust. Do not use gasoline-based solvents to clean brake parts. Use only brake cleaner or ethyl alcohol.
Note: New caliper guide pin bolts will be required during installation.
1. Apply the parking brake, then jack up the front of the vehicle and support it on jack stands (see "Lifting the vehicle and placing it on stands"). Remove the front wheels.
2. Loosen the clamps and remove the brake pad wear sensor connector cover from the hole in the caliper.
3. Disconnect the connector from the caliper body (see fig. 4.3).
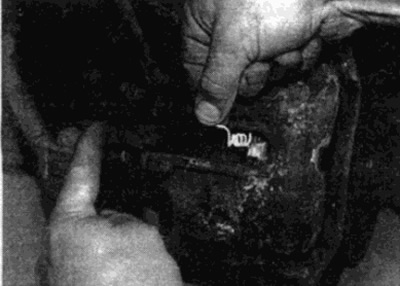
Pic. 4.3. Unfasten the cover and disconnect the pad wear sensor connector
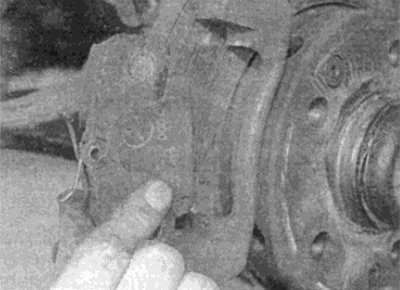
4. On pre-1985 models, remove the top pin and rotate the caliper down.
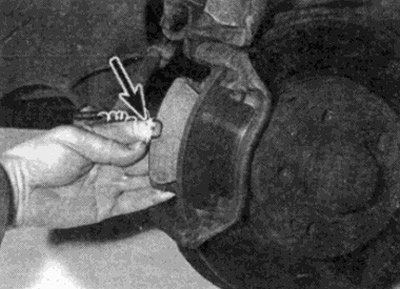
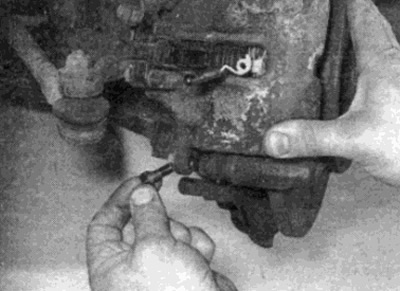
5. On post 1985 models, loosen and remove the lower caliper pin bolt using a thin open end wrench to keep the pin from turning (see fig. 4.5, a, b). Dispose of the bolt - installation requires a new one.
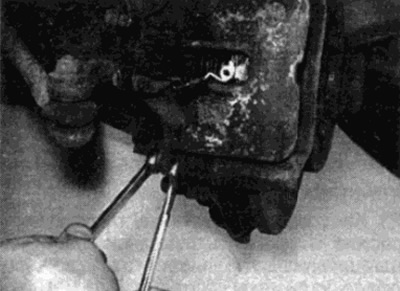
Pic. 4.5, a. Loosen the bottom pin bolt while holding the pin with an open end wrench...
Pic. 4.5b....then remove it from the caliper
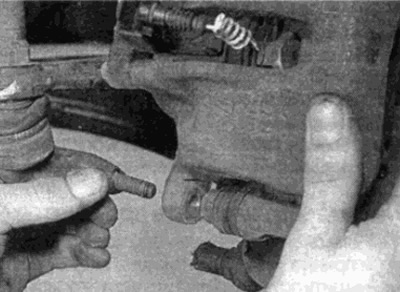
6. Pivot the caliper forward away from the pads and support bracket. Remove heat shield from cylinder piston where required.
Pic. 4.6. Rotate the caliper away from the disc and remove the heat shield from the piston
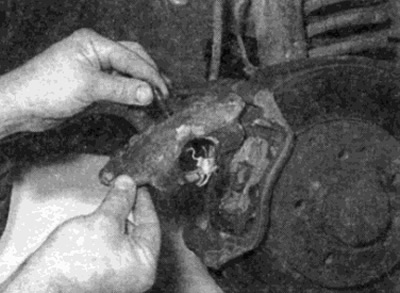
7. Remove the two pads from the support bracket, paying attention to the correct location of the wear sensor (see Figure 4.7, a, b).
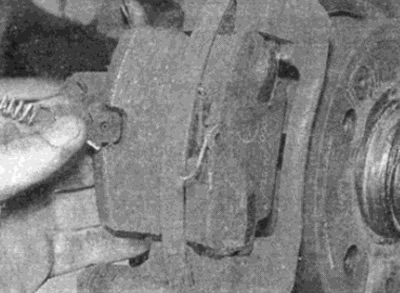
Pic. 4.7, a. Remove the inner...
Pic. 4.7b.... and the outer pad from the caliper bracket
8. Measure the thickness of the friction lining on each shoe. If any pad is worn beyond the acceptable limit, all four pads should be replaced. The pads should also be replaced if they are found to be oiled. If any of the pads are unevenly worn or oily, the cause should be determined before replacement. Check the wear sensors. New pad sets are available from your Mercedes-Benz dealer.
9. If the pads can still be used, thoroughly clean them with a clean, fine-wire brush, paying particular attention to the side and back metal surfaces. Clean the grooves in the pads and collect any large particles or debris. Thoroughly clean the location of the pads in the caliper housing.
10. Before installing the pads, make sure that the guide pins can easily be inserted into the caliper and that the rubber boots of the guide pins are not damaged. Remove all traces of fixative from the finger threads using a tap of the correct size and pitch.
Advice. If the required tap at Weight is not available, thread using an old slotted bolt on the thread.
11. Brush off dust and dirt from the caliper and cylinder, but do not inhale them as this is hazardous to health. Check the cylinder dust covers for damage and for visible signs of fluid leakage, corrosion or damage. If found, the caliper should be repaired - see paragraph 8.
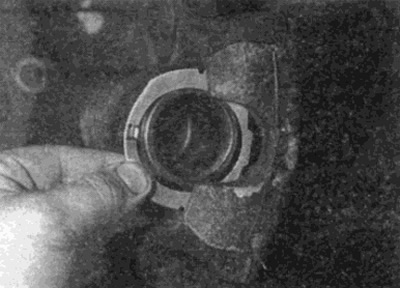
12. When installing new pads, it is necessary to drown the piston of the cylinder to make room for the pads. Use a vise or a wooden object to push the piston in like a lever. If the liquid level in the reserve tank exceeds the mark "MAX", remove some of the fluid from the master cylinder reservoir to prevent overflow when you push the piston in. You can use a syringe or a brake bleeding procedure (see paragraph 2).
Warning: Do not try to suck up the liquid by mouth as it is very poisonous; use the syringe.
13. Apply brake grease to the back of the pads (Mercedes-Benz recommends brake paste part number 001 98910 51); do not apply a lot of paste so that it does not get on the friction linings.
14. Install the pad wear sensor (where it was filmed) and install the pads in the bracket with the friction pads facing the disc. Please note that the pad with wear sensor must be installed from the inside (see fig. 4.14).
Pic. 4.14. When installing, make sure that the pad with the wear indicator (shown by arrow) installed on the inside
15. Install the heat shield on the caliper piston, then rotate the caliper down on top of the pads, passing the wires from the wear sensor through the hole in the caliper (see fig. 4.15).
Pic. 4.15. Rotate the caliper into place by passing the wear sensor connector wire through the hole in the caliper
16. Check that the pressure springs are correctly positioned relative to the caliper body, then press the caliper and insert a new guide pin bolt (see fig. 4.16). Tighten the bolt to the correct torque while holding your finger against turning with an open end wrench.
Pic. 4.16. Insert new guide pin bolt
17. Connect the pad wear sensor connector to the caliper by wrapping the loose wire around the connector. Make sure the connector is properly connected and close the connector cover.
18. Press the brake pedal several times so that the pads are pressed against the brake disc and normal pedal pressure is restored.
19. Repeat the steps on the remaining caliper.
20. Install the wheels, then lower the vehicle to the ground and tighten the wheel bolts to specification.
21. Check fluid level as described in section "Weekly check". Thoroughly check the operation of the brakes before leaving on the road.
Warning: New pads will not brake effectively until they are worn in to the discs. Avoid hard braking as much as possible for the first few hundred kilometers.