
2. Loosen and remove one wheel bolt on each rear wheel, then place wedges under the front wheels and jack up the rear of the vehicle and support it on jack stands (see "Vehicle lifting and jacking up").
3. Locate the parking brake adjuster that is located above the driveshaft on the pivot point where the rear cables connect. With the parking brake lever fully released, unscrew the cable adjuster to allow maximum cable play.
4. Starting with the left rear wheel, position the wheel/rim so that the free bolt hole is 45°back from vertical. After verifying that the parking brake is fully released, insert a screwdriver through the bolt hole and fully extend the machine brake pads by turning the adjusting ring. Watching through the hole, turn the ring up. When the wheel can no longer be turned, turn the adjusting ring back 5-6 teeth (notches) to make the wheel turn easily (see fig. 13.4, a. b).
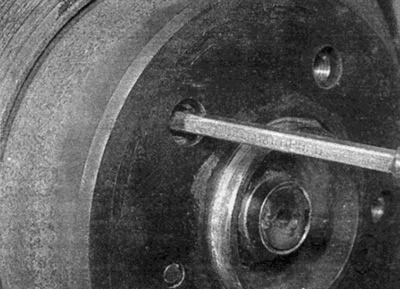
Pic. 13.4, a. Position the wheel bolt hole as described in the text and adjust the parking brake pads...
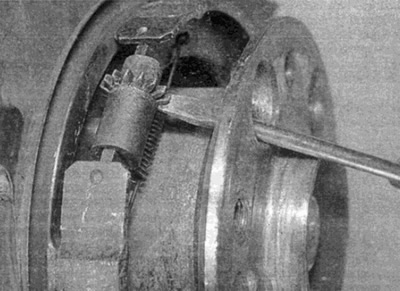
Pic. 13.4, b.... by turning the adjusting ring (shown by arrow) with a flat blade screwdriver (shown with disc removed)
5. Similarly, adjust the parking brake pads on the right wheel, keeping in mind that the adjusting ring must be turned down to spread the pads apart.
6. When both pairs of shoes are properly adjusted, firmly tighten the parking brake lever several times to install the brake cable and parts.
7. Adjust the parking brake cable with the cable adjuster until the brake is fully applied after 7 clicks of the ratchet.
8. When the cable is adjusted, lower the vehicle to the ground and install the wheel bolts. tighten them to the required torque. Thoroughly check the operation of the parking brake before leaving on the road.