
Removing
1. Remove the rear brake disc as described in paragraph 7, recording the correct location of all parts (see fig. 14.1).
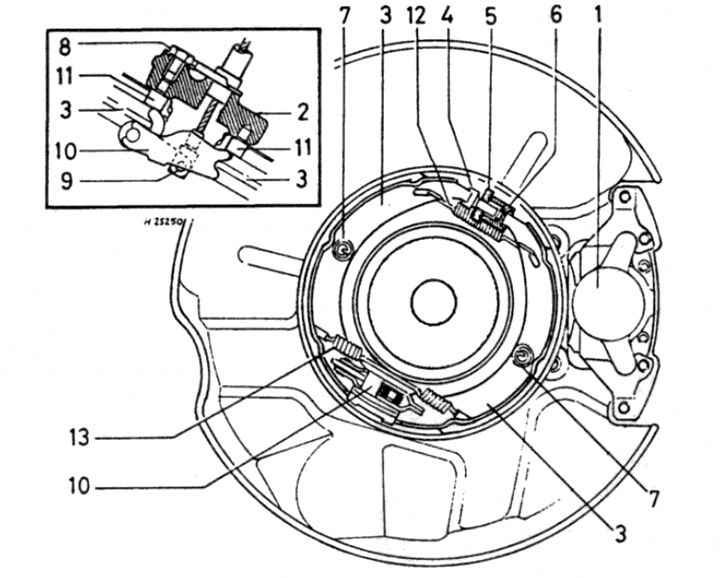
Pic. 14.1. Parking brake parts (left side shown)
1 brake cylinder
2 Rear hub holder
3 Parking brake pads
4 Regulator pin
5 Knurled adjusting ring
6 Regulator body
7 Mounting spring
8 Cable bolt
9 Rope end
11 Set screws
12 Upper return spring
13 Lower return spring
2. Using pliers, compress the shoe retaining springs, then rotate them 90°and remove them from the bottom brake plate. The springs are accessible through holes in the hub flange (see fig. 14.2).
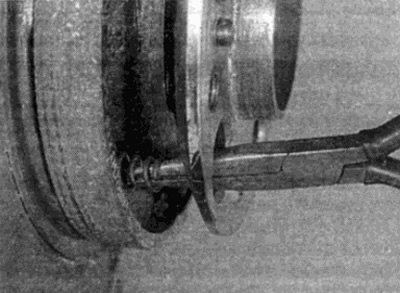
Pic. 14.2. Remove mounting springs...
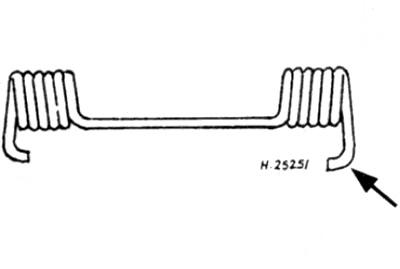
3. Carefully unhook and remove the lower return spring of the parking brake shoes, remembering how it is installed - it is not symmetrical (see fig. 14.3).
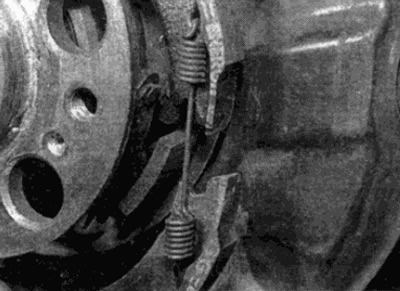
Pic. 14.3....then unhook the lower return spring, paying attention to which cut it is installed...
4. Separate the lower ends of the pads from the expansion mechanism and remove the assembly from the vehicle (see fig. 14.4).
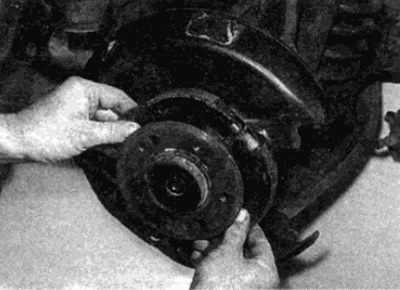
Pic. 14.4....and remove the parking brake shoe assembly from the vehicle
5. With the assembly on the workbench, pay attention to the correct location of each part, then unhook the upper return spring and separate the shoe adjuster.
6. Inspect the pads. If wear or contamination is found, replace. It is also recommended to replace the tension springs. Mercedes-Benz does not set a wear limit for parking brake pads, but pads with a friction material thickness of about 1.5 mm must be replaced.
7. If the pads will change, clean and check the condition of the adjusting and expansion mechanisms of the pads. If wear or damage is found, replace them. If all goes well, apply a fresh coat of brake paste to the adjuster threads and sliding surfaces of the expander (Mercedes-Benz recommends Molykote Paste U or G-Rapid). Do not allow the paste to get on the friction material of the pads.
Installation
8. Before installation, clean the base, apply a thin layer of high temperature brake paste (see point 7) or "anti-tack" composition on all surfaces of the base that touch the brake pads. Do not allow paste to get on friction linings.
9. Assemble the shoes and adjustment mechanism, taking into account that the regulator must be installed with a knurled adjustment ring from the front. Pull the adjuster out completely and install the top return spring.
10. Replace the assembly and align the bottom ends of each shoe with the expansion mechanism.
11. Install the lower return spring so that the longer hook is attached to the upper shoe (see fig. 14.11).
Pic. 14.11. Longer lower recoil hook (shown by arrow) must be installed on the upper shoe of the parking brake
12. Make sure that the pads are correctly positioned and secure them with the retaining springs.
13. Check that all parts are correctly installed and center the parking brake pads.
14. Install the brake disc as described in paragraph 17. Before installing the wheel, adjust the parking brake as described in paragraph 13.