



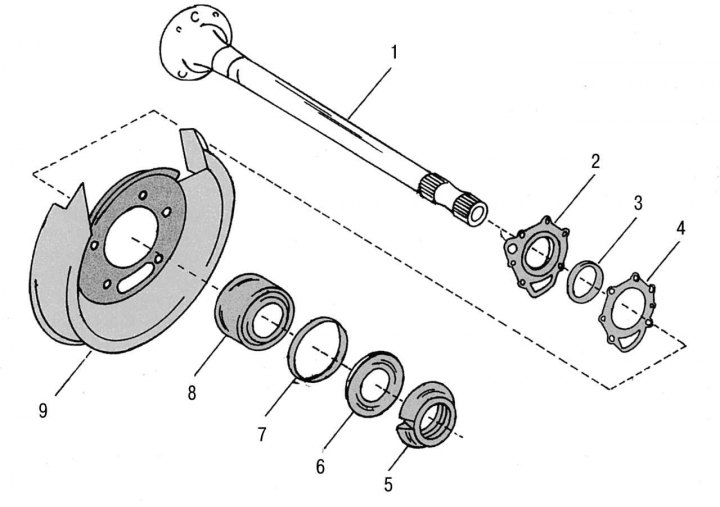
Figure 231. Axle shaft parts: 1 — axle shaft; 2 — bearing cap; 3 - cuff (always subject to replacement); 4 - gasket (always subject to replacement); 5 - slotted nut; 6 - lock washer; 7 - square section sealing ring; 8 — bearing; 9 - protective cover
Since a slotted nut is used for fastening, a special key that provides a significant tightening torque is required to replace the bearing. You should be aware that a loose nut inside the axle can cause serious damage. To remove the bearing you will also need a puller. Figure 231 shows the axle shaft in a disassembled state. The axle shaft must be disassembled as follows:
- clamp the axle shaft in a vice. Unlock both nut splines by bending back the edges of the lock washer. To better hold the axle shaft in a vice, screw two wheel bolts into it and clamp it together with them;
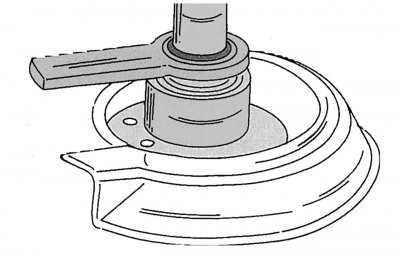
Figure 232. Unscrewing the spline nut using a special key
- unscrew the slotted nut as shown in the picture 232, subject to the following conditions: the left nut has a left-hand thread, the right nut has a right-hand thread. A left-hand threaded nut can be identified by the groove on the outside;
- remove the lock washer from the axle shaft;
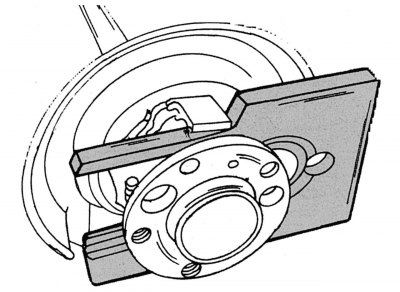
Figure 233. Installing a special removable plate for pressing out the shaft
- use a special puller to remove the bearing and bearing cap with the seal from the axle shaft. If difficulties arise, you should contact a service station, since in this case there is no suitable support point for a conventional puller. If there is a press, a special removable plate (figure 233 shows a plate used at a service station) insert between the axle flange and the bearing cap, compress its ends with a press and press out the shaft;
- after removing the bearing cap, use a suitable drift to remove the seal;
- all parts should be thoroughly washed and inspected.
During assembly, the following operations must be performed:
- apply universal grease to the working edges of the cuff and insert it from the outside into the bearing cover. The outer edge of the seal must be flush. Use a mandrel for installation;
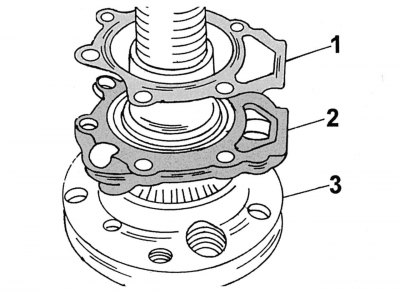
Figure 234. Installing the bearing cap (1) and gasket (2) on the axle shaft (3)
- install the bearing cap on the axle shaft and place the gasket on top (figure 234). Then install the protective cover on the shaft;
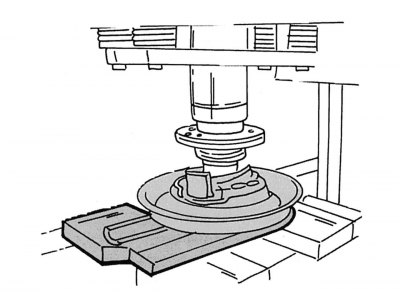
Figure 235. Pressing the bearing onto the axle shaft
- press the bearing onto the axle shaft. To do this, place the inner bearing ring underneath and press it on from the outside of the shaft (flange). The pressing process is shown in the figure 235. To make work easier, the bearing can be heated to 80°C. Do not damage the bearing;
- allow the bearing to cool and apply a sufficient amount of grease to the rollers;
- press the square section sealing ring onto the bearing;
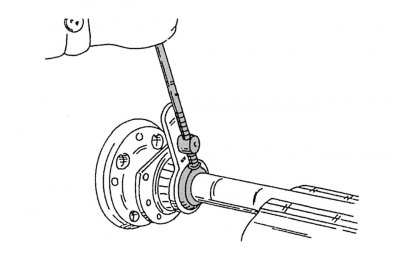
Figure 236. Tightening the axle bearing mounting nut
Original can be found on the website (MercedesMan.ru)
- install a new lock washer (with the flat side facing the slotted nut) and tighten the nut according to the specified requirements: install the nut with the groove on the required side. Install as shown in the picture 236 key and tighten the nut with a torque of 300-350 N·m. If the necessary tool is not available, the nut should be tightened at a service station;
- to secure the nut, lock its splines by bending the edges of the lock washer. This is necessary to prevent the nut from loosening spontaneously.