
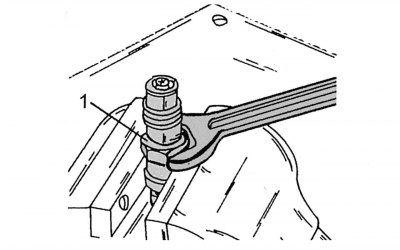
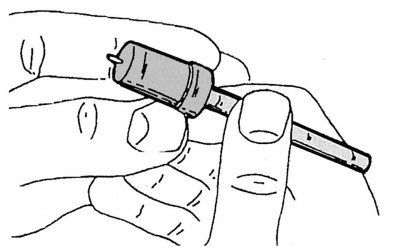
Pic. 158. Dismantling the nozzle
- clamp the injector in a vise so as not to damage the fittings of the fuel lines, and unscrew the nut 1 (pic. 158);
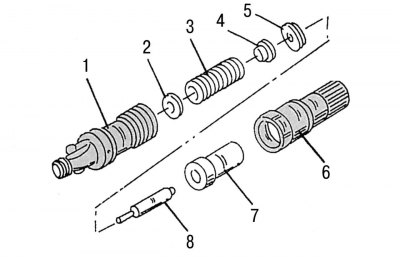
Pic. 159. Injector device: 1 - nozzle body; 2 - steel thrust washer; 3 - spring; 4 - push pin; 5 - intermediate washer; 6 - nozzle clip; 7 - atomizer; 8 - nozzle needle
- remove the nozzle body with a needle, pressure pin, spring and steel washer from the holder. Details of the nozzle are shown in fig. 159;
- immerse all parts in diesel fuel to dissolve deposits. If necessary, carefully clean the parts with a brush. Make sure that the hairs from the brush do not remain on the parts of the nozzle;
- make sure not to confuse the parts of different nozzles - they must not be dismantled.
Nozzle cleaning
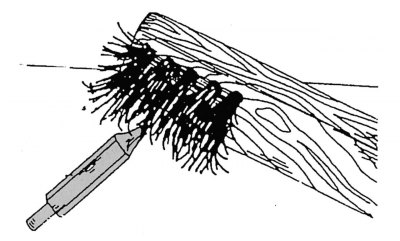
Pic. 160. Cleaning the nozzle needle with a brass brush
Under no circumstances should sandpaper, a scraper or other similar tools be used to clean the nozzles. You can use hardwood sticks, gasoline or diesel fuel. The nozzle needle must only be handled by the pressure pin, as its contact surface can corrode from contact with wet fingers. The surfaces on the outside of the nozzle body can be cleaned with a brass brush, and the needle head can be cleaned in the same way, as shown in fig. 160.
Pic. 161. Cleaning the needle body from the inside with a scraper for annular recesses
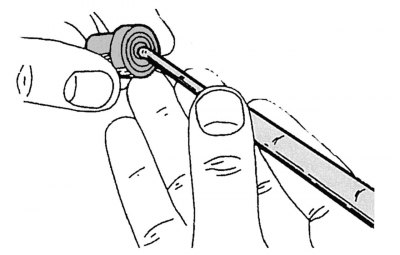
Pic. 162. Cleaning the atomizer with a special tool
Clean the nozzle hole with a wooden stick previously soaked in diesel fuel. Using an annular recess scraper or a wooden stick soaked in diesel fuel, clean the inside of the injector body (pic. 161). Gently clean the needle seat inside the body with a cleaning needle, and the atomizer with a special tool, moving from the inside to the outside (pic. 162).
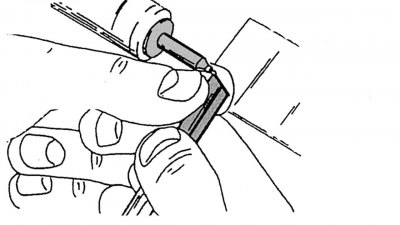
Pic. 163. Cleaning the nozzle needle with a hardwood stick
If the needle is covered with soot, it should be clamped by the pin into the chuck of a lathe or electric drill and cleaned with a wooden block with a sharp edge, previously moistened with diesel fuel (pic. 163). After cleaning a used nozzle, visually inspect for damage to the needle seat surface, body, and atomizer. Damaged nozzles should be replaced.
After an external examination, you should check the ease of movement of the needle. Place the nozzle body and needle separately in filtered diesel fuel, then insert the needle into the body. Holding the nozzle body vertically, pull out the needle about 1/3 of its length. Under its own weight, it should freely fall back. Then slightly turn the needle clockwise and repeat the test. If the needle does not drop, it and the body must be replaced. The assembly of the nozzle is carried out in the reverse order.
The spray cone, injected fuel volume and injector opening pressure can also be checked with the Bosch EFEP 60H special tester. These works are carried out at service stations using equipment for the repair of diesel engines.
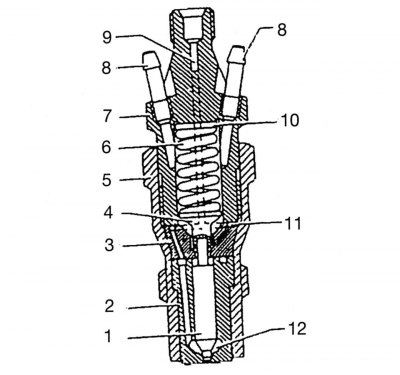
Pic. 164. Nozzle: 1 - needle; 2 - atomizer; 3 - spacer; 4 - push pin; 5 - union nut; 6 - spring; 7 - nozzle body; 8 - fitting of the drain pipeline; 9 - discharge channel; 10 - thrust washer; 11 - feed channel; 12 - high pressure chamber
The nozzles to be installed must match the type of engine. On fig. 164 shows a cross section of the nozzle. The nozzles are marked with the index DN 0 SD 261.