
Menu 2 Audio
Selecting a radio station
Turn on the radio, see separate «Manual».
Press the
Preset radio stations are selected using the
You can enter new radio stations into memory only with the help of a radio receiver, see a separate «Manual».
You can control the radio in the usual way.
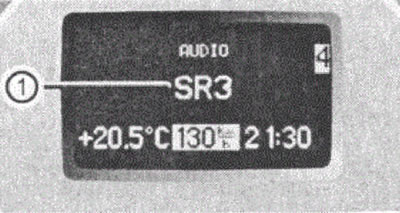
Pic. 34 1. Radio station
CD player control
Turn on the radio and select the CD player (see separate «Manual*).
Press the

Pic. 35
1. Actual CD (for CD changer)
2. Actual title
Press the
Menu 3 Navigation system
How to activate tracking to the destination, read in a separate «Operation manual» for COMMAND system or for Audio 30 APS.
Menu 4 Fault memory
In the Fehlerspeicher menu (fault memory) you can call up a list of faults that have occurred.
The indication on the display depends on whether a malfunction has occurred or not.
Attention: the control system registers faults and warnings only of certain systems. Therefore, make sure that your car is in good condition.
Press the
In the absence of faults
If there are no faults, the message KEINE STORUNGEN is displayed (no faults).
When a malfunction occurs
When a fault occurs, the display shows the number of faults:
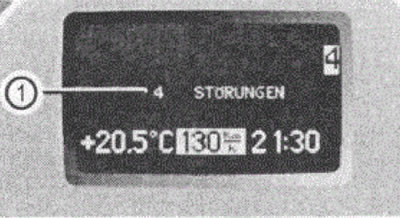
Pic. 36 1. Number of faults
By pressing the
If you turn the ignition key back to the 1 or2, the contents of the fault memory are cleared.
Fault acknowledgment
If the problem occurs while driving or after you have turned the ignition key to the 1 or 2, then to confirm the message that appears on the display, press the buttons
Menu 5 Settings
In the EINSTELLUNGEN·menu (installations) there is a list of submenus with which you can make individual settings for your vehicle.
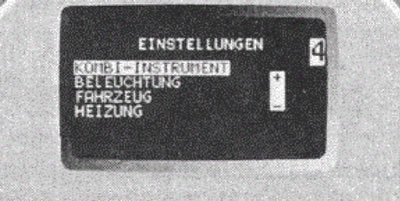
Pic. 37
Submenu in the menu «Settings»
Actions
Click on the
Click on the
Within the submenu, you set the light bar using the
You make the settings yourself using the
The list below shows which settings you can make in the individual submenus.
Submenu «instrument cluster»
In the KOMBI-INSTRUMENT submenu (instrument cluster) you can set the type of display on the instrument cluster. You can make the following settings:
- time setting;
- selection of temperature units;
- choice of speed units;
- choice of language;
- display selection.
Time setting
Actions
Press the
- Press the
Press the
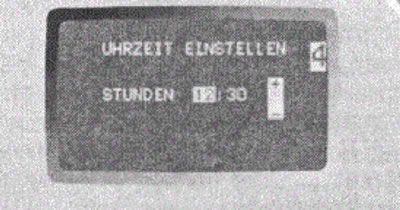
Pic. 38
Actions
Press the
The UHRZEIT EINSTELLEN Minuten menu appears on the display (minute setting).
Press the
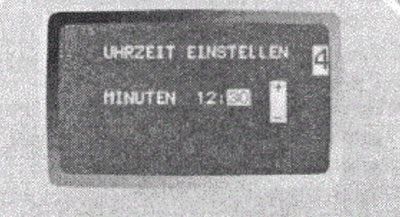
Pic. 39
Temperature unit selection
Actions
Press the
Press the
The light strip is on the operating installation.
Use the
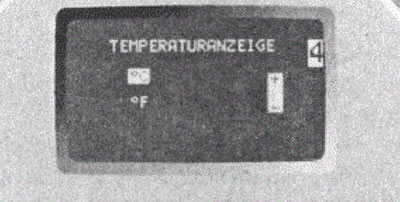
Pic. 40
Language selection
Actions
Press the
The light strip is on the operating installation.
Use the
- German;
- English;
- Italian
- French
- Spanish.
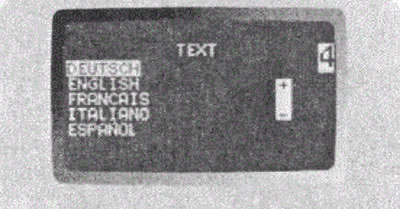
Fig.41
Display selection
With this setting you change the permanent indication in the lower left corner of the display.
Actions
Press the or button until the PTO IN INSTRUMENT submenu is highlighted (instrument cluster).
Press the
The light bar is at the current setting.
Use the or button to select one of the two default displays:
- GESCHWINDIGKEIT (speed);
- AUSSENTEMPERATUR (outdoor temperature).

Fig.42
Submenu «Lighting»
In the BELEUCHTUNG submenu (lighting) you can set the lighting mode of your car.
You can make the following settings:
- installation of permanently on headlights;
- installation of orientation lighting;
- turn off the outdoor lighting with a time delay.
Setting the constantly on low beam headlights when driving
Actions
Press the
Press the
The light strip is on the operating installation.
- Use the
If you have set the headlights to always on, and the light switch is set to 0, then when the engine is running, the exterior lights and dipped beam are automatically turned on.
If you turn the light switch to another position, the corresponding light turns on.
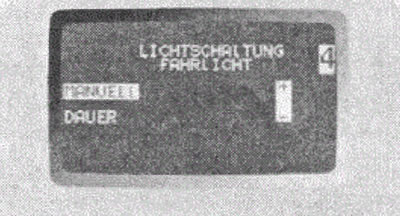
Fig.43
Setting orientation lighting
If you turn on the orienteering lights, then in the dark, after unlocking the car with the key, the following are switched on:
- parking lights;
- fog lights.
The orientation light turns off if you:
- open the driver's door;
- insert the key into the ignition;
- lock the car with the key.
The orientation light switches off automatically after 40 seconds.
Actions
Press the
Press the
The light strip is on the operating installation.
Select the desired value using the
Orientation lighting will be on or off.

Pic. 44
Switching off outdoor lighting with a time delay
With the SCHEINWERFER-AUF-SCHALTUNG function (turning off the headlights) you can set whether and how long the outside light should be on after the engine has stopped.
If you have set the lighting off function with a time delay, then after the engine is turned off, the following lights up:
- parking lights;
- tail lights;
- fog lights.
You can reactivate this function within 10 minutes by opening the door.
If you do not open any of the doors after removing the key, the light will turn off after 60 seconds.
Actions
Press the
Press the
The light strip is on the operating installation.
Use the
In doing so, you can choose:
- 0 seconds: Timed light off function disabled;
- 15,30,45 or 60 seconds during which the timed lighting is on.
You can temporarily turn off the timed light off function by turning the ignition key to position 0, then turning it to position 2 and back to position 0 or 1.
The timed light off function will be disabled. The next time you turn off the engine again, it will turn on again.
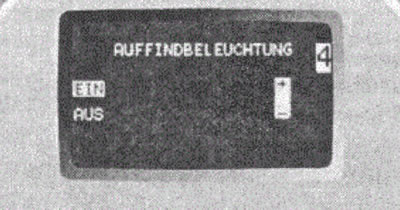
Fig.45
Submenu «Automobile»
Setting the radio tuning mode in AUDIO mode
Using the function SUCHLAUF IM AUDIOMODUS EINSTELLEN (setting the search for a radio station in audio mode) you can set what function the
Actions
Press the
Press the
The light strip is on the operating installation.
Using the
- FREQUENZ (frequency) (search for a radio station in the frequency range);
- SPEICHER (memory) (select the next memorized radio station).
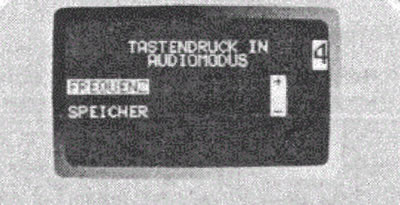
Pic. 46
Trailer Theft Warning
With this function, you can turn the trailer theft warning on and off.
Actions
Press the
Press the
The light strip is located on the operating plant.
Turn on (EIN) or turn off (AUS) using the
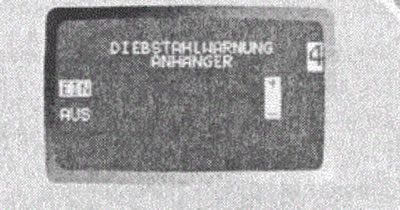
Pic. 47
Installing Key Dependency
This function determines whether the memorized settings for the front seats and other control system settings are to be memorized depending on the key position.
Actions
Press the
Press the
The light bar is at the current setting.
Turn on (EIN) or turn off (AUS) using the
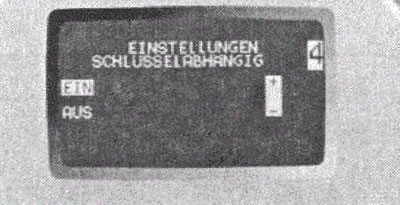
Pic. 48
Submenu «Heating»
Function - setting the switch-on time
HEIZUNG submenu (heating) you only see if your car has an independent heating system.
Menu 6 Trip computer
In REISERECHNER menu (on-board computer) you can call up your car's statistics on the display. The information below is at your disposal:
- consumption statistics from the moment the engine was started;
- consumption statistics since the last reset.
Fuel consumption statistics since launch
Actions
Press the
Press the
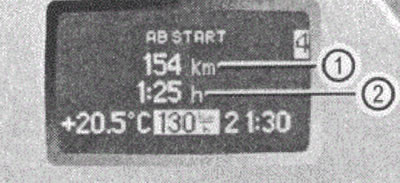
Fig.49
1. Distance in km since the engine was started.
2. Time elapsed since the engine was started.
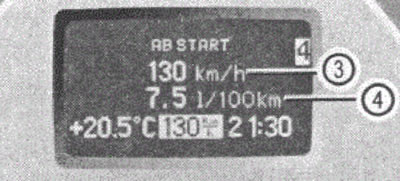
Fig.50
3. Average speed since engine start,
4. Average fuel consumption since engine start.
Fuel consumption statistics since last reset
Actions
Press the
Press the
Press the
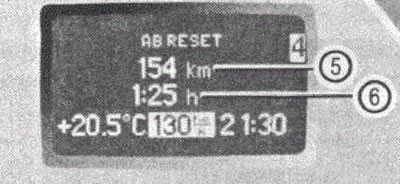
Fig.51
5. Distance in km since last reset
6. Time elapsed since last reset
If you repeat the interrogation of the on-board computer, first call up the last requested function on the display. If you turn the ignition key to position 0 or remove it, all values relating to the last engine start are reset after approximately four hours. If during this time you turn the ignition key to position 1 or 2 again, these values are not reset.

Pic. 52
7. Average speed since last reset
8. Average fuel consumption since last reset
Menu 7 Phone
Using the TEL menu functions (telephone) You can use your telephone if you have connected it to the speakerphone and turned it on.
Depending on the state of your phone, different messages appear on the display:
- if the phone is off, the multifunction display shows TEL AUS (phone off.);
- if you have not yet entered the PIN code number, the display shows the message TEL PIN (enter phone PIN).
- enter the PIN code via phone.
The phone is searching for a network. During this time, there is no indication on the display.
As soon as the phone finds a network, a corresponding message will appear on the display.
After this ready to use message appears, you can use the phone through the control system.
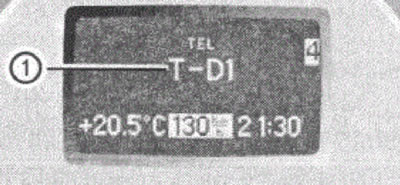
Pic. 53
1. Network operator
Receiving a telephone conversation
If your phone is ready for use, you can take a call at any time. The display shows the following message:
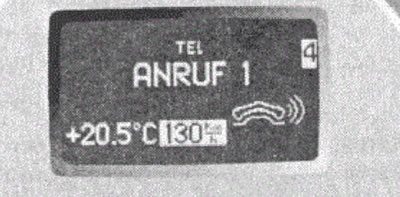
When you press the