



Removal
1. Remove the mixing chamber.
2. Disconnect the fuel injection line 1 and plug 2 from the injector of the fourth cylinder (see figure 4.70).
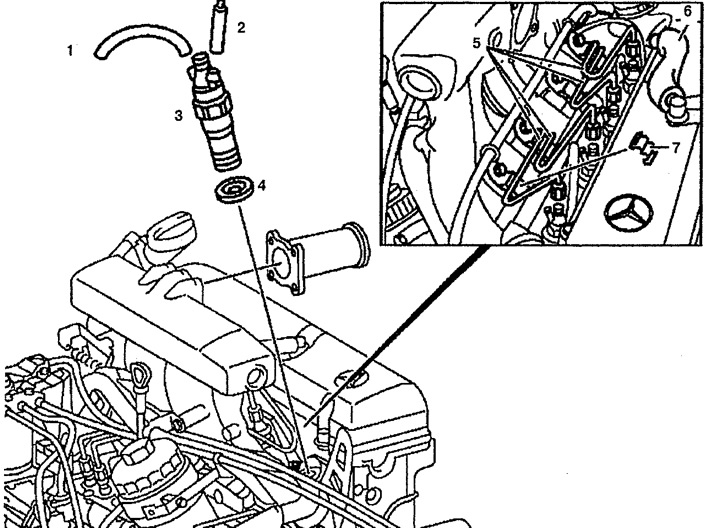
Figure 4.70. Injectors:
1. Fuel injection line,
2. Cork,
3. Nozzle,
4. Sealing,
5. Fuel injection lines,
6. Engine crankcase ventilation tube,
7. Bracket.
3. Disconnect bracket 7.
4. Disconnect fuel lines 5 from the injectors and secure them to the side. Don't bend them.
5. Remove injectors 3 and disconnect seal 4.
Examination
6. Install injector 1 into the tester (see figure 4.71).
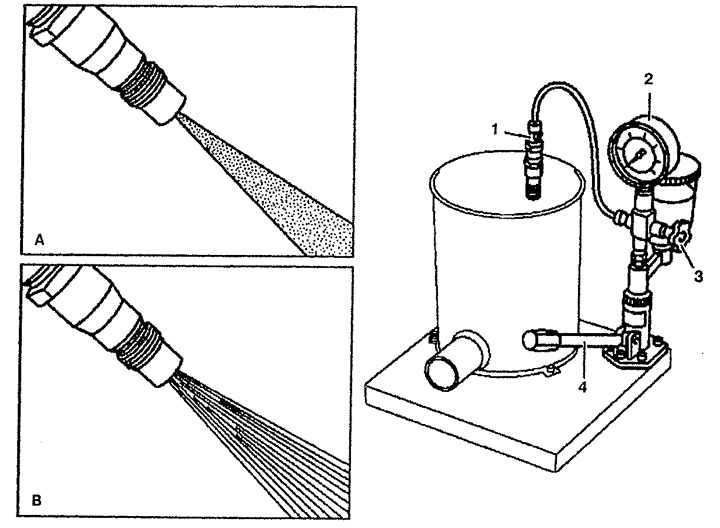
Figure 4.71. Checking the injector:
1. Nozzle,
2. Pressure gauge,
3. Crane,
4. Lever.
"A". Spraying is good,
"B". Spraying is poor.
7. Close tap 3 on the tester and using pressure gauge 2 blow through the injector approximately five times.
[Text republished from the website: MERCEDESMAN]
8. Perform a quick test, for this you need to move the lever 4 of the tester slowly and evenly (approximately 1 cycle). Spraying should be done in a smooth stream.
9. Perform an injection test, for this you need to move the lever 4 of the tester quickly (about 3 cycles). There can be two types of spray flows: good - A and bad - B.
10. Open tap 3 of the tester.
11. Check the injection pressure. To do this, it is necessary to slowly create pressure using lever 4 and measure it on pressure gauge 2.
- Injection pressure adjustment value: 115 - 125 bar.
- Nozzle working pressure: minimum 100 bar.
- Maximum permissible difference between the working pressure of the engine injectors: 5 bar.
Installation
12. Installation is carried out in the reverse order of removal.