
The holes in the crankshaft pulley for the mounting bolts are located so that the pulley can only be installed in a certain position. On fig. 80 shows a section of the front end of the crankshaft.
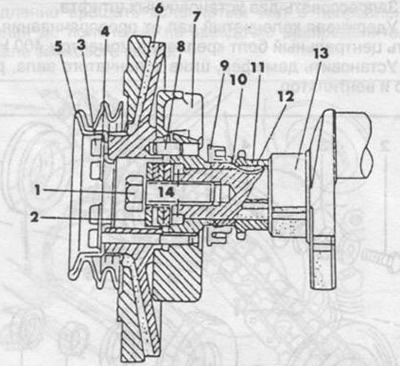
Pic. 80. Pulley and damper section.
1 - M8 bolt,
2 - disc washer,
3 - M18 bolt,
4 - washer,
5 - pulley,
6 - damper,
7 - balancing disk,
8 - mounting pin,
9 - stuffing box,
10 - spacer,
11 - crankshaft sprocket,
12 - key,
13 - crankshaft,
14 - locating pin 8x8.
When dismantling, do the following:
Remove heatsink and fan.
Loosen all drive belts and then remove them.
Secure the crankshaft from turning. To fix it, you can turn on the gear in the gearbox or the parking brake. You can remove the starter and fix the ring gear.
Loosen the six bolts securing the crankshaft pulley. When replacing, only the same pulley can be installed.
Loosen the damper center screw.
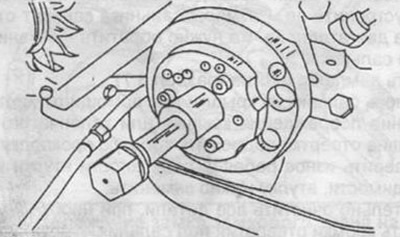
Use a center punch to mark the relative position of the balancing disc and the crankshaft (see fig. 81).

Pic. 81. Marking the balancing disc and crankshaft.
Using a puller, remove the balancing disc as shown in fig. 82. Pay attention to the position of the three cup washers (concavity direction).
Pic. 82. Removing the balancing disc from the crankshaft.
When installing, do the following:
Install the balancing disc on the crankshaft, aligning the holes for the dowel pins.
Put a key in the crankshaft and tighten the M18 bolt, put four washers on the bolt with a concavity towards the bolt head.
Press in two dowel pins.
While holding the crankshaft from turning, tighten the central mounting bolt to 400 Nm.
Install damper, crankshaft pulley, radiator and fan.
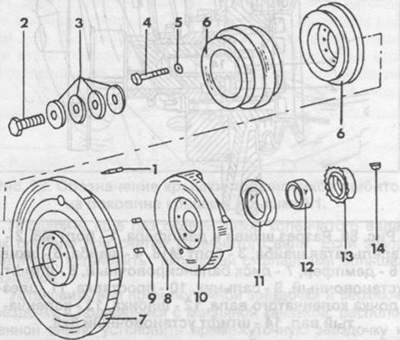
Pic. 83. Pulley and damper details.
1 - locating pin,
2 - M18 bolt,
3 - disc washers,
4 - bolt M8,
5 - washer,
6 - pulley,
7 - damper,
8 - mounting pin,
9 - locating pin 8 mm,
10 - balancing disk,
11 - stuffing box,
12 - bushing,
13 - crankshaft sprocket,
14 - key.