
Warning: Gasoline is a highly flammable liquid - extreme care must be taken when working with system parts. Keep the work area well ventilated - open all doors and windows to create drafts. Do not smoke, do not place open flames or uncovered lighting lamps near the work area. Be aware that appliances such as heaters, water heaters and dryers can be a source of ignition. Take this into account if these devices are installed in the work area. Always keep a fire extinguisher near the work area and read the instructions for use before starting work. When working on power systems, protect your eyes and immediately wash off any traces of gasoline that come into contact with your skin with soap and plenty of water. Remember that gasoline vapors are just as dangerous as the liquid itself: containers that are freed from gasoline. contain gasoline vapours, and are potentially explosive.
Caution: Maintain cleanliness when working on the power system - dirt entering the power system can block the passages, resulting in hard starting or power system failure.
Removing
1. The fuel filter is located in the fuel supply line next to the gas tank. Access to the filter opens from behind, from below the car.
2. Refer to Chapter 4B and depressurize the power system. Disconnect the negative battery cable and route it away from the terminal.
3. Park the vehicle on a level surface, apply the parking brake and place wedges under the front wheels. Raise the rear of the car with a jack and place it on stands (see "Lifting the vehicle and placing it on stands").
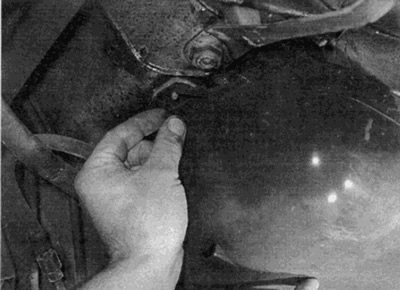
4. Loosen the screws and remove the protective cover from the fuel pump, filter and battery (see fig. 31.4).
5. Clamp the flexible hose of the fuel supply line to the fuel pump and the hose from the filter with suitable clamps. Do not use a vise or flat jaws as they may damage the inside of the hose.
6. Loosen the connections and disconnect the fuel lines on each side of the filter (see fig. 31.6). Where banjo bolts are used, remove sealing washers and discard. When installing, new ones must be installed. Be prepared to spill some gasoline - place a container under the filter and wrap the surrounding parts with rags.
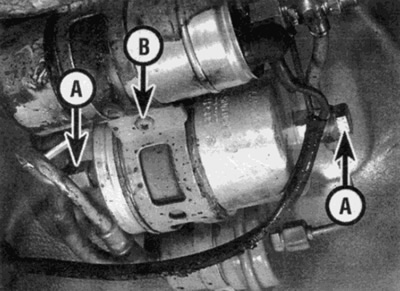
7. Loosen and unscrew the screws, release the mounting tape and lower the filter down from the mounting bracket (see fig. 31.6). Note that on later models the bracket is held in place by two screws and also supports the fuel pump.
8. If the bracket can't be down enough. to remove the fuel filter, where provided, unscrew the banjo fittings and disconnect the fuel line from the fuel pump and battery. Be prepared for some of the gasoline to leak out and remove the sealing washers. When the fuel line is disconnected, it will be possible to lower the filter for removal.
Installation
9. Installation is carried out in the reverse order, taking into account the following points:
- A) Arrow on the side of the filter housing (if it's applied) should indicate the direction of fuel flow towards the engine.
- b) Make sure that the filter clamp is correctly positioned on the filter housing on top of the anti-corrosion plastic gasket.
- V) Where the banjo bolts are installed, install new sealing washers.
10. When finished, start the engine and check for leaks around the removed parts. Please note that air has entered the pump, and therefore it may take a little longer than usual to start the engine.