
Cars BMW Cars Volkswagen Cars Chevrolet Cars Land Rover Cars Lada Cars Honda Cars Peugeot
English Русский
Български
Беларускі
Український
Српски
Hrvatski
Română
Polski
Slovenský
Magyar
Bookmark News and articles Sitemap Feedback Site search
MercedesMan.ru


A-Class C-Class E-Class G-Class M-Class S-Class Others
190 (W201) (1982-1993) W202 (1993-2000) W203 (2000-2007)
  • Main
  • C-Class
  • W201 (1982-1993)
  • General information
  • Maintenance (gasoline)
  • Ignition system — checking the condition and adjusting the ignition timing

Ignition system — checking the condition and adjusting the ignition timing (Mercedes-Benz C-Class W201)

0
1. To avoid problems when starting and running the engine, you should carefully check the ignition system parts. There should be no damage or destruction of parts.

Checking the main details


2. When installing new spark plugs, the high-voltage wires should be checked every time.

3. When removing high-voltage wires from spark plugs, be sure to grasp the tip and not the wire itself. Otherwise, the connection may come loose (see fig. 29.3).
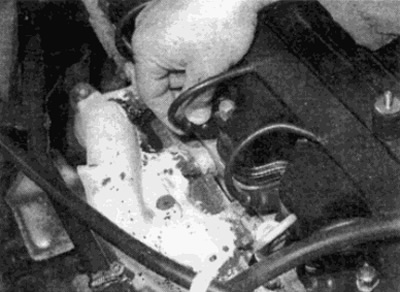
Fig. 29.3. Removing the high-voltage wire from the spark plug

Fig. 29.3. Removing the high-voltage wire from the spark plug


4. Check the inside of the wire tip. Look for signs of corrosion, which looks like a crust of white powder. Put the tip back on the spark plug and make sure it fits snugly onto the spark plug. If it does not, remove the tip and use pliers to squeeze the metal contact inside the tip of the wire so that it fits securely onto the spark plug.

5. Using a clean cloth, wipe the wires along their entire length and remove all dirt and grease. When you have cleaned the wire, check it for burns, cracks, or other damage. Do not twist the wires or stretch the wire too much - the wire inside is fragile and may break.


6. Remove the other end of the wire from the distributor cap (see fig. 29.6). Only grasp the tip of the wire. Check for corrosion and the secure fit of the wire on the cover as well as on the spark plug side. If you have an ohmmeter, check the resistance of the wire between the cat on the spark plug side and the segment on the distributor cap side. When finished, securely install the wire.
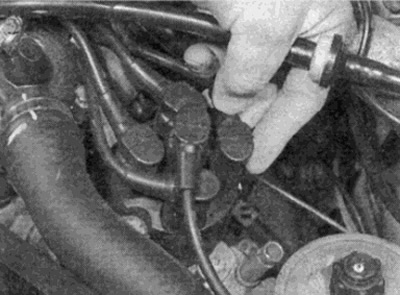
Fig. 29.6. Disconnecting the high-voltage wire from the distributor cap

Fig. 29.6. Disconnecting the high-voltage wire from the distributor cap


7. Check the remaining wires in the same way.

8. If new high-tension wires are required, purchase the required kit that matches your vehicle and engine.

9. Loosen the mounting screws or loosen the clamps and remove the distributor cap (see Fig. 29.9, a, b). Wipe the cover clean and inspect it carefully inside and out. Look for cracks, soot deposits and wear, burnt or loose contacts. Check that the central carbon electrode is not worn, moves freely under the spring force and makes good contact with the runner (see fig. 29.9). Also check the cover seal for wear or damage, replace it if necessary. Remove the rotor from the distributor shaft and inspect the rotor. Typically, the rotor and distributor cap are replaced when installing new spark plug wires.
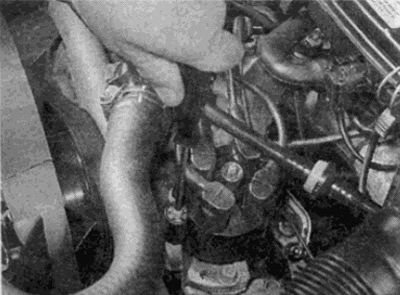


Fig. 29. 9, a. Unscrew the fastening screws...
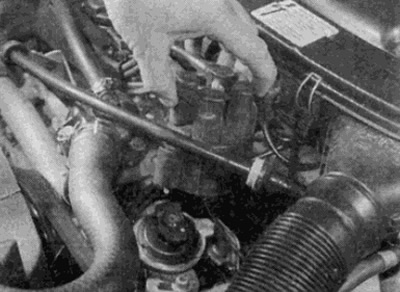
Fig. 29. 9, a. Unscrew the fastening screws...


Fig. 29.9, b....and remove the distributor cap
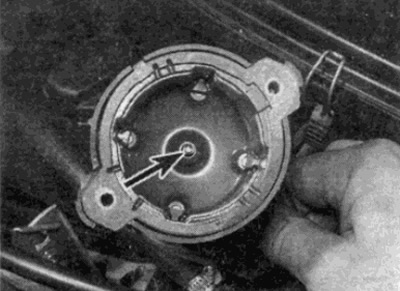
Fig. 29.9, b....and remove the distributor cap


Fig. 29. 9, c. Check the condition of the central electrode (shown by arrow) distributor caps

Fig. 29. 9, c. Check the condition of the central electrode (shown by arrow) distributor caps
This article is available at: russian, bulgarian, belarusian, ukrainian, serbian, croatian, romanian, polish, slovak, hungarian
The article has been verified: Lukyanov Nikita Ilyich
Share with friends:
◀ Previous
C-Class 190 (W201) / Maintenance (gasoline)
Next ▶

Valve timing clearance (pre-1984 models) — checking and adjusting
Clutch — Checking Action
Front Hub Bearings — Checking
Testing in motion
Windshield and Headlight Washer System — Checking Condition
Air Cleaner Filter Element — Replacement
Replacing the fuel filter
Automatic Transmission Fluid and Filter — Replacement
Clutch Driven Disc — Checking Wear
Replacing the carbon absorption filter — models with a gasoline vapor absorption system
More similar articles for repairing other models

☛ General description of the ignition system Mercedes W168 (1997-2004)
☛ Checking and adjusting the ignition timing angle Mercedes W124 (1984-1995)
☛ Checking and adjusting idle speed / ignition timing / CO concentration Mercedes W463 (1999-2019)
☛ Checking and adjusting idle speed / ignition timing / CO concentration Mercedes W163 (1997-2005)
☛ Checking and adjusting idle speed/ignition timing/CO concentration Mercedes W140 (1991-1998)
☛ Fuel injection and ignition control system HFM-SFI/MFI engine 104.900 Mercedes Vito 1 (1996-2003)
Link in different formats to this article
Comments and feedback from visitors
No comments yet


How much will 26 + 19 ?


W203 (2000-2007) 
  • General information
  • Introduction to guide
  • User manual
  • Maintenance
  • Power unit
  • Gasoline engines
  • Diesel engines
  • Cooling system
  • Ventilation and heating
  • Supply system
  • Injection system (gasoline)
  • Injection system (diesel)
  • Exhaust system
  • Ignition and control system
  • Charge and launch systems
  • Transmission
  • Mechanical gearbox
  • Automatic gearbox
  • Clutch and drive shafts
  • Differential
  • Chassis
  • Brake system
  • Car suspension
  • Steering
  • Body
  • Exterior (external elements)
  • Interior (internal elements)
  • Electrical equipment
  • Equipment and devices
  • Lighting system
  • Electrical diagrams (2000)
  • Electrical diagrams (since 2001)
W202 (1993-2000) 
  • General information
  • User manual
  • Driving a car
  • Car care
  • Maintenance
  • Power unit
  • Gasoline engines
  • Diesel engines
  • Lubrication system
  • Cooling system
  • Heating and ventilation
  • Ignition system
  • Fuel system
  • Injection system (gasoline)
  • Injection system (diesel)
  • Exhaust system
  • Transmission
  • Clutch
  • Car gearbox
  • Chassis
  • Suspension, wheels and tires
  • Steering
  • Brake system
  • Body
  • Exterior (external elements)
  • Interior (internal elements)
  • Doors and windows
  • Electrical equipment
  • Equipment and devices
  • Power devices
  • Lighting system
  • Electrical circuits
190 (W201) (1982-1993) 
  • General information
  • Introduction to the guide
  • Operation and care
  • Maintenance (gasoline)
  • Maintenance (diesel)
  • Troubleshooting
  • Power unit
  • Petrol engine I4
  • Petrol engine V6
  • Diesel engines
  • Engine overhaul
  • Cooling and heating
  • Power system (carburetor)
  • Injection system (gasoline)
  • Injection system (diesel)
  • Exhaust system
  • Charge and start system
  • Ignition system (I4)
  • Ignition system (V6)
  • Diesel heating system
  • Transmission
  • Clutch
  • Mechanical gearbox
  • Automatic gearbox
  • Cardan shaft and axle shafts
  • Chassis
  • Brake system
  • Car suspension
  • Steering
  • Body
  • Exterior (external elements)
  • Interior (internal elements)
  • Doors, locks and windows
  • Electrical equipment
  • Equipment and devices
  • Electrical circuits
 
MercedesMan.ru © 2017–2026 · Mobile version · Read about Mercedes · Sitemap: EN BG BY UA RS HR RO PL SK HU · Feedback · Site search · Bookmark A-Class (W168) · C-Class (W201) · C-Class (W202) · C-Class (W203) · E-Class (W123) · E-Class (W124) · E-Class (W210) · G-Class (W463) · M-Class (W163) · S-Class (W116, petrol) · S-Class (W126, petrol) · S-Class (W140) · S-Class (W220) · Sprinter · Vito 1 · Vito 2 · Vario 814D ·
 
We only use cookies without which some of the site's features may not be available.