
2. Raise the car with a jack and put it on stands (see "Lifting the vehicle and placing it on stands"). Check that the vehicle is level.
3. Where provided, to gain access to the gearbox, remove the crankcase protection.
4. Move the gear selector to position "R".
5. Clean the transmission pan, especially the area near the drain plug. bolts securing the pallet to the box and connecting the pallet to the gearbox.
6. Place a suitable container under the drain hole, then use an Allen wrench or hex wrench to unscrew the plug and allow the liquid to drain into the container (see fig. 32.6). Replace drain plug when all liquid has drained.
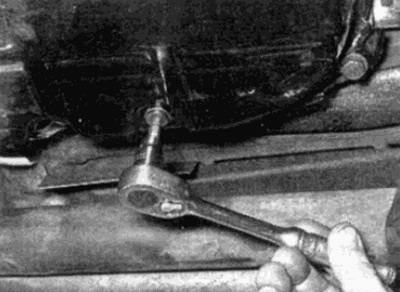
Pic. 32.6. Unscrewing the drain plug of the automatic transmission
7. Using a wrench on the crankshaft pulley hub bolt, turn the crankshaft so that the torque converter drain plug is visible in the hole in the gearbox housing (see fig. 32.7).
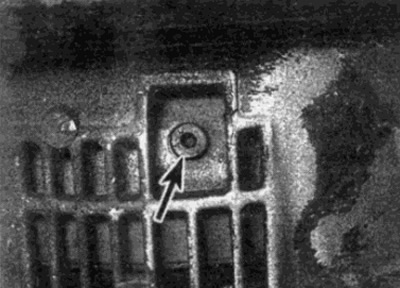
Pic. 32.7. Torque converter drain plug (shown by arrow)
8. Move a container under the torque converter drain hole, then unscrew the plug and let the fluid drain into the container. Close the stopper when all the liquid has drained.
9. Remove the fluid sump mounting bolts, then remove the mounting plates and lower the sump off the gearbox (see fig. 32.9). If the pan is stuck to the body, lightly tap the pan with a soft hammer. Remove the rubber seal.
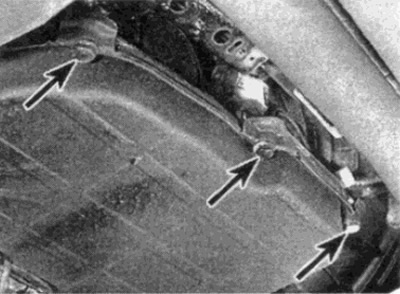
Pic. 32.9. Bolts of fastening of the pallet of an automatic transmission (shown by arrows)
10. Remove the screws and remove the filter screen (see fig. 32.10).
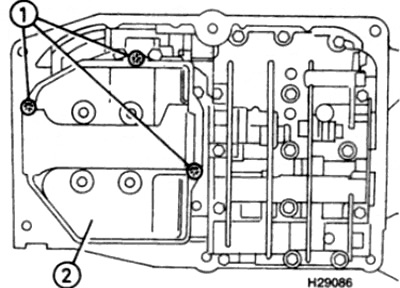
Pic. 32.10. Loosen the fixing screws (1) and remove the filter screen (2)
11. Using a clean, lint-free cloth, thoroughly clean the tray inside and out.
12. Install the new filter screen and tighten the mounting screws.
13. Put the pallet in place and install the mounting plates and bolts. Tighten the bolts to the required torque.
14. Where provided, install the sump guard.
15. Lower the vehicle to the ground, then release the release lever and pull out the fluid level screw.
16. Initially fill the transmission through the dipstick tube with 4.0 liters of the required fluid (see "Operating materials"). Start the engine and let it run at idle speed with the gear selector in position "R".
17. Continue to add fluid until the level is 12 mm below the mark "MIN" on the dipstick (see paragraph 6 of this Chapter).
18. Move the gear lever to all positions, stopping in each of them for a few seconds. Then return to the position "R".
19. Check the level again as described in point 17.
20. Repeat steps 18 and 17 until the liquid level is at the same level.
21. Drive the car for a short time and check the level as described in paragraph 6 of this chapter.