



Contents: Flushing the cooling system ↡ Radiator flushing ↡ Engine flush ↡ Filling the cooling system ↡ Antifreeze mixture ↡
Warning: Begin this procedure after the engine has cooled. Avoid contact with skin or painted surfaces. If spilled, rinse immediately with plenty of water. Do not leave antifreeze in an open container near your work area or on the garage floor. Children and pets may be attracted to the sweet smell of antifreeze, but be aware that ingesting it is fatal.
1. After the engine has completely cooled down, cover the expansion tank cap with a rag and slowly turn the cap counterclockwise to relieve pressure in the cooling system (a hissing sound is usually heard) (see fig. 36.1). Wait until the pressure in the system drops to normal atmospheric pressure and turn the cap so that it can be removed.
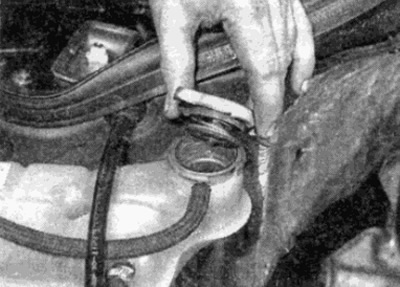
Fig. 36.1. Reducing the pressure in the cooling system by removing the expansion tank cap
2. Place a suitable container under the radiator, then install a piece of rubber hose into the drain nozzle (see fig. 36.2). Open the drain plug (below the nozzle), turning it with a large screwdriver, and allow the coolant to drain through the hose into a container.
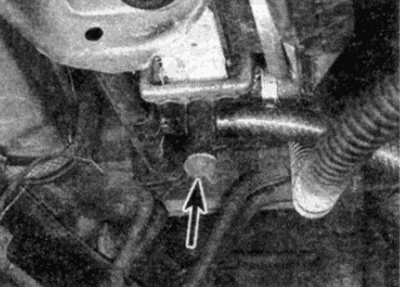
Fig. 36.2. Radiator drain nozzle (shown by arrow)
3. Move the container so that it is located under the cylinder block drain hole, which is located on the right side of the cylinder block (see fig. 36.3). (Certain engines are equipped with drain holes with a combined nozzle to which a piece of rubber hose can be attached). Loosen the drain plug by turning it with an open-end wrench and allow the liquid to drain into a container.
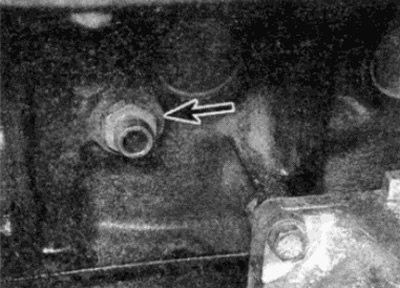
Fig. 36.3. Engine block drain nozzle (shown by arrow)
4. Once the coolant has been drained, remove the drain hoses and tighten the drain plugs on the cylinder block and radiator.
Flushing the cooling system
5. If the antifreeze has not been renewed for a long time, or the cooling mixture is very diluted, then over time, the cooling system loses its efficiency due to the fact that the internal walls of the radiator tubes corrode, become covered with scale and other deposits. The efficiency of the cooling system is restored by flushing it.
6. To avoid unwanted contamination, the radiator and engine are washed separately.
Radiator flushing
7. To flush the radiator, disconnect the upper and lower hoses and all other hoses from the radiator as described in Chapter 3.
8. Insert a garden hose into the top inlet. Run clean water through the radiator and continue flushing until clean water comes out of the bottom hole.
9. If after a reasonable time clean water does not flow out, flushing with the addition of detergent additives will be required. It is important to strictly follow the manufacturer's instructions. If this does not lead to the desired result, it is necessary to insert a hose into the lower opening of the radiator and flush it with a reverse flow of water.
Engine flush
10. To flush the engine, remove the thermostat as described in chapter 3, then temporarily install the thermostat cover. Adjust the temperature control to the maximum value.
11. Disconnect the upper and lower hoses from the radiator. Insert a garden hose into the upper engine hose and run clean water through it. Continue flushing the engine until clean water flows out of the lower hole.
12. After flushing is complete, install the thermostat and connect the hoses as described in chapter 3.
Filling the cooling system
13. Before filling the cooling system, check that all hoses and clamps are in good condition and that the clamps are securely tightened. Remember that the antifreeze mixture should be used all year round to prevent corrosion of engine parts (see next subsection).
14. Remove the expansion tank cap and fill the system slowly to prevent air locks, pouring coolant into the expansion tank.
15. If the coolant is being replaced, first drink a couple of liters of water, then the required amount of antifreeze. Then drink up the water to the required level (see Fig. 36.15, a. b).
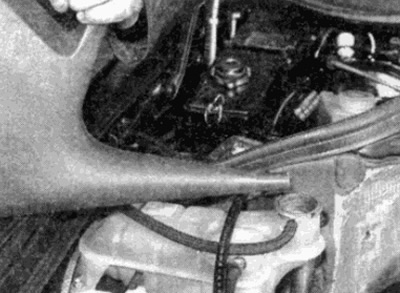
Fig. 36.15, a. If the coolant is changed, start by adding a couple of liters of water...
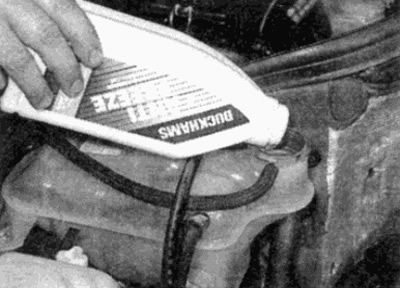
Fig. 36.15, b....then pour in the required amount of antifreeze and add water
16. As the coolant level in the expansion tank rises, squeeze the upper and lower radiator hoses to help force out any trapped air in the system. Once the air has been forced out, add coolant to the "MAX" mark. Close the expansion tank cap securely.
17. On 6-cylinder SOHC models, remove the plug from the coolant sensor housing on top of the cylinder head. When coolant begins to flow out, reinstall the plug and tighten it. If coolant does not flow out of the hole, pour coolant into the open hole until it begins to flow back out. Reinstall the plug and tighten it securely. This will remove any air pockets in the cooling system that may interfere with the operation of the cooling system sensor(s).
18. Start the engine and warm it up until the thermostat opens - when this happens, the liquid from the radiator, flowing through the upper radiator hose, will begin to heat it.
Original source of information: mercedesman.ru
19. Check for leaks, especially around the removed parts. Check the coolant level in the expansion tank and top up if necessary. Remember, to accurately determine the coolant level in the expansion tank, the system must be cold. If the expansion tank cap is removed while the engine is still warm, cover the cap with a thick cloth and slowly unscrew the cap to gradually reduce the pressure in the system (a hissing sound is usually heard). Wait until the pressure in the system drops to normal atmospheric pressure, and turn the cap so that it can be removed.
Antifreeze mixture
20. Antifreeze must be changed at the specified intervals. This is necessary not only to maintain its properties, but also to prevent metal corrosion, which can occur over time when the anti-corrosion inhibitors lose their effectiveness.
21. Always use ethylene glycol based antifreeze, which is recommended for use in cooling systems with different metals. Antifreeze quantities and freezing temperatures are listed in the section "technical conditions".
22. Before adding antifreeze, the cooling system must be completely drained, preferably flushed. Check the condition of all hoses.
23. After filling the system, hang a label on the expansion tank, indicating the type, concentration of antifreeze and the date of filling. All subsequent toppings must be done with the same type and concentration of antifreeze.
24. Do not use antifreeze in windshield/rear window washers as this will damage the vehicle's paintwork. Special windshield cleaner additives should be added in the quantities specified on the bottle labels.