
Note. See also Section materials Checking the condition and replacing the engine compartment hoses, localizing leaks.
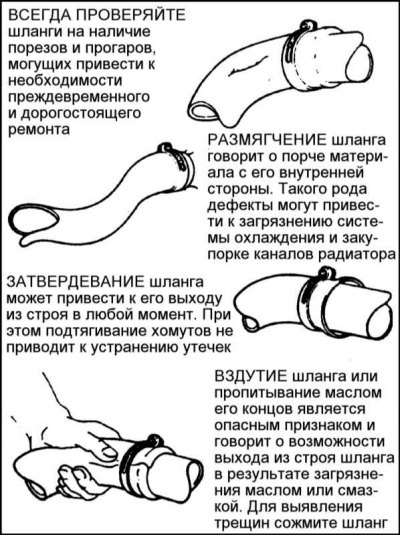
Hoses, as well as drive belts, tend to fail at the most inopportune moment - in order to avoid troubles associated with rupture of radiator or heater hoses, carefully inspect them, as shown in the illustration
1. Many serious engine malfunctions are related to malfunctions in the cooling system. If the car is equipped with an automatic transmission, then its operation and service life are also directly related to the operation of the cooling system.
2. Checking the cooling system should be carried out with a cold engine, so it is better to do it before the first trip of the day or no earlier than three hours after turning off the engine.
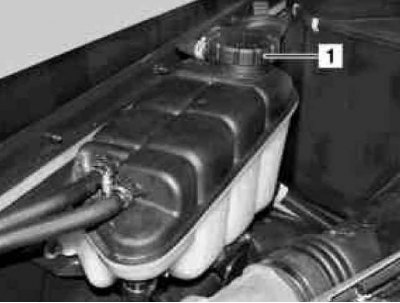
3. Slowly, being careful in case the engine is not completely cool, remove the expansion tank cap. Rinse thoroughly inside and out with clean water. Also clean the filler neck of the tank. The presence of corrosion in the filler neck means that the coolant should be replaced (see below). The coolant inside the expansion tank should be relatively clean and clear. If it has a brownish color, empty the system and fill it with new coolant.
4. Carefully check the radiator hoses, as well as the heater hoses, which have a smaller diameter. Check the cooling system hoses along the entire length, if cracks, swellings and signs of aging of the material are found, replace them. Cracks are easier to find by squeezing the hose. Pay special attention to the mounting clamps, which can cut or puncture the hoses, which will lead to the development of coolant leaks.
5. Make sure all hose connections are secure. Coolant leaks usually show up as white or rusty deposits in the area of the seal failure. If your vehicle uses wire-type clamps, it makes sense to replace them with screw-type clamps.
6. Use compressed air or a soft brush to clean the front of the radiator (as well as the air conditioning condenser, where present). Remove all insects, leaves and other foreign objects that have fallen on the radiator fins - be very careful not to damage the fins or cut your fingers on them.
7. If the coolant level is constantly dropping, and you have not found any leaks, you should have the pressure test of the cooling system in a Mercedes-Benz workshop.
Checking the frost resistance of the coolant
Attention! Do not allow antifreeze to come into contact with your skin or painted vehicle surfaces. In case of contact, rinse immediately with plenty of water. Antifreeze is extremely toxic and deadly if ingested. Do not leave antifreeze in an open container or spilled on the floor; its sweet smell can easily attract children or pets. Check local regulations for the disposal of used antifreeze. In many areas there are special centers for its acceptance.
1. Before the start of the winter season, it is imperative to check the concentration of antifreeze in the coolant, especially if clean water was poured into the system during operation - use a hydrometer with frost resistance graduation.
2. Slightly warm up the engine so that the top hose of a radiator warms up. When measuring the concentration of antifreeze, the temperature of the liquid should be about +20°C.
3. Carefully turn away a stopper of a broad tank.
Attention! When the engine is hot, open the expansion tank cap carefully. There is a risk of burns! It is necessary to put a rag on the cork. Open the plug only when the liquid temperature is not more than +90°C.
4. Draw liquid with the hydrometer bulb.
5. In our latitudes, the concentration of antifreeze is sufficient to protect the system to a temperature of -25°C, in a particularly cold climate up to -35°C.
Coolant replacement
1. Prepare a draining container of a suitable size.
2. Remove the cover of the expansion tank.
3. Open the heater control valve.
4. Remove the crankcase protection.
5. Drain the coolant one by one from the radiator first (see resist. illustrations a and b), then from the crankcase (see resist. illustration with).
a - The location of the radiator drain valve, - pull a hose with an inner diameter of 12 mm onto the valve (petrol models)
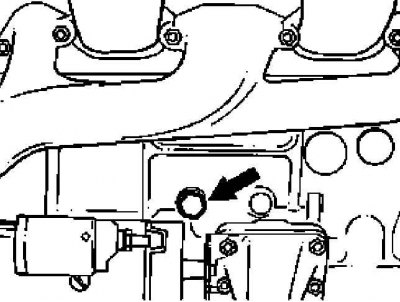
b - The location of the radiator drain valve, - pull a hose with an internal diameter of 12 mm over the valve (diesel models)
c - Location of the drain plug of the crankcase water jacket, - if necessary, use a hose with an internal diameter of 14 mm
6. Check the patency of the open sections of the channels of the cooling path, if necessary, clean them.
7. Estimate a condition of sealing washers of drain plugs, replace defective washers.
8. Pour the required amount of fresh coolant into the system through the expansion tank neck. When operating a car in conditions with temperatures up to -25°C, the concentration of antifreeze in the coolant should be about 40%. When lowering the thermometer to -35°C, the concentration should be increased to 50% (see Specifications).
Note. If a higher degree of frost protection is required, the antifreeze concentration level can be increased up to 60% (this concentration will provide freeze protection down to -40°C). A further increase in the content of antifreeze in the coolant leads to a decrease in its effectiveness both in removing heat and in protecting the engine from corrosion.
9. Start the engine and release air pockets from the cooling path (see below).
10. Attach a label to the cap of the expansion tank indicating the concentration, brand of antifreeze and the date of its replacement. Any subsequent replenishment of the system (before scheduled replacement) should only be carried out with a liquid of the same composition, or with distilled water
Removal of air pockets
1. If the engine overheats after changing the fluid, the reason is most likely air pockets in the system. Plugs usually appear as a result of haste when refueling the system and do not disrupt the proper circulation of the coolant.
2. The presence of air pockets in the rubber hoses of the cooling system is usually quite easy to detect by touch. After performing a coolant change, air pockets usually disappear the first time the engine is started.
3. With the engine warmed up to normal operating temperature, turn on the heater and its fan - warm air must enter the passenger compartment in sufficient quantities. One of the reasons for insufficient air heating may be the presence of air pockets in the duct of the cooling system.
4. The appearance of air pockets in the cooling path is sometimes fraught with the most serious consequences, and not just leads to a decrease in the efficiency of the heater output. A sufficiently voluminous plug can prevent fluid from circulating inside the engine's water jacket. In order to make sure that there are no plugs inside the engine, feel the upper radiator hose: when the engine is running, it should be hot. Insufficient heating of the hose may indicate the presence of air pockets in the jacket, as well as a possible malfunction of the thermostat.
Petrol models
1. If after the first start of the engine, after performing the coolant replacement procedure, air plugs remain in the system, turn off the engine and wait for it to cool completely, then remove the expansion tank cap and squeeze the coolant hoses. In the worst case, the cooling system will have to be completely emptied and refilled with fresh coolant (see above).
Diesel models
G270 CDI (M612)

Preparing to remove air pockets from the turbocharged engine cooling system (1 of 4)
Preparing to remove air pockets from the turbocharged engine cooling system (2 of 4)
Preparing to remove air pockets from the turbocharged engine cooling system (3 of 4)
Preparing to remove air pockets from the turbocharged engine cooling system (4 out of 4)
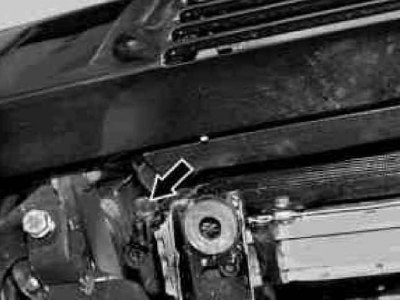
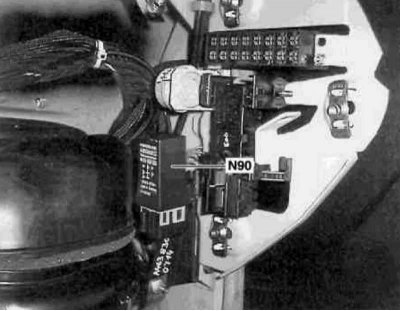
N90 - Charge air cooler control module
1. Switch the AT selector lever to position «R» and turn off the ignition.
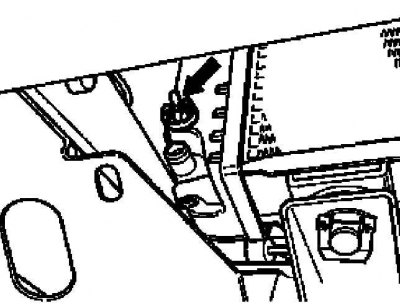
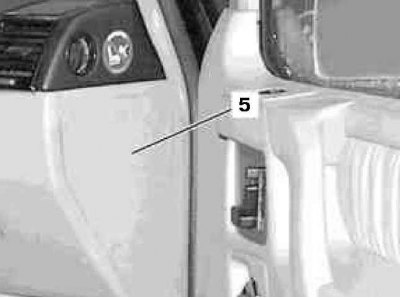
2. Turn out fixing bolts (1), pull down the cover (2) right under the instrument panel, remove the bolts (3) and remove the cover (4).
Note. On models equipped with the TELE AID emergency call system (code ET2), disconnect the electrical wiring from the corresponding loudspeaker of the right front door.
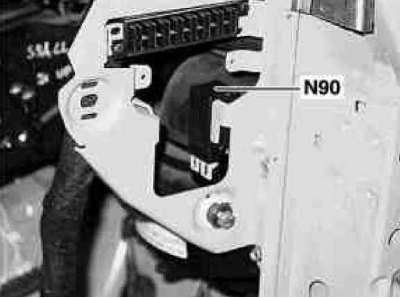
3. Open the right front door and release the side cover from the latches (5) on the right side of the instrument panel for easy access to the charge air cooler control module (N90).
4. Remove the N90 module and bridge terminals No. 2 and 5 of the terminal block between each other in order to close the power circuit of the circulation pump (M44).
Attention! Be careful: the numbering of the terminals on the block and on the module connector does not match!
5. Open the cover of the expansion tank and turn on the ignition - activation of the circulation pump will remove plugs from the cooling system path.
6. Having ascertained completeness of removal of air, switch off ignition and establish into place removed components.
G400 CDI (M628)
Attention! During the procedure, constantly monitor the liquid level in the expansion tank, if necessary, make the appropriate adjustments! When the coolant temperature reaches 60-70°C, the expansion tank cap should be closed.
1. On models equipped with a 628 series engine, air is also bled from the cooling path by activating the circulation pump electric motor (M44).
2. Connect and activate the STAR DIAGNOSIS reader (act in accordance with the instructions given in the instrument manufacturer's instructions).
3. Select the vehicle model, indicating the type of engine and steering gear.
4. Enter the main control module group and select the required driver.
5. Specify the type of power system (CDI-V1).
6. Select the activation mode by specifying the circulation pump motor as the target point (M44).
7. To activate the pump, press the function key «F3», - the pump will only function when the key is pressed.
Attention! The key must be pressed physically, not virtually with the mouse!
Removal of oil from the cooling and heating paths of diesel engines
Attention! Do not open the cap on the expansion tank until the coolant has reached a temperature of 90°C. Be careful when opening the lid - do not scald yourself!
Removal of oil from the cooling/heating path of a diesel engine
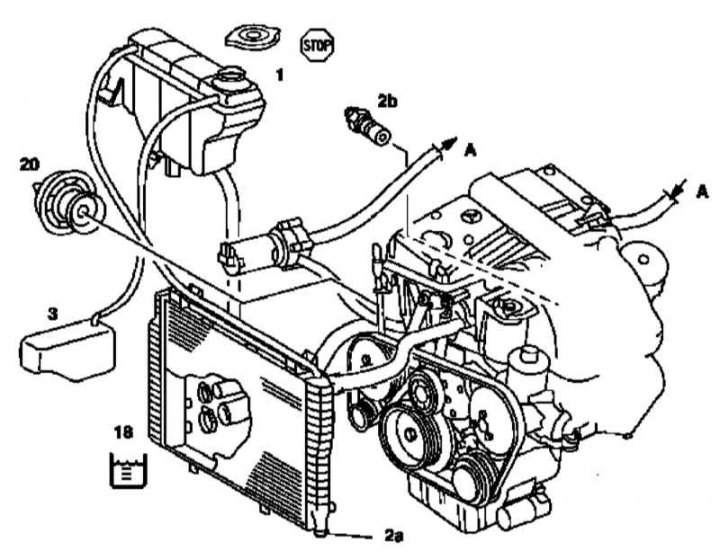
1 - Expansion tank; 2a - Radiator drain valve; 2b - Drain plug of the engine crankcase; 3 - Overflow tank (not used on the considered models); 1 - 8 Radiator; 20 - Thermostat; A - Supply and return flows of the heater
1. Remove the crankcase protection. Empty the cooling system (see above).
2. Remove the thermostat of the cooling system (see chapter Refrigeration, heating, ventilation and air conditioning systems).
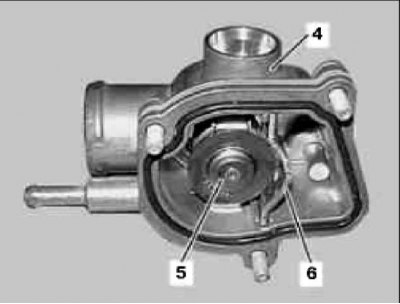
3. Use pliers to remove the lock plate (6), then pulling down and turning at the same time, remove from the casing (4) thermostat operating element (5). Further, the casing can be used as a device for removing oil from the cooling system.
4. Turn on the heater for maximum performance (see part Comfort devices), if equipped, also activate the auxiliary heater (see ibid).
5. Fill the cooling system with a special flushing solution (5% concentrate to 95% water).
6. Start the engine and at moderate speeds warm it up to a temperature of about 80°C (it will take about 5 minutes).
7. Stop the engine and let it cool down to approximately 50°C.
8. Drain the solution from the cooling system (see above).
9. Fill the cooling system with clean water, run the engine for 5 minutes, then turn off and drain the water again.
10. Fill the cooling system with fresh coolant, remove air from the cooling path (see above) and inspect system components for signs of leak development.