



Brake system of the car Mercedes G-Class (W463)

General information about the brake system and safety precautions
General information Hydraulic brake drive organization diagram for three-channel ABS 5.04 - Main and auxiliary vacuum receivers; 8.05 - Initial pressure valve; 19. -...
General information Hydraulic brake drive organization diagram for three-channel ABS 5.04 - Main and auxiliary vacuum receivers; 8.05 - Initial pressure valve; 19. -...

Brake system specifications
Note: Individual characteristics are also given in the text of the Chapter and, if their implementation is mandatory, are highlighted in bold. General information Drive...
Note: Individual characteristics are also given in the text of the Chapter and, if their implementation is mandatory, are highlighted in bold. General information Drive...

Checking the brake system for leaks
The test is carried out using a special tester (051), connected to the brake caliper bleed valve. Checking the brake circuit for leaks 051 — Tester 080 - Pedal release...
The test is carried out using a special tester (051), connected to the brake caliper bleed valve. Checking the brake circuit for leaks 051 — Tester 080 - Pedal release...

Checking the proper functioning of the brake booster
Checking the proper functioning of the brake booster 030 — Vacuum gauge 051 — Tester 060 - Pedal force meter 1. Connect the vacuum gauge (030) to the brake booster, then...
Checking the proper functioning of the brake booster 030 — Vacuum gauge 051 — Tester 060 - Pedal force meter 1. Connect the vacuum gauge (030) to the brake booster, then...

Removal and installation the brake fluid reservoir and the brake master cylinder (BMC)
Tank Brake fluid reservoir installation details 1 - Lid; 2 - Electrical wiring connector; 3 - Mounting screw; A - Reservoir Removing the brake fluid reservoir (A)...
Tank Brake fluid reservoir installation details 1 - Lid; 2 - Electrical wiring connector; 3 - Mounting screw; A - Reservoir Removing the brake fluid reservoir (A)...

Removal and installation the brake booster and the BAS diaphragm stroke sensor
Assembling the vacuum booster Brake Booster Installation Details (1 of 4) 8 - Brake fluid level sensor wiring connector; 9 - Brake fluid reservoir; 10 - Brake lines; 11...
Assembling the vacuum booster Brake Booster Installation Details (1 of 4) 8 - Brake fluid level sensor wiring connector; 9 - Brake fluid reservoir; 10 - Brake lines; 11...

Removal and installation a vacuum pump (diesel engines)
Models 463.323 (M612) Vacuum pump installation details on models 463.323 (M612) 1 - Vacuum line; 2 - Vacuum pump; 3 - Retainer 1. Remove the viscous coupling of the...
Models 463.323 (M612) Vacuum pump installation details on models 463.323 (M612) 1 - Vacuum line; 2 - Vacuum pump; 3 - Retainer 1. Remove the viscous coupling of the...

Removal and installation ABS/EBV/ESP control modules
ABS/EBV control module For petrol models produced before 30.11.00. ABS/EBV control module installation details for petrol models produced up to 11/30/00 1 - Nut; 2 -...
ABS/EBV control module For petrol models produced before 30.11.00. ABS/EBV control module installation details for petrol models produced up to 11/30/00 1 - Nut; 2 -...

Removal and installation of the ABS hydraulic modulator / 4-ETS
Hydromodulator ABS/4-ETS For models 463.250/333 produced before 30.09.01. Details of installation of ABS hydraulic modulator on models 463.250/333 produced up to...
Hydromodulator ABS/4-ETS For models 463.250/333 produced before 30.09.01. Details of installation of ABS hydraulic modulator on models 463.250/333 produced up to...

Removal and installation ABS wheel sensors
Front sensors Front ABS Wheel Sensor Installation Details L6/1 - Left front wheel sensor; L6/2 - Right front wheel sensor; 1 - Bolt 1. Remove the appropriate front...
Front sensors Front ABS Wheel Sensor Installation Details L6/1 - Left front wheel sensor; L6/2 - Right front wheel sensor; 1 - Bolt 1. Remove the appropriate front...

Removal and installation ABS wheel sensor rotors
Front sensors Front ABS Wheel Sensor Rotor Installation Details 1 — Rotor 2 — Drive shaft 1. Disassemble the drive shaft (2) (see Chapter Transmission line ). 2. Clamp...
Front sensors Front ABS Wheel Sensor Rotor Installation Details 1 — Rotor 2 — Drive shaft 1. Disassemble the drive shaft (2) (see Chapter Transmission line ). 2. Clamp...

Removal and installation the foot brake pedal
Foot brake pedal installation details 1 - Cover on the left under the instrument panel; 2 - Connector; 3 - Master cylinder pusher mounting pin; 4 - Cotter pin; 5 -...
Foot brake pedal installation details 1 - Cover on the left under the instrument panel; 2 - Connector; 3 - Master cylinder pusher mounting pin; 4 - Cotter pin; 5 -...

Removal and installation the parking brake cocking lever with the carrier bracket
Parking brake lever installation details 1 - Ventilation duct; 2 - Adjusting nuts; 3 - Bracket; 4 - Parking brake lever; 5 - Nut; X20/10 - Electrical wiring connector 1....
Parking brake lever installation details 1 - Ventilation duct; 2 - Adjusting nuts; 3 - Bracket; 4 - Parking brake lever; 5 - Nut; X20/10 - Electrical wiring connector 1....
Replacing brake hoses
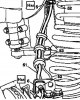
Front Brake Hose Routing Diagram 5, 6 - Brake lines 51 — Brake hose 52 — Fixators 53 - Rubber holders Rear Brake Hose Routing Diagram (for models with rear disc brakes)...
Front Brake Hose Routing Diagram 5, 6 - Brake lines 51 — Brake hose 52 — Fixators 53 - Rubber holders Rear Brake Hose Routing Diagram (for models with rear disc brakes)...

Checking the condition and replacing brake pads
Examination Visual inspection of the condition of the brake pads Arrow - Direction of View 1. Visual assessment of the condition of the pads can be made through the...
Examination Visual inspection of the condition of the brake pads Arrow - Direction of View 1. Visual assessment of the condition of the pads can be made through the...

Replacing the parking brake shoes
Parking Brake Shoe Installation Details 1 - Lower tension spring; 2 - Pressure springs; 3 - Brake shoes; 4 - Upper tension spring; 5 - Regulator 1. Remove the rear wheel...
Parking Brake Shoe Installation Details 1 - Lower tension spring; 2 - Pressure springs; 3 - Brake shoes; 4 - Upper tension spring; 5 - Regulator 1. Remove the rear wheel...

Removal and installation of brake calipers
Front wheel brakes Front Wheel Fixed Brake Caliper Installation Details 5 - Brake line; 31 - Support; 35 - Bolts; S10/1 - Left front brake pad wear sensor; S10/1x1 -...
Front wheel brakes Front Wheel Fixed Brake Caliper Installation Details 5 - Brake line; 31 - Support; 35 - Bolts; S10/1 - Left front brake pad wear sensor; S10/1x1 -...

Fixed type caliper repair
Fixed type support design (front wheel brakes) 45 - Dust covers; 47 - Pistons; 50 - Cuffs; 020 - Piston Rotating Pliers; 026 - Tongs; 027 - Plates; 040 - Metal segment...
Fixed type support design (front wheel brakes) 45 - Dust covers; 47 - Pistons; 50 - Cuffs; 020 - Piston Rotating Pliers; 026 - Tongs; 027 - Plates; 040 - Metal segment...

Checking, removing and installing brake discs
Examination Measuring the lateral runout of a brake disc (using the example of the front wheel brake mechanism) 1. Assess the amount of play in the wheel bearing and...
Examination Measuring the lateral runout of a brake disc (using the example of the front wheel brake mechanism) 1. Assess the amount of play in the wheel bearing and...

Removal and installation components of the parking brake cable drive
Parking brake cable drive design (1 of 2) 1 - Carrier plate; 2 - Drive cables; 3 - Rubber bushing; 4 - Bracket; 5 - Parking brake release lever; 38 - Adjusting nuts; a -...
Parking brake cable drive design (1 of 2) 1 - Carrier plate; 2 - Drive cables; 3 - Rubber bushing; 4 - Bracket; 5 - Parking brake release lever; 38 - Adjusting nuts; a -...

Adjusting the parking brake drive
1 - Wheel bolt 2 — Regulator 1. Jack up the car and place it on supports. 2. Remove the wheel bolt (1) and turn the wheel so that the adjuster (2) is accessible through...
1 - Wheel bolt 2 — Regulator 1. Jack up the car and place it on supports. 2. Remove the wheel bolt (1) and turn the wheel so that the adjuster (2) is accessible through...

Bleeding the brake system
Bleeding the brake system using a special device 1, 2 — Rear brake calipers 3, 4 — Front brake calipers After repairing the brake system, during which its hydraulic...
Bleeding the brake system using a special device 1, 2 — Rear brake calipers 3, 4 — Front brake calipers After repairing the brake system, during which its hydraulic...
This section is available on: russian, bulgarian, belarusian, ukrainian, serbian, croatian, romanian, polish, slovak, hungarian
More similar sections for repairing other models
☛ Chassis: Brake system car Mercedes W168 (1997-2004)
☛ Chassis: Brake system car Mercedes W203 (2000-2007)
☛ Chassis: Brake system car Mercedes W124 (1984-1995)
☛ Chassis: Brake system car Mercedes W163 (1997-2005)
☛ Chassis: Brake system car Mercedes W126 (1979-1991, petrol)
☛ Chassis: Brake system car Mercedes Vito 1 (1996-2003)
Link in different formats to this section
TEXTHTMLBB Code
- General information
- Introduction to the guide
- Controls and instruments
- Driving and operation
- Maintenance
- Power unit
- Engine repair
- Cooling system
- Heating and ventilation
- Power system (gasoline)
- Fuel system (diesel)
- Exhaust system
- Ignition and control system
- Charging and starting system
- Transmission
- Automatic gearbox
- Transfer case
- Axles front and rear
- Chassis
- Brake system
- Front suspension
- Rear suspension
- Steering
- Body
- Exterior (external elements)
- Interior (internal elements)
- Doors, locks and windows
- Electrical equipment
- Equipment and devices
- Switches in salon
- Headlights and lighting
- Audio system and navigation
- Electrical circuits