



Hydromodulator ABS/4-ETS
For models 463.250/333 produced before 30.09.01.
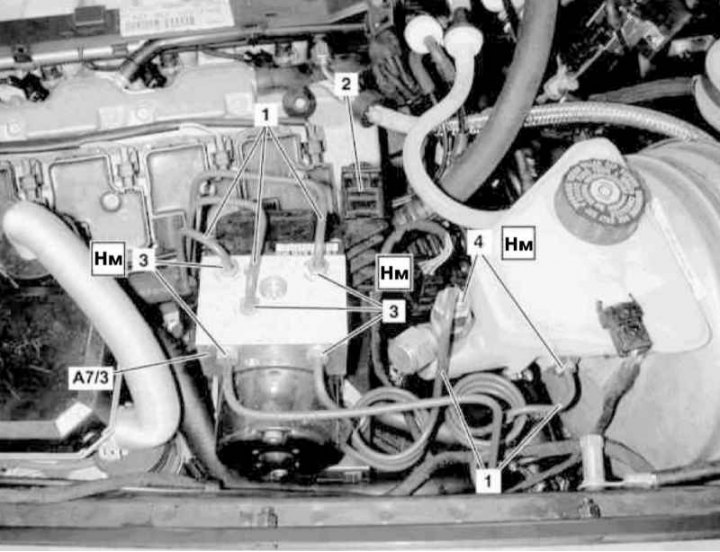
Details of installation of ABS hydraulic modulator on models 463.250/333 produced up to 30.09.01.
1 - Brake lines; 2 - Connector; 3 - Hydraulic modulator union nuts; 4 - Brake master cylinder union nuts; A7/3 - Hydromodulator ABS/4-ETS
1. On models with the corresponding configuration (code ET2), activate the service mode of the TELE AID emergency call system (see Section Activation/deactivation of the service mode of the TELE AID emergency call system).
2. Turn on the auxiliary battery and connect it to the standard battery, then disconnect the negative cable from the latter.
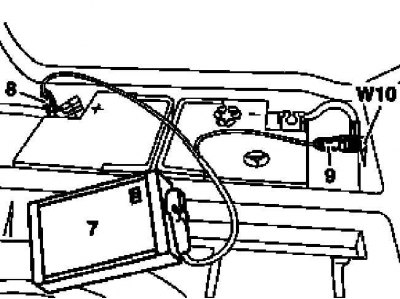
7 - Auxiliary battery
8 — Positive wire terminal of the module
9 — Terminal of the negative wire of the module
W10 - Battery ground
3. Loosen the union nuts (3 and 4) and disconnect the brake lines (1) - prepare to collect the hydraulic fluid.
4. Disconnect the connector (2) of the hydraulic modulator electrical wiring (A7/3) and remove the latter from the support bracket - if necessary, prepare replacement rubber mounting bushings.
5. Installation is carried out in reverse order - try not to mix up the order of connecting the brake lines.
6. On models with the corresponding configuration (code ET2), deactivate the service mode of the TELE AID system (see Section Activation/deactivation of the service mode of the TELE AID emergency call system).
7. Finally, read the DTC codes and clear the on-board diagnostic system memory using the STAR DIAGNOSIS scanner (6511 1801 00) (See Chapter Engine electrical systems).
Hydromodulator ABS/4-ETS
For models 463.250 with code B02
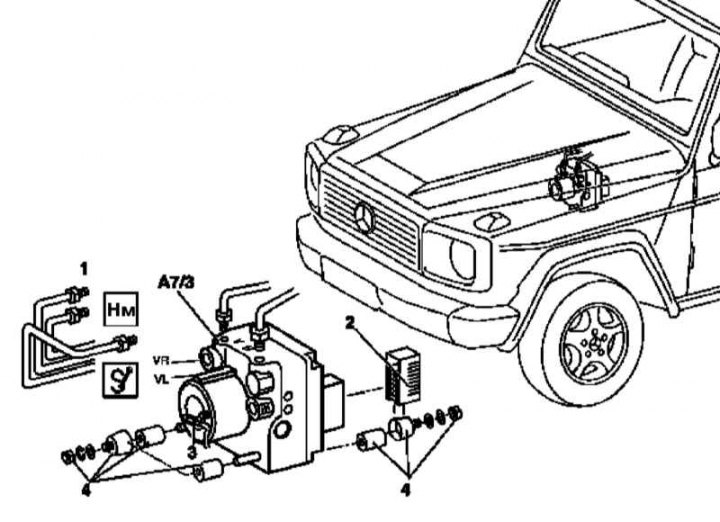
Details of installation of ABS hydraulic modulator on models 463.250 with code B02
1 - Hydraulic lines; 2 - Connector; 3 - Grounding busbar; 4 - Fasteners; A7/3 - Hydromodulator ABS/4-ETS
1. Disconnect the negative cable from the battery.
2. Disconnect the hydraulic lines (1).
3. Disconnect the connector (2) of the hydraulic modulator wiring (A7/3), disconnect the ground bus (3).
4. Release the fastener (4) and, pushing it upwards, remove the modulator (A7/3).
5. Installation is carried out in reverse order.
6. Finally, bleed the brake system (see Section Bleeding the brake system).
ESP hydraulic modulator
For models 463.246/249/323 and 463.250/333 produced from 30.09.01.
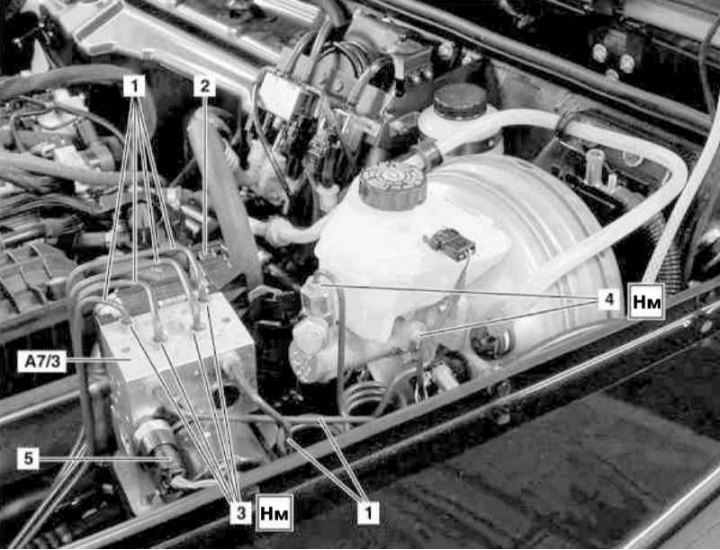
Details of installation of ESP hydraulic modulator on models 463.246/249/323 and 463.250/333 produced from 30.09.01
1 - Hydraulic lines; 2 - Connector; 3 - Mounting bolts; 4 - Fittings; 5 - Pressure sensor switch connector; A7/3 - ESP hydraulic modulator
1. On models with the corresponding configuration (code ET2), activate the service mode of the TELE AID emergency call system (see Section Activation/deactivation of the service mode of the TELE AID emergency call system).
2. Turn on the auxiliary battery and connect it to the standard battery, then disconnect the negative cable from the latter.
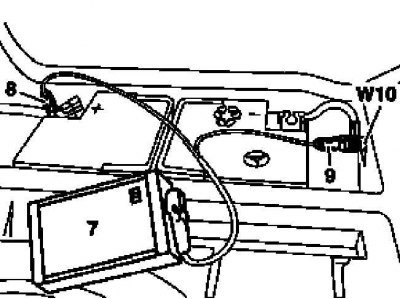
7 - Auxiliary battery
8 — Positive wire terminal of the module
9 — Terminal of the negative wire of the module
W10 - Battery ground
3. Release the nipple connectors (4) and disconnect the hydraulic lines (1) - prepare to collect the hydraulic fluid, immediately plug the open ends of the lines and nipples.
4. Disconnect the connector (2) of the hydraulic modulator wiring (A7/3).
5. Disconnect the connector (5) of the pressure sensor switch.
6. Remove the modulator (A7/3) from the support bracket - if necessary, prepare replacement rubber mounting bushings.
7. Installation is carried out in reverse order - try not to mix up the order of connecting the brake lines.
8. On models with the corresponding configuration (code ET2), deactivate the service mode of the TELE AID system (see Section Activation/deactivation of the service mode of the TELE AID emergency call system).
9. Finally, read the DTC codes and clear the on-board diagnostic system memory using the STAR DIAGNOSIS scanner (6511 1801 00) (See Chapter Engine electrical systems).